Monday, August 31, 2020

PSF GSoC students blogs: Final Check-in

Hey,

What did I do this week?

Cluster analysis template got merged. Mostly worked on the cluster status info. Also added support for the python script download support.

What's next?

Complete the current PR opened, and continue contributing to LiberTEM.

Did I get stuck somewhere?

No.


from Planet Python
via read more

PSF GSoC students blogs: Final Words

Link to final report

Link to repository

Link to production


Thank you Python Software Foundation for giving me this incredible opportunity. I got to learn a lot of new things and made several good contacts.
I hope to continue contributing to my organisation. Looking forward to what life throws at me next.

Super signing off!


from Planet Python
via read more

PSF GSoC students blogs: Weekly Blog Post | GSoc | #14

Greetings, People of the world!

Here's my last blog post for GSoC'2020. It has been an amazing journey. Full of learning and excitement every day. Here's a bit about the last week.

1. What did I do this week?

Wrapped things up, made a few animated icons and made the final GSoC report. Here's the link if you want to check it out: https://ift.tt/3bdNffv

2. What is coming next week?

Now that the program has almost ended, these blog posts will not be coming anymore but of course things will continue to come up right? I will continue to contribute to my project and to my organization's other projects. You can find me on linkedin: https://www.linkedin.com/in/shashank-jarial-354485152/  to know more about whats going onwink

3. Did you get stuck anywhere?

No I did not! I was a fun last week.


GSoC has been an amazing experience. I am really grateful to be a part of this. To anyone reading this if you are a GSoC aspirant, I'd say that just start started and you will reach great heights. And if you are someone who has been a part of GSoC or just here to read this blog, Thank you for reading this.laugh


from Planet Python
via read more

Podcast.__init__: When, Why, and How To Use Web Scraping In A Nutshell

The internet is a rich source of information, but a majority of it isn't accessible programmatically through APIs or databases. To address that shortcoming there are a variety of web scraping frameworks that aid in extracting structured data from web pages. In this episode Attila Tóth shares the challenges of web data extraction, the ways that you can use it, and how Scrapy and ScrapingHub can help you with your projects.

Summary

The internet is a rich source of information, but a majority of it isn’t accessible programmatically through APIs or databases. To address that shortcoming there are a variety of web scraping frameworks that aid in extracting structured data from web pages. In this episode Attila Tóth shares the challenges of web data extraction, the ways that you can use it, and how Scrapy and ScrapingHub can help you with your projects.

Announcements

  • Hello and welcome to Podcast.__init__, the podcast about Python and the people who make it great.
  • When you’re ready to launch your next app or want to try a project you hear about on the show, you’ll need somewhere to deploy it, so take a look at our friends over at Linode. With the launch of their managed Kubernetes platform it’s easy to get started with the next generation of deployment and scaling, powered by the battle tested Linode platform, including simple pricing, node balancers, 40Gbit networking, dedicated CPU and GPU instances, and worldwide data centers. Go to pythonpodcast.com/linode and get a $60 credit to try out a Kubernetes cluster of your own. And don’t forget to thank them for their continued support of this show!
  • This portion of Python Podcast is brought to you by Datadog. Do you have an app in production that is slower than you like? Is its performance all over the place (sometimes fast, sometimes slow)? Do you know why? With Datadog, you will. You can troubleshoot your app’s performance with Datadog’s end-to-end tracing and in one click correlate those Python traces with related logs and metrics. Use their detailed flame graphs to identify bottlenecks and latency in that app of yours. Start tracking the performance of your apps with a free trial at datadog.com/pythonpodcast. If you sign up for a trial and install the agent, Datadog will send you a free t-shirt.
  • You listen to this show to learn and stay up to date with the ways that Python is being used, including the latest in machine learning and data analysis. For more opportunities to stay up to date, gain new skills, and learn from your peers there are a growing number of virtual events that you can attend from the comfort and safety of your home. Go to pythonpodcast.com/conferences to check out the upcoming events being offered by our partners and get registered today!
  • Your host as usual is Tobias Macey and today I’m interviewing Attila Tóth about doing data extraction with web scraping.

Interview

  • Introductions
  • How did you get introduced to Python?
  • Can you start by explaining what web scraping is and when you might want to use it?
    • How did you first get started with web scraping?
  • There are a number of options for web scraping tools in Python, as well as other languages. What are the characteristics of the Scrapy project and community that have made it stand out and retain such widespread popularity?
  • One of the perpetual questions with web scraping is that of copyright and content ownership. What should we all be aware of when scraping a given website?
  • What are some of the most challenging aspects of crawling and scraping the web?
    • What are some of the features of Scrapy that aid in those challenges?
  • Once you have retrieved the content from a site, what are some of the considerations for storing and processing the data that we should be thinking about?
  • How can we guard against a scraper breaking due to changes in the layout of a site, or simple updates that weren’t accounted for in the initial implementation?
  • What are some of the most complicated aspects of scaling web scrapers?
  • For someone who is interested in using Scrapy, what are some of the common pitfalls that they should be aware of?
  • What are some of the most interesting, innovative, or unexpected projects that are built with Scrapy and ScrapingHub?
  • What are the most interesting, unexpected, or challenging lessons that you have learned while working with web scrapers and ScrapingHub?
  • What resources would you recommend to anyone who is looking to learn more about web scraping?

Keep In Touch

Picks

Closing Announcements

  • Thank you for listening! Don’t forget to check out our other show, the Data Engineering Podcast for the latest on modern data management.
  • Visit the site to subscribe to the show, sign up for the mailing list, and read the show notes.
  • If you’ve learned something or tried out a project from the show then tell us about it! Email hosts@podcastinit.com) with your story.
  • To help other people find the show please leave a review on iTunes and tell your friends and co-workers
  • Join the community in the new Zulip chat workspace at pythonpodcast.com/chat

Links

The intro and outro music is from Requiem for a Fish The Freak Fandango Orchestra / CC BY-SA


from Planet Python
via read more

Davy Wybiral: A Lesson in LoRa Module P2P Standards (or the Lack Thereof)

I got a handful of LoRa modules from Reyax a while back, the RYLR896 model based on Semtech SX1276 chips. Instead of using an SPI interface they operate over UART using a small set of AT commands. This made them easier to work with since I didn't have to dig too deeply into a bunch of SPI registers and Semtech specs and they communicate between one another really well. My Espruino JS module for them is available here, which I've used in a few of my YouTube videos. And more recently I've written a MicroPython module for them here.

 
(A pair of Reyax RYLR896  modules)

But, always being on the lookout for different boards and platforms I eventually ended up with a few Maduino LoRa boards. These are cool because they have an Arduino-compatible ATmega328 and the same Semtech LoRa chip (via an RFM95) both integrated on one board. They weren't compatible with Espruino or MicroPython though, and they used the SPI interface instead of AT commands so I knew I would need to look elsewhere for code to control them. Luckily, the popular Arduino RadioHead library has support for RFM95s and the API is surprisingly easy to use. Only, one problem...

 
(A pair of Makerfabs Maduino LoRa boards)

Even when I set all of the LoRa parameters to be the same the boards didn't seem capable of communicating! So I took a peak at the signals using a Software Defined Radio device and they looked really similar. Except that the first portion of the message was different. So I went digging through the RadioHead source code to see if any data was being prepended to the packets or to see if any packet validation was rejecting them. Sure enough, I found the method "validateRxBuf":

 
(RadioHead RH_RF95.cpp source code)

The RadioHead library prepends four bytes to each packet (to, from, id, and flags) and it filters packets based on the "to" address. Somehow I'd overlooked the fact that the API also provides basic addressing (as does the Reyax AT commands). Probably because it's obscured by three layers of inheritance: RH_RF95 inherits RHSPIDriver which inherits RHGenericDriver which is where those methods are found.

So I enabled the "promiscuous" mode to stop the packet filtering and low and behold... I was receiving packets from the Reyax module using the Maduino LoRa board! But something still wasn't right. Every packet started with a garbage byte for some reason. After some trial and error experimenting (since I didn't have the source code to the Reyax AT controller) I realized that this garbage byte was the length of the packet.

For some reason the Reyax modules prepend the length of the message in front of the message itself. So while the RadioHead library sends [4 byte header] + [message] the Reyax modules send [4 byte header] + [1 byte message length] + [message]. This is a pretty easy problem to solve though, but it has to be done on the Maduino LoRa side because there is no way to change how the Reyax modules handled things behind the AT command API.

The devices allow for two forms of addressing. You can send messages directly to certain addresses where all devices that don't match the address will filter it out (unless they're in promiscuous mode). Or you can send messages to a "broadcast" address that all devices will accept. To use them properly in a project I wanted to disable promiscuous mode and that's where I hit another snag. For some reason broadcasting wouldn't work. So I dug through the documentation for the Reyax AT commands and the RadioHead source code and realized that they use different "broadcast" addresses.

Reyax modules use 0x00.

RadioHead library uses 0xff.

But again, this was a trivial fix (either by patching RadioHead to use 0x00 or by explicitly sending to 0x00 in the user code) and now everything was finally working. Until...

Still wanting to try new devices I got my hands on another Makerfabs board, this time their MakePython LoRa gateway. This one is even cooler because the main board is an ESP32 and the LoRa module attachment has two RFM95 modems! And it comes with MicroPython preinstalled, which is what I wanted to program them with since I'll be writing something a bit more on the complex side that integrates the ESP WiFi with the LoRa module.

 
(Makerfabs MakerPython ESP32 + LoRa gateway)

Not wanting to write something from scratch to deal with the RFM95 over SPI I looked for some example code. Makerfabs had a couple of example projects that used this MicroPython library. Now that I knew what to look for I dug into that code to see which header structure their implementation was using... And it turns out they weren't using one at all! It doesn't prepend or validate packets based on any headers and instead just sends the raw packet as-is.

So now I have to write some helper functions to deal with the headers in the user code (I also ended up rewriting that MicroPython library to fit my projects better here so I could also fork that and use the Reyax structure) but otherwise everything still works.

At the end of all this, what I learned is that there is no one standard protocol for p2p LoRa radio communication and it seems like every library takes their own liberties to enforce different packet structures. So if you ever find yourself in this situation hopefully you'll be able to fix it right away instead of having to do all of this sleuthing.

Now I have all three different models of devices communicating with one another, so if you'll excuse me I have an Internet of Things to build!


from Planet Python
via read more

PSF GSoC students blogs: From console.log to GSoC 2020

It is time to share my wonderful journey to Google Summer of Code, tips and tricks to get selected and what all you can do before GSoC to take a step closer to your dream internship or job.

I have written in detail about my journey here - https://ift.tt/2DdN5bk

Thank you EOS Design System and Python Software Foundation for this awesome opportunity.

Signing off!


from Planet Python
via read more

Montreal Python User Group: Quadratic Judo Code Sprint

Montréal-Python 79 doesn't end after our presentation night.

For the whole month of September, we code together on free and open source software in Python. Our effort will be centered on two projects: * French translation of the official Python documentation; * Voluntaria, a Django portal to help non-profits synchronize the effort of their volunteers.

We have a wide range of tasks for both projects, ranging from easy to very advanced. We promise you a detailed overview of the tasks as well as an introduction to the mentors on the sprint opening night on Monday August 31st at 5:30pm. After the initial meeting, we stay in touch on the Montréal-Python Slack and with one sync-up meeting every Monday evening. The results of the sprint are going to be during Montréal-Python #80 (Pedal Kayak) on September 28, 2020.

Everyone is invited to contribute, no matter their skill level in Python or their mastery of the French language.

Join up on Slack (channel #hackathon): https://mtlpy.org/en/slackin


from Planet Python
via read more

PSF GSoC students blogs: GSoC Weekly Blog #7

After 3 months filled with coding, debugging and testing, GSoC'20 has finally come to an end. I spent this last week wrapping up the documentation and finishing up my final submission report for GSoC. I also discussed with my mentors the future steps we'll take with Mscolab.

My code was just recently merged with the develop branch of MSS and all tests passed!. I am really excited to have users use a piece of software that I wrote. I am already planning on what I want to work on in MSS after GSoC is over as there is a lot I can learn while working on this project.

These past 3 months have improved my coding skills significantly and introduced me to the amazing mentors at MSS. My time during GSoC has been absolutely wonderful and I can't wait to contribute to more interesting open source project. I hope next year, I would be able to mentor some bright students who are working on MSS smiley.


from Planet Python
via read more

Python 3 Installation & Setup Guide

Installing or updating Python on your computer is the first step to becoming a Python programmer. There are a multitude of installation methods: you can download official Python distributions from Python.org, install from a package manager, and even install specialized distributions for scientific computing, Internet of Things, and embedded systems.

This tutorial focuses on official distributions, as they’re generally the best option for getting started with learning to program in Python.

In this tutorial you’ll learn how to:

  • Check which version of Python, if any, is installed on your machine
  • Install or update Python on Windows, macOS, and Linux
  • Use Python on mobile devices like phones or tablets
  • Use Python on the Web with online interpreters

No matter what operating system you’re on, this tutorial has you covered. Find your operating system below and dive in!

How to Install Python on Windows#

There are three installation methods on Windows:

  1. The Microsoft Store
  2. The full installer
  3. Windows Subsystem for Linux

In this section, you’ll learn how to check which version of Python, if any, is installed on your Windows computer. You’ll also learn which of the three installation methods you should use.

How to Check Your Python Version on Windows#

To check if you already have Python on your Windows machine, first open a command-line application, such as PowerShell.

You can also use cmd.exe or Windows Terminal.

With the command line open, type in the following command and press Enter:

C:\> python --version
Python 3.8.4

Using the --version switch will show you the version that’s installed. Alternatively, you can use the -V switch:

C:\> python -V
Python 3.8.4

In either case, if you see a version less than 3.8.4, which was the most recent version at the time of writing, then you’ll want to upgrade your installation.

If you’re interested in where the installation is located, then you can use the where.exe command in cmd.exe or PowerShell:

C:\> where.exe python
C:\Users\mertz\AppData\Local\Programs\Python\Python37-32\python.exe

Note that the where.exe command will work only if Python has been installed for your user account.

What Your Options Are#

As mentioned earlier, there are three ways to install the official Python distribution on Windows:

Read the full article at https://realpython.com/installing-python/ »


[ Improve Your Python With 🐍 Python Tricks 💌 – Get a short & sweet Python Trick delivered to your inbox every couple of days. >> Click here to learn more and see examples ]


from Real Python
read more

PSF GSoC students blogs: Final Work Report - Last Weekly Check-in

End of my GSoC journey - 31/08/2020

My GSoC'20 journey end today. This summer was a truly an amazing journey and surely an unforgettable one!

I would like to thank my mentors John Andersen for guiding me and being a very patient & supportive mentor, Yash Lamba for being supportive & understanding and Sudharsana for being helpful throughout my journey. Their guidance and support is the reason why this project was successful. I have learnt a ton of important things from them.

I'd also like to thank my fellow GSoC students Himanshu Tripathi and Aghin Shah Alin for helping me during the summer.

Thank you to Google and Python Software Foundation for providing this opportunity!


What did you do this week?

I finalized the Custom Neural Networks PR, so to summarize what this PR adds are the following stuff:

1. Create custom neural networks using config files for performing image processing tasks.
2. Replace last layer of torchvision pre-trained models to perform classification using powerful architectures.
3. Entrypoint style loading of Loss functions to modify their parameters.
4. Accommodate image processing tasks other than image classification.
5. Tests and example tutorial for creating networks using DFFML to classify Rock Paper Scissors hand poses.


Final Report and Future Work

Aim

Add ways of training and testing machine learning models in DFFML on image datasets and perform image processing and computer vision tasks via DFFML.

The project is divided into 2 parts:

  1. Wrapping the image processing libraries namely OpenCV and Scikit-Image.
  2. High Level Operation Workflow, i.e., Custom Operations which will act as high level operations implementing a predefined flow of OpenCV and Scikit-Image functions.


Modifications to the proposal and scope of the project

During the summer, the proposed work was modified to achieve better results. The finalized work done in the project:

  1. Wrapping important image pre-processing functions as DFFML operations.
  2. PyTorch based pre-trained Convolutional Networks for image classification.
  3. Custom Neural Networks for image pre-processing and classification tasks via DFFML.


Project Tasks Completed

  • Sources for reading and pre-processing of image datasets

    To enable working with image datasets and pre-process these datasets, the Directory source and DataFlow pre-processing source were added. The Directory source is used to read images stored in a directory format and DataFlow pre-processing source is used to modify the data using DFFML operations and creating a flow of operations to run the data through. The edit command uses DataFlow pre-processing Source to modify records using operations and provides an option to overwrite modified records on old records.

    Related Links:

  • Image Processing Operations

    Added DFFML operations that wrap functions from OpenCV for pre-processing images after reading the image dataset from the source provided. The operations are put in a flow through which the image data runs by and is pre-processed before they are feeded to a machine learning model in DFFML for performing various tasks such as image classification!

    Related Links:

  • Convolutional Neural Networks

    Visual data being very complex and containing high dimensions of features of same type in different orientation can be very hard to classify using classification models such as RandomForestClassifier, KNearestNeighbours, etc. This is where powerful deep learning models come into the picture. Deep learning networks like Convolutional Neural Networks offer great accuracy and versatility for tasks such as image classification, object detections, etc.

    By adding Convolutional Neural Networks to DFFML, it becomes very easy to perform image processing techniques and get great results by using Transfer Learning or creating custom networks.

    Related Links:

  • Many other important features that aided the addition and proper functioning of image processing tasks in DFFML are listed below:

    Related Links:


Future Work

DFFML is a machine learning based project which aligns with my interest in the field, so I will be more than happy to stay a part of the community to keep contributing and learning!

Goals for future contributions:

  1. Adding more image processing techniques.
  2. Adding image processing examples via DFFML's PyTorch model plugin such as image colorization.
  3. Connecting Transfer Learning models with custom Neural Networks to use powerful architectures for different Computer Vision tasks.
  4. Contribute to DFFML's Web UI.


Link to read the complete final report: GSoC2020FinalReport.md


Thank you for reading!


from Planet Python
via read more

Real Python: Python 3 Installation & Setup Guide

Installing or updating Python on your computer is the first step to becoming a Python programmer. There are a multitude of installation methods: you can download official Python distributions from Python.org, install from a package manager, and even install specialized distributions for scientific computing, Internet of Things, and embedded systems.

This tutorial focuses on official distributions, as they’re generally the best option for getting started with learning to program in Python.

In this tutorial you’ll learn how to:

  • Check which version of Python, if any, is installed on your machine
  • Install or update Python on Windows, macOS, and Linux
  • Use Python on mobile devices like phones or tablets
  • Use Python on the Web with online interpreters

No matter what operating system you’re on, this tutorial has you covered. Find your operating system below and dive in!

Free Bonus: Click here to get a Python Cheat Sheet and learn the basics of Python 3, like working with data types, dictionaries, lists, and Python functions.

How to Install Python on Windows#

There are three installation methods on Windows:

  1. The Microsoft Store
  2. The full installer
  3. Windows Subsystem for Linux

In this section, you’ll learn how to check which version of Python, if any, is installed on your Windows computer. You’ll also learn which of the three installation methods you should use.

How to Check Your Python Version on Windows#

To check if you already have Python on your Windows machine, first open a command-line application, such as PowerShell.

Tip: Here’s how you open PowerShell:

  1. Press the Win key.
  2. Type PowerShell.
  3. Press Enter.

Alternatively, you can right-click the Start button and select Windows PowerShell or Windows PowerShell (Admin).

You can also use cmd.exe or Windows Terminal.

With the command line open, type in the following command and press Enter:

C:\> python --version
Python 3.8.4

Using the --version switch will show you the version that’s installed. Alternatively, you can use the -V switch:

C:\> python -V
Python 3.8.4

In either case, if you see a version less than 3.8.4, which was the most recent version at the time of writing, then you’ll want to upgrade your installation.

Note: If you don’t have a version of Python on your system, then both of the above commands will launch the Microsoft Store and redirect you to the Python application page. You’ll see how to complete the installation from the Microsoft Store in the next section.

If you’re interested in where the installation is located, then you can use the where.exe command in cmd.exe or PowerShell:

C:\> where.exe python
C:\Users\mertz\AppData\Local\Programs\Python\Python37-32\python.exe

Note that the where.exe command will work only if Python has been installed for your user account.

What Your Options Are#

As mentioned earlier, there are three ways to install the official Python distribution on Windows:

Read the full article at https://realpython.com/installing-python/ »


[ Improve Your Python With 🐍 Python Tricks 💌 – Get a short & sweet Python Trick delivered to your inbox every couple of days. >> Click here to learn more and see examples ]


from Planet Python
via read more

Reuven Lerner: New course: Testing your Python programs with pytest

My first job was at a company that wrote software for hospitals. As you can imagine, our work needed to be really reliable — so we had an entire team dedicated to quality assurance (QA). Their job was to run our software for months at a time, given many different inputs, and to make sure that it didn’t cause trouble.  I can tell you that the head of QA was the most feared person in my department. And yet, we all knew that his job was of utmost importance. If it weren’t for him, buggy software could go out the door, with catastrophic effects for people being treated in hospitals around the world.

More than 25 years have passed since I had that job. And while not every program directly affects people’s lives,  there’s no doubt that software is hugely influential. Buggy programs can not only hurt people, but lose money, destroy documents, give incorrect projections, and use up valuable resources.

It’s no surprise, then, that testing continues to be really important. And while there are lots of  people still working in QA, much of that burden is now shouldered by individual developers, who have to test the code that they wrote themselves.  That’s right — you can test your own code, to make sure it does what it’s supposed to do (and  doesn’t do what it’s not supposed to do).

Over the last few years, I’ve joined a large and growing number of Python developers using pytest — a test system written in Python, designed to be used by Python developers. And I have to say, pytest is truly amazing: It’s easy to learn, very powerful, and has a huge community that contributes a wide variety of plugins for everyone to use.

Earlier this month, I asked subscribers to my “Better developers” list what topics they would like to learn in a series of live courses I’m starting to offer. And overwhelmingly, people wanted to learn pytest.

I’m thus delighted to announce that on Sunday, September 13th, I’ll be teaching a live, four-hour online course about pytest: “Test your Python code with pytest” If you’ve always wanted to learn about testing in general, or pytest in particular, this course will jump-start you into understanding the hows (and whys) of testing your Python code. 

Click here to join my “pytest” course

A few quick points:

  • The course will take place at 6 p.m. in Israel (where I live), which is 4 p.m. in London, 11 a.m. Eastern, and 8 a.m. Pacific. I hope that you’ll be able to join me live, so that you can participate and ask questions.
  • Even if you can’t join me live, the recording will be available to everyone who has enrolled. And that recording will be available forever — if you don’t have a chance to watch it right away, or want to review the material later on.
  • The course is 4 hours long, but will include a good number of hands-on exercises.

You’ll walk out of this course knowing how to use pytest, and how to apply that knowledge to your own programs — making them more robust, and saving you time down the road.

I’m really excited about pytest, and also excited to offer courses in this new format.  Please join me, and learn how to write better, more reliable code in less time.

For more info, and to register, go to https://store.lerner.co.il/pytest. Any questions? Just contact me at reuven@lerner.co.il or on Twitter as @reuvenmlerner.

The post New course: Testing your Python programs with pytest appeared first on Reuven Lerner.


from Planet Python
via read more

PSF GSoC students blogs: Outro

Note: This article's HTML source is exported from reST.  Without necessary CSS, some part might look hideous.  Please consider viewing on my personal blog.

The Look

At the time of writing, implementation-wise parallel download is ready:

Does this mean I’ve finished everything just-in-time? This sounds to good to be true! And how does it perform? Welp…

The Benchmark

Here comes the bad news: under a decent connection to the package index, using fast-deps does not make pip faster. For best comparison, I will time pip download on the following cases:

Average Distribution

For convenience purposes, let’s refer to the commands to be used as follows

legacy-resolver

pip --no-cache-dir download {requirement}

2020-resolver

pip --use-feature=2020-resolver --no-cache-dir download {requirement}

fast-deps

pip --use-feature=2020-resolver --use-feature=fast-deps --no-cache-dir download {requirement}

In the first test, I used axuy and obtained the following results

legacy-resolver

2020-resolver

fast-deps

7.709s

7.888s

10.993s

7.068s

7.127s

11.103s

8.556s

6.972s

10.496s

Funny enough, running pip download with fast-deps in a directory with downloaded files already took around 7-8 seconds. This is because to lazily download a wheel, pip has to make many requests which are apparently more expensive than actual data transmission on my network.

Note

With unstable connection to PyPI (for some reason I am not confident enough to state), this is what I got

2020-resolver

fast-deps

1m16.134s

0m54.894s

1m0.384s

0m40.753s

0m50.102s

0m41.988s

As the connection was unstable and that the majority of pip networking is performed as CI/CD with large and stable bandwidth, I am unsure what this result is supposed to tell (-;

Large Distribution

In this test, I used TensorFlow as the requirement and obtained the following figures:

legacy-resolver

2020-resolver

fast-deps

0m52.135s

0m58.809s

1m5.649s

0m50.641s

1m14.896s

1m28.168s

0m49.691s

1m5.633s

1m22.131s

Distribution with Conflicting Dependencies

Some requirement that will trigger a decent amount of backtracking by the current implementation of the new resolver oslo-utils==1.4.0:

2020-resolver

fast-deps

14.497s

24.010s

17.680s

28.884s

16.541s

26.333s

What Now?

I don’t know, to be honest. At this point I’m feeling I’ve failed my own (and that of other stakeholders of pip) expectation and wasted the time and effort of pip’s maintainers reviewing dozens of PRs I’ve made in the last three months.

On the bright side, this has been an opportunity for me to explore the codebase of package manager and discovered various edge cases where the new resolver has yet to cover (e.g. I’ve just noticed that pip download would save to-be-discarded distributions, I’ll file an issue on that soon). Plus I got to know many new and cool people and idea, which make me a more helpful individual to work on Python packaging in the future, I hope.


from Planet Python
via read more

PSF GSoC students blogs: Weekly Check-in #13

What did I do this week?

Finalised everything! My last PR on scikit operations tutorial got merged and this marks the completion of GSoC project.

What's next?

I will keep contributing to DFFML and help others to come and contribute to open source. :)

Did I get stuck somewhere?

No, this week didn't involve any new work, I only went through the old work that I did.


from Planet Python
via read more

Zero to Mastery: Python Monthly 💻🐍 August 2020

9th issue of Python Monthly! Read by 20,000+ Python developers every month. Keeping you up to date with the Python industry ecosystem, without wasting your valuable time.

from Planet Python
via read more

Stack Abuse: Remove Element from an Array in Python

Introduction

This tutorial will go through some common ways for removing elements from Python arrays. Here's a list of all the techniques and methods we'll cover in this article:

Arrays in Python

Arrays and lists are not the same thing in Python. Although lists are more commonly used than arrays, the latter still have their use cases. The main difference between the two is that lists can be used to store arbitrary values. They are also heterogeneous which means they can simultaneously store integers, strings, other objects, etc.

Arrays, on the other hand, are similar to what arrays are in C. They are homogeneous data structures for storing elements of the same type and they use much less memory than lists.

This tutorial will focus on arrays, instead of lists, although most of the techniques shown in this tutorial can be used on both of these two data structures.

Using remove()

Appropriately, the remove() function can be used on any array in Python. To use it, we can simply pass the value of the element we want to remove. Let's imagine we have the following array:

array = [10, 20, 30, 40, 50, 60, 70, 80, 90, 100]

To remove, say, element 40, we would simply write:

array.remove(40)

The result is the same array without the value 40:

[10, 20, 30, 50, 60, 70, 80, 90, 100]

Using pop()

The pop() function accepts the index of the element we want to remove. If we had the same array as before (with values from 10 to 100), we could write something like the following:

index = 3
array.pop(index)

If we printed the result of the pop method, it would be the value 40:

[10, 20, 30, 50, 60, 70, 80, 90, 100]

Similarly to how pop() works in the stack data structure, here pop() also returns the value that it had just removed.

The only difference is that with arrays, we can remove an arbitrary element. With stacks, only the top element (i.e. the last one added) can ever be removed.

Using del

del is a python keyword used for deleting objects. Its exact behavior changes depending on the context, so we can also use it to remove array elements. Once again, let's take the same array and index as before:

array = [10, 20, 30, 40, 50, 60, 70, 80, 90, 100]
index = 3

To remove the element at index 3, we simply type the following:

del array[index]

If we now printed the contents of our array, we would get the following output:

[10, 20, 30, 50, 60, 70, 80, 90, 100]

Using numpy Arrays

NumPy arrays are technically also arrays, and since they are commonly used (especially in machine learning), let's show one of the ways to remove an element from a numpy array. Before using numpy, it is necessary to import it with

import numpy as np

To create a numpy array, we can wrap our current array using np.array() as such:

a = np.array(array)

Alternatively, we could also declare a new array inside the method call itself:

a = np.array([10, 20, 30, 40, 50, 60, 70, 80, 90, 100])

Now to remove an element at index 3, we use the following code:

index = 3
a = np.delete(a, index)

delete() is a static method declared in the numpy module. It accepts the array and the index of the element to remove.

The method returns a new array without the removed element:

[10, 20, 30, 50, 60, 70, 80, 90, 100]

Conclusion

There are different ways to remove an array element in Python. Sometimes we might want to remove an element by index and sometimes by value. Sometimes we're using Python's default array and sometimes a numpy array.

In all these cases, it's good to have multiple options to help us decide which of the techniques to use.


from Planet Python
via read more

PSF GSoC students blogs: Final Blog Post

This has been a fantastic journey. I got to meet some amazing people in the community. There is still work to be done, and I'll be continuing to contribute after GSoC. You can check out my final report here https://ift.tt/2EH0CsL


from Planet Python
via read more

PSF GSoC students blogs: Final Week Check-in

What did you do this week?

As I wrote in last week's blog post, this week I concluded the PR for the random module by adding multimethods for the Generator class. This PR was the last one of my GSoC project. I also wrote the project's final report for my third and final evaluation where I included a short description of the project, links to the the code, a summary of the current state of the project, discussed future work, and enumerated challenges and learnings.

What will you do after GSoC has ended?

They say all good things come to an end and this blog post marks the end of my GSoC journey. Soon I will start working on my master's thesis and look for job opportunities in the industry. I also intend to keep working on unumpy and other open-source software projects.


from Planet Python
via read more

"CodersLegacy": PySide vs PyQt | Understanding the difference

Once people get to know about both PySide and PyQt, due to their similarities, people have a hard time picking one over the other. Here in this “PySide vs PyQt” article we’ll examine both libraries from multiple angles and attempt to come to a conclusion.

The reason why we are comparing these two libraries is because both of them are Python bindings of the same GUI framework Qt. We’re here to compare both these bindings.

We’ll start off with PyQt first as it’s the more poplar library and was released (officially) before PySide.


Background and Licensing

PyQt was created by Riverbank Computing as the Python binding for Qt. For a long time PyQt was the only Python binding available. However in 2009 a dispute arose with regards to what license PyQt should be released under, between the creators of PyQt and the creators of Qt (Nokia).

Since the groups couldn’t come to an agreement, a new Python Binding, PySide was born. PySide (for Qt4) was released under the LGPL license (like Qt), whereas PyQt was released under the GPL license. You can always check out the details on the licenses in more detail later (you really don’t need to) but we’ll give a brief summary here.

The LGPL license allows you to distribute code without having to share your source code. This allows a person to develop commercial applications with PySide. The GPL license however prevents you from withholding the source code in a distributed program.

In short, if you want to develop and distribute commercial programs in PyQt, you should purchase a commercial license for Qt. You could still sell the software for money (without a commercial license), but you would have to share the source code. This is something that’s unacceptable for most commercial software.


Present day

Doing a PyQt vs PySide comparison at the time of the split (2009) would have shown that both were roughly equal. However as the time went on, the development of PySide lagged behind PyQt.

Following the release of Qt5, PyQt5 (the python binding for Qt5) was released in 2016. In contrast, it took PySide an extra 2 years (2018) to release their binding of Qt5 as PySide2.

This two year gap is likely the major reason that PyQt5 is more common amongst the Python developers of today.

Aside from a few syntax differences in how they are imported and launched, the syntax of both libraries is exactly the same. They use the same widgets (Qt widgets) so you can learn about PySide from a PyQt tutorial too, and vice versa. We’ll be covering and explaining these differences down below.


PyQt vs PySide – Differences

In this section we’ll briefly go through the differences between PyQt5 and PySide2, the most latest versions. These differences are going to be pretty minor and very situational (besides the first one) so it’s OK to skip them.

First thing we’ll do is demonstrate how to create a simple window in both PyQt5 and PySide2. You’ll notice how similar how they, as well the slight difference in the imports.

Imports

First up is the PyQt5 example:

import sys
from PyQt5.QtWidgets import QApplication, QDialog

app = QApplication(sys.argv)

window = QDialog()
window.setGeometry(500, 300, 300, 200)
window.setWindowTitle('GUI Window')
window.show()

sys.exit(app.exec_())

Next is PySide2:

import sys
from PySide2.QtWidgets import QApplication, QDialog

app = QApplication(sys.argv)

window = QDialog()
window.setGeometry(500, 300, 300, 200)
window.setWindowTitle('GUI Window')
window.show()

sys.exit(app.exec_())

We use QDialog we create the window, but you can use other methods like QMainWindow and QWidget, which also work on both PySide2 and PyQt5.

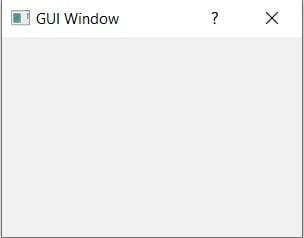
The output of the two examples is also the exact same. Below is a screen shot of it.

PyQt vs PySide

Everything related to the widget’s look and functionality is the exact same, so we didn’t bother including any in the window.

UI Files

If you’re loading files exported from QtDesigner into your Python program, there are different functions that must be used for PySide and PyQt.

We’ll let the examples speak for themselves. Below are both the methods listed, first PyQt5 then PySide2.

import sys
from PyQt5.QtWidgets import QApplication
from PyQt5 import uic

app = QApplication(sys.argv)

window = uic.loadUi("testfile.ui")
window.show()
sys.exit(app.exec_())

Now PySide2:

import sys
from PySide2.QtWidgets import QApplication
from PySide2.QtUiTools import QUiLoader

loader = QUiLoader()

app = QApplication(sys.argv)
window = loader.load("testfile.ui", None)
window.show()
sys.exit(app.exec_())

Signals and Slots

If you ever want to create your own custom slots or signals in PyQt5 or PySide, keep in mind that the functions are slightly different.

See the below code to see the difference between PyQt5 and PySide when creating a signal or slot object.

my_signal = pyqtSignal()   # PyQt5
my_signal = Signal()       # PySide2

my_signal = pyqtSlot()  # PyQt5
my_signal = Slot()      # PySide2

Both of these are part of the QtCore class, so the import is like QtCore.pyqtSignal or QtCore.Signal.

If you master all these differences, migrating a PyQt5 app to PySide2 or vice versa will be a piece of cake!


Conclusion

And that’s the end of our PyQt vs PySide debate. Since both of them are bindings of the same library (same widgets and code), there’s no point in comparing the speed and memory usage. Any differences that might be present are going to be insignificant.

If you’re a casual programmer, then the differences in licensing don’t matter at all. The difference will only become significant if you decide to release a commercial software of your own. It costs about $550 to buy a permanent PyQt5 commercial license with a year of support. That’s not too much, especially if the seller is a company or group of developers.

If you had to pick between one, I would just go with PyQt5 due to it’s larger usage and community. Honestly though it’s best to just learn both as the differences are so minimal. You can learn PyQt5 on our tutorial series here on this site.

You aren’t limited to just these two libraries either. There are many other great GUI frameworks in Python, each with their own special advantage.

  • Tkinter: Part of the standard Python Library and comes with a very small memory footprint (compared to Qt5). Probably the most popular Python Library due to it’s ease of use.
  • Kivy: Another popular GUI framework that specializes in touch screen devices (mobile phones).


This marks the end of the PySide vs PyQt article. Any suggestions or contributions for CodersLegacy are more than welcome. Questions regarding the article content can be asked in the comments section below.

The post PySide vs PyQt | Understanding the difference appeared first on CodersLegacy.


from Planet Python
via read more

PyBites: How to Deploy Your Open Source Package to PyPI

In this post I share some useful things I learned deploying an open source package to PyPI.

The app

I built a small PyBitesTips class to consume our Python tips from the command line. The code (project) is here

Speaking of tips, here are some cool things I learned / re-used: - Make a class callable using the __call__ dunder (magic) method. - Use namedtuples and instantiate them with ** keyword args: [Tip(**tip) for tip in resp.json()] - Use paging of results with pydoc.pager. - Break down output creation and printing in different methods (and helpers) which made testing the code easier.

Testing

I put the tests in a separate tests/ subdirectory. This way it's easier to omit them from the package build (see further down).

I also mocked out requests.get, providing a static tips_payload list, and builtins.input to simulate a user searching for various tips.

As mentioned before the abstraction of an individual tip output using _generate_tip_output made it easy to write test_tip_output(pb_tips).

Another thing worth mentioning is the conftest.py I added to the main package folder pytip which has pytest added to sys.path. With that change I could just run pytest in the top project folder (more info).

License

This is as simple as copying an existing one and updating the Copyright banner (MIT example). For more info, check out Choosing a License.

setup.py

This file is your key to making your project pip installable. As per the official documentation, a basic setuptools.setup will do the trick. A few things to highlight as well as extra features I used for my setup.py:

  • In classifiers you set the Python versions you support, here I use Python 3.x
  • In packages you specify which directories to bundle up, here it's just pytip. Note that I called it pytip instead of src. I discovered that is how it ends up in your virtual environment's site-packages.
  • In install_requires you specify any 3rd party dependencies, in this case requests. Note that this makes requirements.txt redundant, because python setup.py install will now pull it in automatically.
  • And one of the coolest things I learned: main.py, it allows you to run your package as a console script. So here entry_points > console_scripts makes an alias pytip that points to pytip directory (package) > __main__ module > main function which has some argparse logic to make this a CLI app (read much more about this in Erik's Exploring the Modern Python Command-Line Interface). So when you pip install this package, you can just run pytip, how cool is that, no?!

Wheels and PyPI

This is 80% of the battle. Uploading it to PyPI is actually very easy.

  1. Make 2 accounts: PyPI and Test PyPI.
  2. Get API tokens for both. Note them down because they only show them once.
  3. I highly recommend making this file so you can authenticate to both servers without entering a password ever again:

    $ cat ~/.pypirc
    [distutils]
    index-servers =
        pypi
        testpypi
    
    [pypi]
    username: __token__
    password: ...
    
    [testpypi]
    repository: https://test.pypi.org/legacy/
    username: __token__
    password: ...
    
  4. pip install setuptools, wheel and twine.

  5. Create your distribution: python setup.py sdist bdist_wheel. This will put a tar.gz and a .whl (wheel) in a dist/ folder (which you should add to .gitignore).

  6. Always first upload your package to the Test PyPI to make sure it all works: twine upload --repository testpypi dist/*. This is important because version numbers can only be uploaded once, so it better work before uploading it to the real PyPI.

  7. pip install the package from the test index to see if you are happy with the results (here I found out about the "pytip vs src directory name" thing by looking at what got installed in site-packages. And here I tested out if my pytip alias, as defined in console_scripts, actually worked.

  8. If all good, upload it to the real PyPI server: twine upload dist/* (no need to specify repository as PyPI is the default).

And that's it, a new open source project on PyPI.

Resources

These resources really helped me going through this process end-to-end:

"Modern" Python

Setup.py is still the way to go in many cases, but Poetry and the standardized toml file is a strong contender.

Check it out for yourself:


Keep Calm and Code in Python!

-- Bob


from Planet Python
via read more

Codementor: Automated Browser Testing with Opera and Selenium in Python

When it comes to cross browser testing, we tend to focus on executing test cases for bigwigs like Google Chrome, Firefox, or Safari. What about the other

from Planet Python
via read more

PSF GSoC students blogs: All Done!

Hello there!

Today is the final day of my GSoC Journey. I am truly grateful for all that I have learnt the past 3 months. Here's my final overview of my work in the last week.

What did you do this week?

My mentors tested out my product and found many bugs, and advised changes for better use. As a developer, using the same features everyday, you get the feeling that users will be able to use it as easily. But its always better to have a third perspective. The best perspective is that of the users, and my mentors are exactly that. I implemented the changes (2- 3 PRs) .

The changes implemented messed up some of the tests. Not All. (Finally understood what Reimar had meant when he said that all tests should be independent from each other. Thanks for the tip!)

I worked on the Documentation, gave a small demo to the mentors, and made a demo video as well! So, a very productive final week :)) 

I am very happy to say that my code has been merged into the main development branch. And I'll continue to better the software from that branch now :))

What will I do next week?

I will continue to work on my skills, apart from GSoC. 

Did you get stuck anywhere?

I was reluctant with some of the changes.. simply because I am a bit attached to my work. But mentors pointed out changes logically, and  I agreed with them too . Other than this, there was no getting stuck.


You can find my Work Submission report here. You can check out my demo video right here!

Acknowledgements

I'm thankful to my mentors Jörn, Reimar and Christian who provided immense support and motivation to persevere through all my difficulties. They sympathised with my problems and gave me ideas on how to face the challenges head on. Without their guidance, I would have been lost. I would also like to thank my GSoC mate Tanish who helped me out with my small doubts from time to time :))

I'm also grateful to MSS, PSF & the GSoC Community. This program has made me more confident about my abilities, and has strengthened my belief in the fact that passion, perseverance and patience can help you achieve wonders!

Finally, to the Open Source Community : Thank you for being so welcoming. I started from scratch and three months later, its still hard for me to believe that I developed a feature of a software :)) Thank you for giving me this opportunity, and I'll personally continue forward the Open Source spirit with my future contributions.


from Planet Python
via read more

Kushal Das: Securedrop Worktstation and how can you help

Snowden tweet

A few weeks ago on August 12 Freedom of the Press had one event where we talked with Paul Lewis from The Gurdian about their use of SecureDrop project, and how it helps in doing the investigative journalism work. My dear friend Harlo was the host for the evening. You can watch []the event on Youtube](https://www.youtube.com/watch?v=1mI3uQnXPdM).

The second half of the event was a live demo of the new SecureDrop Workstation project.

SecureDrop is an open source whistleblower submission system that media organizations and NGOs can install to securely accept documents from anonymous sources. It was originally created by the late Aaron Swartz and is now managed by Freedom of the Press Foundation. SecureDrop is available in 20 languages.

The current SecureDrop is dependent heavily on air-gapped Tails systems. This means increased security but also means a lot of time in accessing the submissions by the journalists. SecureDrop Workstation is the next generation system coming up to help in reducing this and also provide much smoother user experience without giving up the security.

In simple words, it is a system built on top of the QubesOS, where journalists can access the submissions via a desktop application and can communicate with sources with much ease.

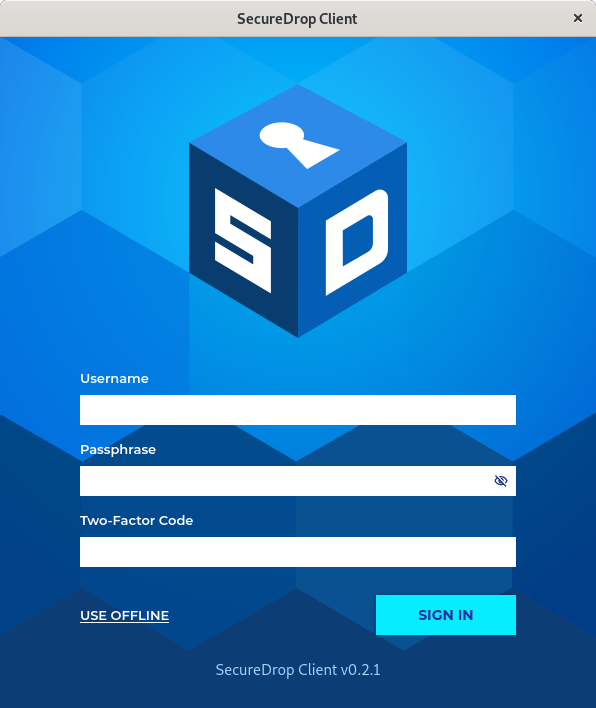
Login window

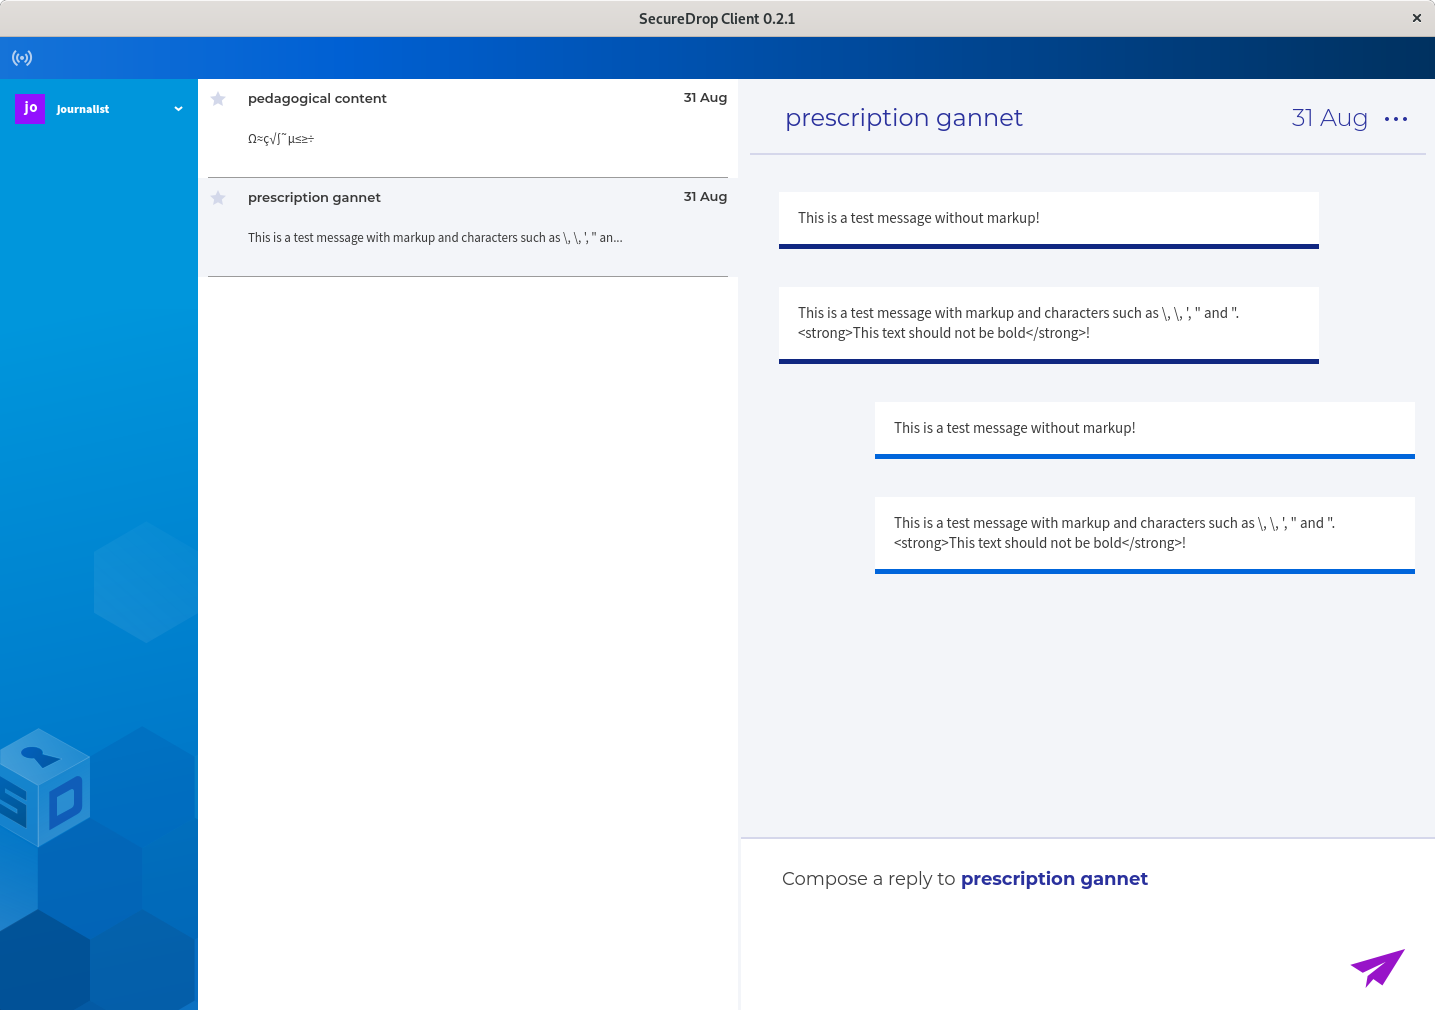
And the view for the journalists.

journalist view

You can read in detail about the idea and reasoning behind this project in this whitepaper.

At the beginning of this year, we also published the news on the first (for alpha release) security audit. You can directly jump into the full audit report too.

If you follow DEF CON, you may remember the last panel in 2019 where the usage of SecureDrop and the security audit was discussed.

You can also watch the talk at USENIX Enigma 2020 by Jennifer Helsby.

Technologies used, and how can you help?

SecureDrop is a Free Software project built with similar technologies that you all see and use every day. The main server side is written in Python, with a lot of Ansible, and molecule to test. The web application is written in Flask and contains tests written in Pytest. The documentation is written in Sphinx and maintained via ReadTheDocs. Development setup can be created using Docker, and full-scale production vms (for testing) can be created using the Vagrant.

The translations are maintained in the Weblate by the amazing community at Localization Lab.

The SecureDrop Workstation client is written in PyQt. There are many related Python modules in our Github. The packages are reproducible builds, except the RPMS.

The sources and journalists access SecureDrop via Tor Project. In Qubes OS we use both Fedora and Debian VMs.

There are many issues opened in all of these project’s repositories, and by using/testing them, you most probably will be able to find more things to be fixed. There are problems which can be solved with people from different experiences.

We do daily standup at 16:00UTC in this meeting link. Please feel free to join in and say hi.


from Planet Python
via read more

PSF GSoC students blogs: GSoC: Week #14

Hello!

What did you do this week?

I wrote docs, looked into K2IS’ sync_flag and completed implementing positive sync_offset for HDF5. I also extracted the recursive slice splitting code in HDF5 into its own function and wrote tests for it. While working on HDF5, I faced a strange bug in which the unit tests passed when ran on real datasets but failed when ran on randomly generated temporary data.

What is coming up next?

Handle combinations of sync_offset and reshaping, fix sig_shape reshaping and the bug mentioned above for HDF5. I’ve almost figured out how the sectors are synced in K2IS, so hope to finish it soon. I’ve a few more things on my todo list before my PR can be merged and I think this would be my last GSoC blog, so thanks a lot for reading!

Did you get stuck anywhere?

No, but I must say that the best and most challenging part of this journey was deciding between different algorithmic/design solutions to solve problems in my project.

Thanks again to my mentors, PSF and Google for this opportunity!

:-)


from Planet Python
via read more

Mike Driscoll: PyDev of the Week: Connor Ferster

This week we welcome Connor Ferster as our PyDev of the Week! Connor is the author of handcalcs which was recently featured on the PythonBytes Podcast. You can see more of Connor’s work on Github.

Let’s spend some time getting to know Connor now!

Can you tell us a little about yourself (hobbies, education, etc):

I am 38 years old and went back to school at 31 to pursue civil technology and then civil engineering. Civil engineering is the discipline of building anything to do with “civilization”: water resources and pipes, roads and transportation, buildings and bridges. I currently work as a structural design engineer-in-training in Canada where I work on buildings. My education involved a special transfer year between college and university where I learned, among other things, programming in Matlab. It was during that year that I got really into programming, primarily as a creative outlet. I would have to say that programming in Python is probably my biggest hobby right now but I also enjoy cooking, making bread, and reading. I have been reading everything by Ursula K. LeGuin recently.

Prior to going back to college, I was also a headhunter, business owner, sales person, and music school drop-out (in that reverse chronological order).

Why did you start using Python?

I first heard of Python when I was at a house party in about 2009. At that time, I had my online wallet business and I had hired my friend’s company to build the website. He was a big fan of Ruby on Rails and he had gotten me interested in learning it. When I was at this house party, I met some other web developer guys and I was telling them about my interest in learning Ruby on Rails. They said, “Pfffft! Forget Ruby. Learn Python!” They were showing me some of their projects in Python and talking about how great Python is (I don’t remember what they said, though!). Since then, I have been aware of “Python”, just as a name, but not much else.

In 2018, I saw that the university offered a course called “Introduction to Systematic Program Design”, a kind of computer science course for non-computer science majors. The course was to teach people in other disciplines how to write programs for their own disciplines. When I saw the course would be taught in Python, I signed up, even though it didn’t give me credits for my degree. That course changed my life. I believe I got an A+ on that final exam which was all hand-written Python code.

Since then, I have fallen in love with Python. I love Python so much.

What projects are you working on now?

I have two open source projects that I am building, called “handcalcs” and “forallpeople”. Handcalcs was a library developed for a simple, single purpose: calculations written in Python code can be displayed as though you wrote them by hand. Forallpeople is another units library for Python but designed for fast and casual calculations following a “convention over configuration” approach.

In addition to these projects, I work on proprietary projects internally for my company that have to do with work-flow automation and how it relates to the structural design process. I am grateful that my company has allowed me to work on handcalcs and forallpeople as open source projects in my free time.

Which Python libraries are your favorite (core or 3rd party)?

Like many Pythonistas, I love pathlib. It just handles everything related to paths so beautifully.

In the standard library, I really value collections. Not only for the containers it provides but also the way the code is written. I opened up the source one day and learned so much about Python in just 15 minutes of reading the source.
I think shapely is fantastic. Being able to perform 2D geometric queries and comparisons is really powerful.
Handcalcs is built on pyparsing, which is an incredibly beautiful and useful library.
For plotting, I really appreciate plotly but I am keeping an eye on ipyvolume and hope to use it more in the future (I am waiting for custom pop-ups when hovering over a glyph).

I just started using a new library called sxl for lazy loading of single tables and table ranges within really large Excel files. It’s a simple library but it works really well! You do not have to load the whole workbook into memory to iterate over a range or sheet within the file.

I have been on the streamlit bandwagon for a few months now. I think it can be a revolutionary library for some Python users: the ability to create simple and fast web interfaces for one’s Python script feels like magic.
I don’t know if I am allowed to say this here but I really love my own modules: handcalcs and forallpeople. I rely on them everyday to be productive at work and I don’t want to imagine my work life without them! They are just so important to me.

What is the origin story for your handcalcs package?

I spent a summer as a student programming design calculation spreadsheets for my current company. It was a great experience but, knowing how to use Python, I grew to become very frustrated at working in Excel. In the engineering world, a hand-written calculation is still a kind of “gold standard” for design notes that typically become a part of a project’s legal history. Excel is often used to make the process more efficient however it is not transparent: you type a formula in a cell and 1) the formula only contains cell references (unless you define cell names) and 2) the formula is hidden. For accountability, you have to separately type the formula in an adjacent cell so you can print your sheet out as a report or calc sheet. However, the formula you typed is just text: the resulting value has no relationship with the formatted formula you typed out and you have to change both to update. This makes maintenance cumbersome.

I wanted the formula I typed to be the same as the formatted representation of the formula I typed — change the representation and the result changes. Software packages like SMathStudio and MathCAD do this but you have to manually lay out formulas on the sheet and, most importantly, none of these software packages show the numerical substitution. This is how we are taught in school: first you write out the formula, then you write the numerical substitution of values, then you write the answer. This allows for fast verification of the calculation. Additionally, I wanted the calculations and notes to format themselves: I don’t have time to fuss with formatting.

However, there is no software (that I have seen) that can actually do all of this, which is why I wrote handcalcs.

Handcalcs is a library intended to be used with Jupyter Lab/Notebooks with a simple premise: type a calculation into your Python cell and have it be automatically rendered out in Latex as though you wrote it by hand. Jupyter handles the formatting for you. Print to PDF using your browser (via an HTML export) or through Latex (if you have it installed). Additionally, use handcalcs with any other library that enhances your workflow with Jupyter, such as with papermill that allows you to run parameterized notebooks.

The primary handcalcs interface is through the “%%render” Jupyter cell magic but I have also written a decorator interface that you can put on any calculation function to render the function source to Jupyter or Streamlit. This decorator interface is so powerful because it allows you to write small “library modules” of commonly-used calculations that you can import into your Juptyer Notebook without re-typing them. I am still figuring out all the ways I can use the decorator interface!

Why should people use your package instead of something like LaTex?

Ah! When you are using handcalcs you are actually using LaTex! Handcalcs will render out your calculations for you so you do not need to know LaTex. However, using the %%tex cell magic, you can also use handcalcs to spit out the raw LaTex code that you can use in your own .tex documents. LaTex, but more specifically Mathjax and Katex, is what makes handcalcs possible. In this way, LaTex is like the flux capacitor.

But if we are comparing handcalcs to Excel and SMathStudio (which is excellent) and MathCAD, then in addition to all of the reasons I provided earlier, I would say that it’s really important to have and use Free Software. Python is Free Software, Jupyter is Free Software; LaTex, Mathjax, and Katex are Free Software; and handcalcs is Free Software. I think that the Free Software realm represents a kind of microcosm of the larger world that I hope we can create where people’s creative gifts are given to enhance all people, everywhere. When people in the future use and build upon your work, it can be a kind of way to live forever.

Thanks for doing the interview, Connor!

The post PyDev of the Week: Connor Ferster appeared first on The Mouse Vs. The Python.


from Planet Python
via read more

TestDriven.io: Working with Static and Media Files in Django

This article looks at how to work with static and media files in a Django project, locally and in production. from Planet Python via read...