Visual Studio Code, or VS Code for short, is a free and open source code editor by Microsoft. You can use VS Code as a lightweight code editor to make quick changes, or you can configure it as an integrated development environment (IDE) through the use of third-party extensions. In this tutorial, you’re going to look at how to get the most out of VS Code for Python development.
During this tutorial, you’ll learn how you can configure, extend, and optimize VS Code for a more effective and productive Python development environment. After finishing this tutorial, you’ll have a variety of tools to help you be more productive using VS Code. It can be a powerful tool for rapid Python development.
In this tutorial, you’ll learn how to:
- Customize your user interface
- Run and monitor Python tests
- Lint and format your code automatically
- Leverage type annotations and Pylance to write code faster with higher accuracy
- Configure and utilize both local and remote debugging
- Set up data science tools
As usual, this tutorial is full of links, tips, and tricks to help you on your way.
If you haven’t already installed Visual Studio Code or the Python extension, you’ll need both for this tutorial. If you’re just getting started with VS Code, you might want to check out Jon Fincher’s tutorial on Python development in Visual Studio Code before continuing with this one.
Free Bonus: 5 Thoughts On Python Mastery, a free course for Python developers that shows you the roadmap and the mindset you’ll need to take your Python skills to the next level.
Mastering the Visual Studio Code User Interface
By default, VS Code’s user interface is designed for everyone—whether you’re writing C++, doing front-end development with JavaScript and CSS, or using data science tools like Jupyter Notebooks. In this first section, you’ll explore how to tailor VS Code to support how you work.
Keyboard Shortcuts
For almost everything that you do in VS Code, you can do it directly from the keyboard. You can map all activities in VS Code, whether they’re built-in or provided via extensions, to a keyboard shortcut.
A small subset of built-in commands is already mapped in Keyboard Shortcuts. If you want to learn these default shortcuts, print out the PDF for Windows, macOS, or Linux and pin it next to your monitor.
As a Python developer, a lot of the commands you’ll use in Visual Studio Code are provided from extensions, similar to the Python extension that you already installed. These don’t come with shortcuts mapped by default, but you can configure them using VS Code’s Keyboard Shortcuts editor.
Using the Keyboard Shortcuts Editor
Open the Keyboard Shortcuts editor by going to File → Preferences → Keyboard Shortcuts or Code → Preferences → Keyboard Shortcuts on macOS:
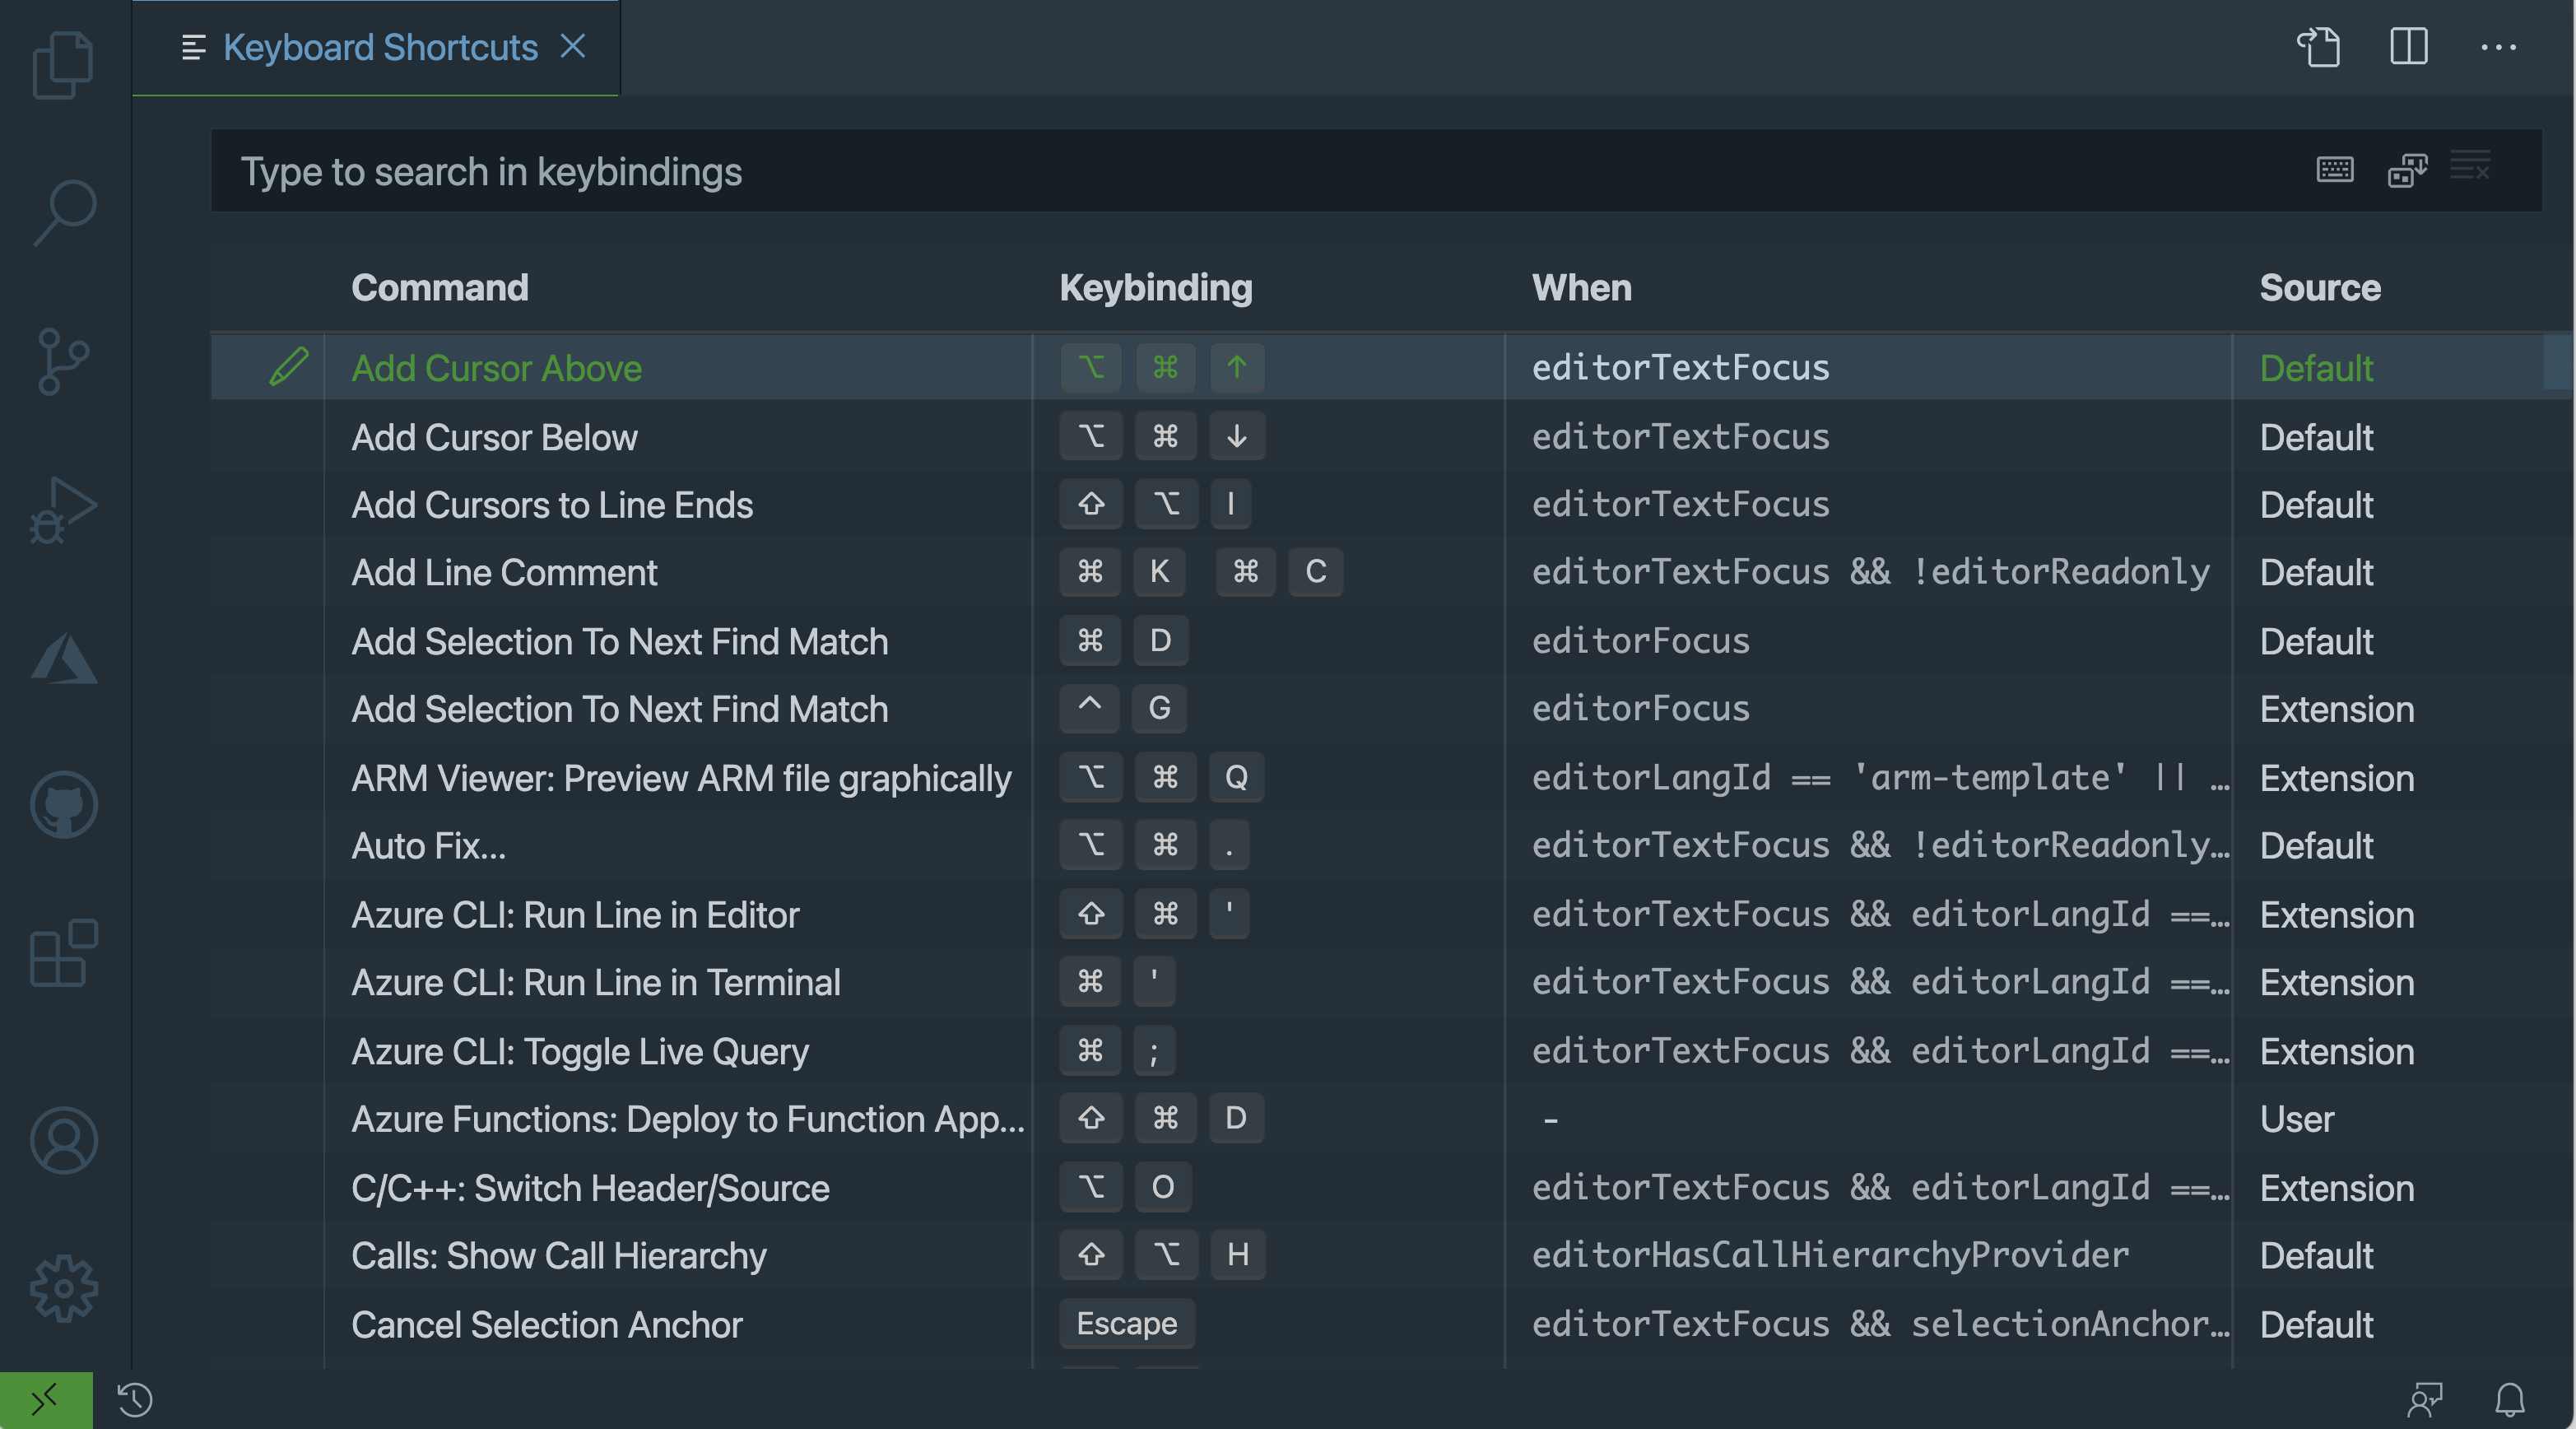
In this editor, you can see a list of all the existing shortcuts along with their details:
- Command: The command or action to be run
- Keybinding: The sequence of keys to press to trigger this command, with a blank indicating that there’s no mapping
- When: Conditions that need to be met for this keybinding to work, with a minus sign (
-) indicating that there are no requirements - Source: Where this binding was configured, either defined by Default, User, or Extension, the last one indicating that you provided it by installing a keymap extension
To override an existing binding, right-click on the existing action and click Change Keybinding. To assign a keybinding to a command that has no binding, double-click on it. If the key sequence you press is already assigned to something else, VS Code will warn you with a link to see which commands are mapped to this keybinding.
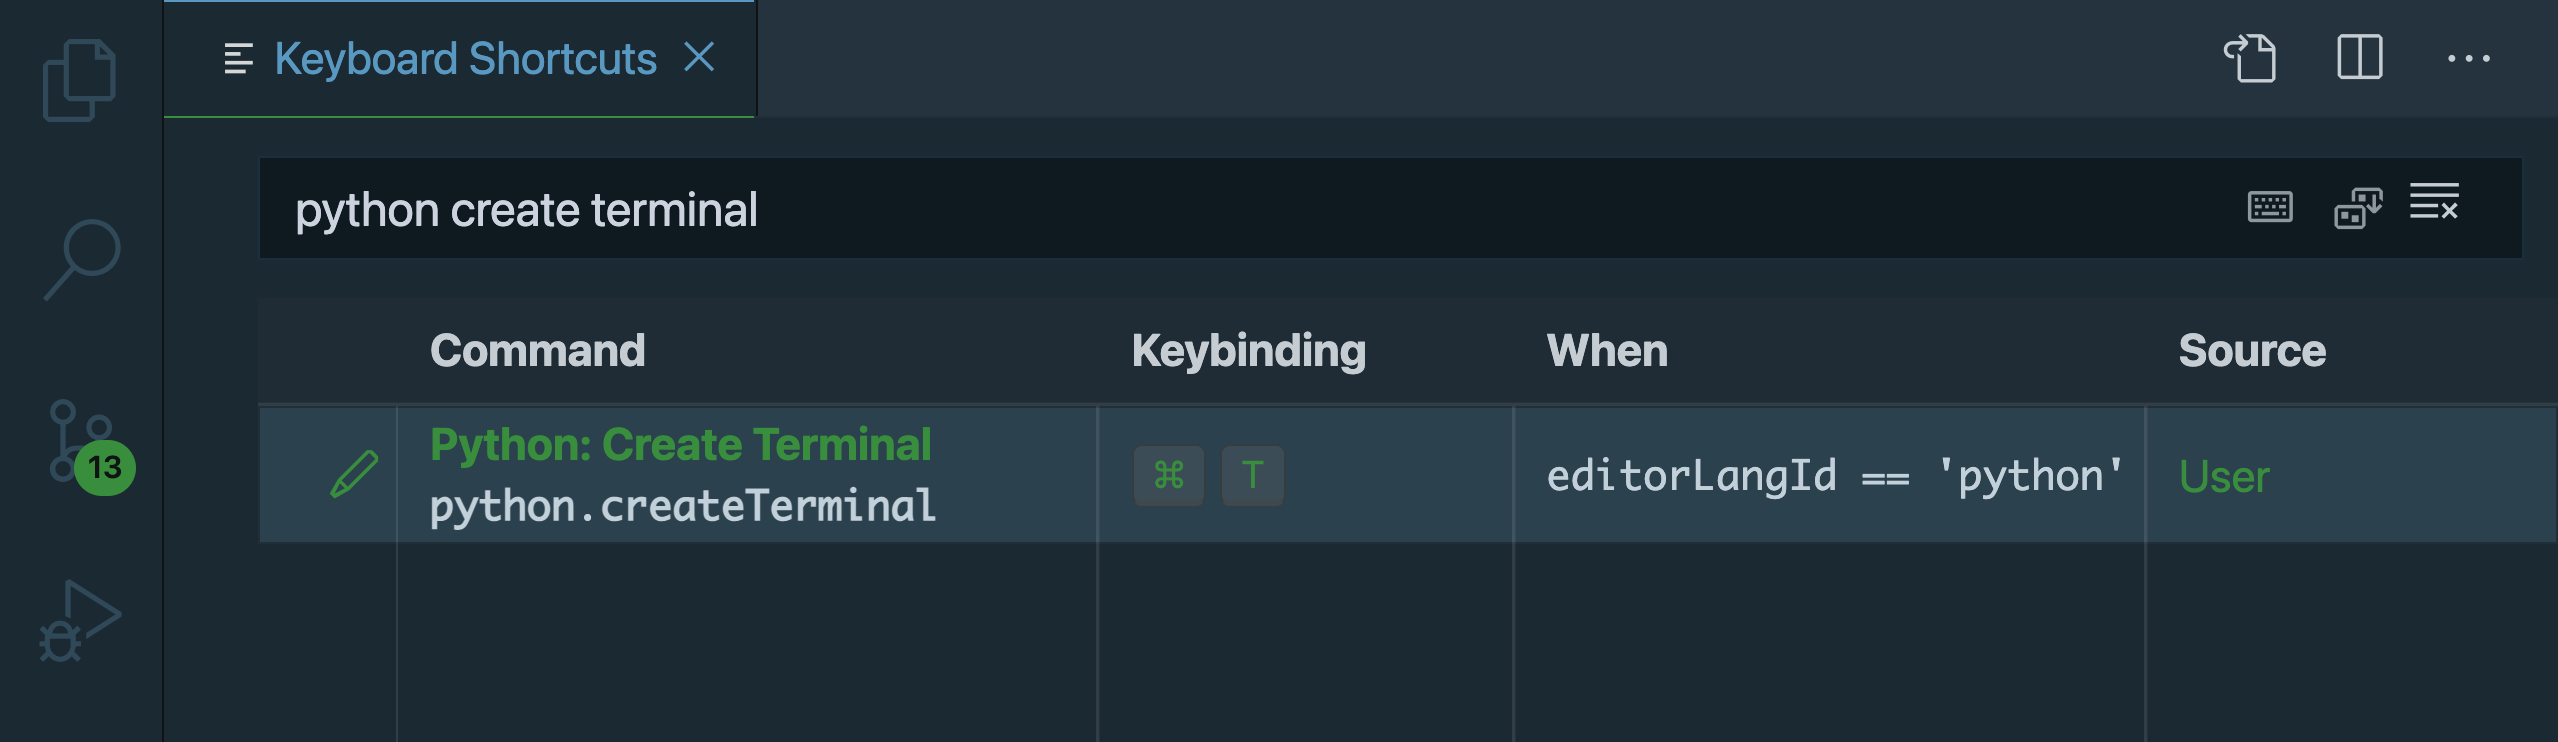
As an example, type python create terminal in the search box at the top. If no results come up, make sure you have the Python extension installed. Press Enter to assign a keybinding, like Ctrl+Alt+T, and then hit Enter again.
To assign that shortcut to only work when you’re editing Python code, right-click on the shortcut and select Change When Expression. Enter the expression editorLangId == 'python':
There are more conditional operators to choose from if you need something more specific. Here are some examples to get you started:
- Use
resourceFilename == '__init__.py'when the file you’re editing is__init__.py - Use
editorLangId == 'python'when working with Python. If needed, you can also replace'python'with another language identifier. - Use
editorHasSelectionfor when you’re inside the editor.
Once you’ve configured this extension, open up a Python file in the editor to try it out by pressing your newly assigned keyboard shortcut Ctrl+Alt+T to open up a Python terminal.
Read the full article at https://realpython.com/advanced-visual-studio-code-python/ »
[ Improve Your Python With 🐍 Python Tricks 💌 – Get a short & sweet Python Trick delivered to your inbox every couple of days. >> Click here to learn more and see examples ]
from Planet Python
via read more


No comments:
Post a Comment