Moments signify the distribution of matter about a point or an axis. In OpenCV, moments are the average of the intensities of an image’s pixels.
Segmentation is changing the representation of an image by dividing it into pixel segments to analyze the image easily.
After segmentation, we use image OpenCV moments to describe several objects in the image. OpenCV moments are used to describe several properties of an image, such as the intensity of an image, its centroid, the area, and information about its orientation.
What is opencv library?
OpenCV stands for Open Source Computer Vision Library. OpenCV is an open-source library in python which is used for computer vision. The main use of OpenCV is to process real-time images and videos for recognition and detection. It has various applications, such as self-driving cars, medical analysis, facial recognition, anomaly detection, object detection, etc.
The computer converts the real-time images and videos into numbers which are the image’s pixel values. Since we are dealing with real-time image capturing, motion is inevitable between two consecutive images.
We use OpenCV moments to relate the motion between two consecutive images. It is used to detect features of an image that remain unchanged when the object in the image undergoes rotation, translation, or any other form of orientation. Image moments are the parameters that measure the distribution of pixel intensities.
cv2.moments() Function
To find the image moment, we have a function names moments() which is present in the OpenCV library. The syntax of the functions is :
cv2.moments(array[, binaryImage])
Parameters:
array : It is the array of 2D points
binaryImage : This parameter is used only in the case of images. If it is true, then all the non-zero pixels will be treated as 1's.
The output will be the moments.
Formula for calculating moments
We use the below given formula to calculate moments from an image.

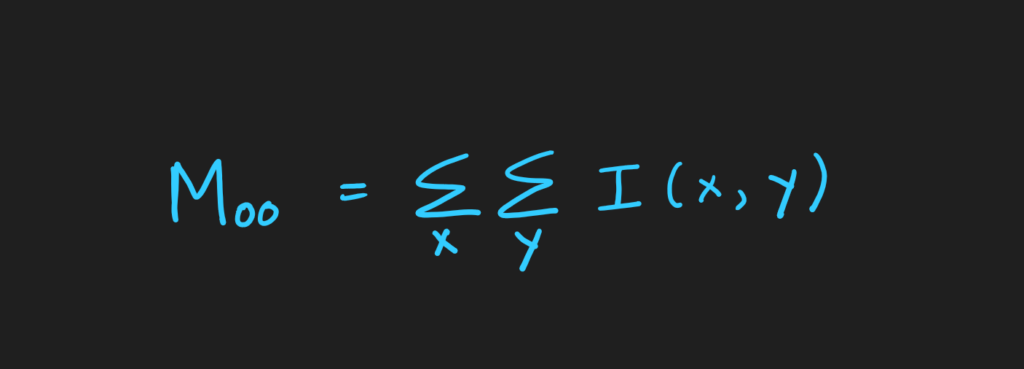
Her Mij stands for the moment calculated for the order (i,j). So I(x,y) is the intensity for each pixel of the image. x and y refer to the row and column of the image. So we perform summation twice here for the product between the intensity at row x and column y, and the row and column raised to the ith and jth power.
We can calculate several moments, such as the zeroth-order moment, first-order moment, and second-order moment.
But, the problem with the above formula is that the moments are sensitive to the x and y positions. We want the moments of the shape to be independent of where the shape is present. So, for fulfilling that purpose, we use central moments.

Here, the basic formula is the same. The only difference is that instead of taking x and y, we take x and subtract the mean of x from x. Similarly, we subtract the mean of y from y. Here, p and q are the order of the moment.
Example for Calculating Moments
Let us consider an example and understand how we calculate regular moments. We will be using the below image containing binary pixel values. We have chosen binary values for the sake of simplification.

We will kind the zeroth moment. Here, i = 0 and j = 0. So, for finding M(0,0), the formula will be:

Since the product of x^0 and y^0 will be one, we will get the above formula for M(0,0).
Now, we will find the summation for x = 1 first.
I(1,1) + I(1,2) + I(1,3) + I(1,4) = 0 + 1 + 1 + 0 = 2

For x = 2:
I(2,1) + I(2,2) + I(2,3) + I(2,4) = 0 + 1 + 1 + 0 = 2

For x = 3:
I(3,1) + I(3,2) + I(3,3) + I(3,4) = 0 + 1 + 1 + 0 = 2

 For x = 4:
 I(4,1) + I(4,2) + I(4,3) + I(4,4) = 0 + 0 + 0 + 0 = 0
So performing summation, we get M(0,0) = 6
Similarly, we can find M(1,0) and M(0,1) for first order moments and M(1,1) for second moments.
OpenCV moments in Python
Here, we will be understanding an example of using OpenCV in python. We will be creating moments from a given image using cv2.moments().
Creating OpenCV moments
First, we shall import cv2 library.
import cv2
Now, we shall give a grayscale image of a circle as the input.

We will use cv2.imread() function to read the image from the mentioned path and save it in a variable named ‘sample_img’. Since our image is already grayscale, we would not mention flag value. If you want to load a grayscale image, pass the flag as 0.
sample_img = cv2.imread('circle.jpg',0)
We will apply thresholding now by using cv2.threshold() function.
ret,thresh = cv2.threshold(sample_img,127,255,0)
The function cv2.threshold() takes the image where thresholding has to be applied as the first argument. The second argument is the thresholdValue and the third argument is the maxVal. We shall apply binary thresholding here.
For that, the last parameter thresholdingTechnique is set to 0. In thresholding, the maximum value which can be assigned to a pixel is equal to the maxVal. Since we are applying binary thresholding, we will assign the maximum value to a pixel if the value is greater than the threshold. Else, if the pixel value is smaller than the threshold, it will be set to 0.
It shall return a tuple of two values. The first value will be the threshold value, and the second tuple value returned will be the thresholded image.
Now, to print the moments, we shall pass the cnt value to the cv2.moments() function as an argument. And then, we shall print all the moments.
Moments = cv2.moments(thresh)
print(Moments)
The output will be all the moments – zeroth-order moment, first-order moment, second-order moment, and so on.
{'m00': 297430725.0, 'm10': 160463836995.0, 'm01': 160463940780.0, 'm20': 115480544945955.0, 'm11': 86570284856055.0, 'm02': 115480625959710.0, 'm30': 9.349598344212074e+16, 'm21': 6.23017850428387e+16, 'm12': 6.230179450356362e+16, 'm03': 9.349602901617693e+16, 'mu20': 28910326004526.094, 'mu11': 9922632.25, 'mu02': 28910295034257.203, 'mu30': 10491691136.0, 'mu21': -4760138584.0, 'mu12': 1289265324.0, 'mu03': -14695699136.0, 'nu20': 0.0003267994594797273, 'nu11': 1.1216445139388754e-10, 'nu02': 0.0003267991093948776, 'nu30': 6.87671336801541e-12, 'nu21': -3.1200030776619635e-12, 'nu12': 8.450408969863825e-13, 'nu03': -9.632204130953146e-12}Using moments to Draw Centroids and Contours
We shall use these moments to find the centroid of the image. First, we shall calculate the x and y co-ordinates for the centroid.
x = int(Moments["m10"] / Moments["m00"])
y = int(Moments["m01"] / Moments["m00"])
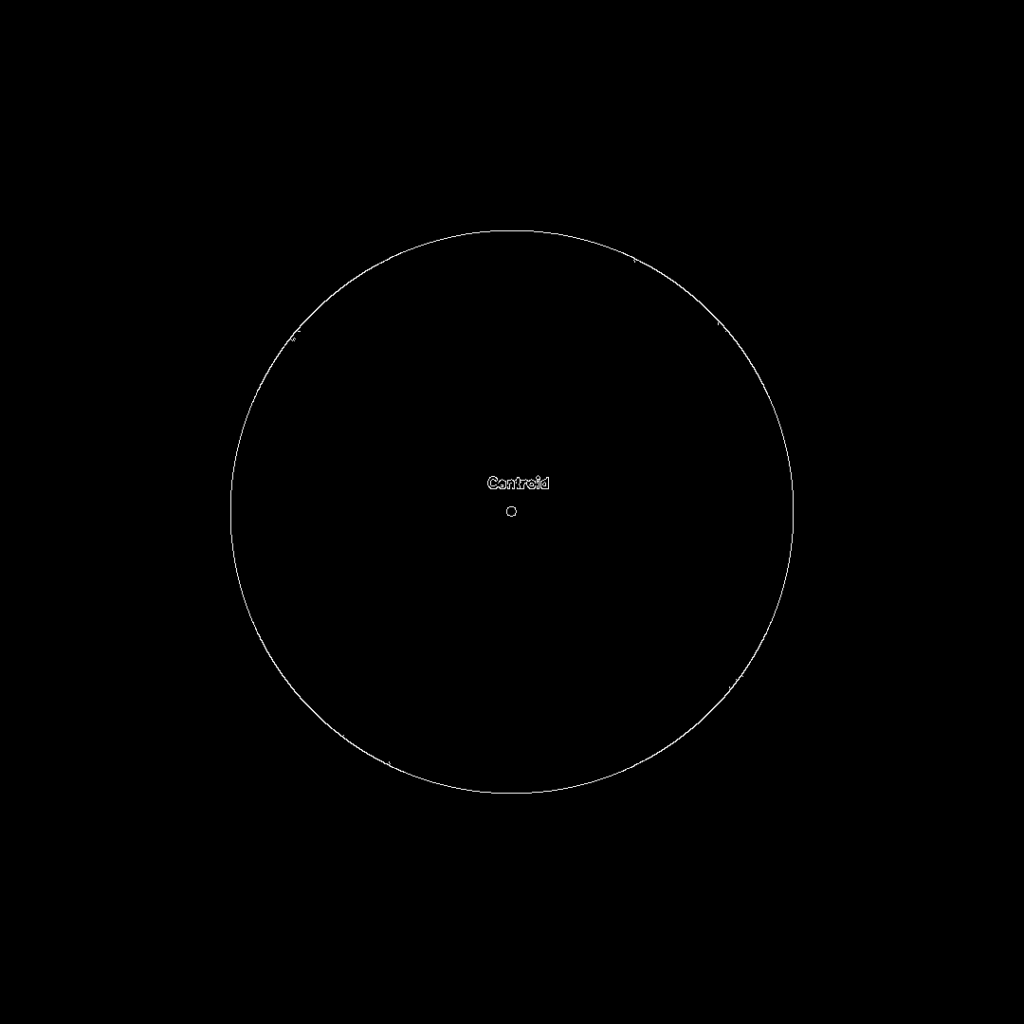
Now, we shall highlight the circle and display text ‘centroid’ to indicate the centroid. We shall use cv2.circle() and cv2.putText() functions for that.
cv2.circle(sample_img, (x, y), 5, (255, 255, 255), -1)

cv2.putText(sample_img, "Centroid", (x - 25, y - 25),  cv2.FONT_HERSHEY_SIMPLEX, 0.5, (255, 255, 255), 2)
We shall use cv2.Canny() to detect the edges from the image. The first argument passed will be the image. The rest two arguments are aperture size.
canny_edges = cv2.Canny(sample_img, 30, 200)
Afterward, we shall extract contours from the image. For that, we will use cv2.findContours() function.
contours, hierarchy = cv2.findContours(canny_edges, cv2.RETR_EXTERNAL, cv2.CHAIN_APPROX_NONE)

from google.colab.patches import cv2_imshow

cv2_imshow(canny_edges)
cv2.drawContours(sample_img, contours, -1, (0, 255, 0), 3)
The first argument to the findContours() function is the canny_edges. The second argument is contour retrieval mode, and the third argument is the contour approximation method. The values returned by the function are the contours and the hierarchy.
Then, we shall import cv2_imshow from google.colab.patches to use cv2_imshow() function. Then, we shall use cv2.drawContours() to display the image with contours. The final image will be:

Also, Read
FAQ’s on OpenCV moments
Q. What are Hu moments?
A. Hu moments are moments which are invariant to image transformations. They are a set of 7 numbers calculated using central moments. To calculate hu moments, we use HuMoments() function present in the OpenCV library.
Q. What are central moments and central normalized moments?
A. Central moments are prone to translational invariance whereas central normalized moments in addition to translational invariance are scale invariant too.
That sums up everything about OpenCV moments. If you have any questions or any thoughts to share, let us know in the comments.
Till then, Keep Learning!
The post Know Everything About OpenCV moments appeared first on Python Pool.
from Planet Python
via read more
No comments:
Post a Comment