Wing version 7.2 has been released, and the next couple Wing Tips look at some of its new features. Last time at code reformatting with Black and YAPF. Now let's investigate Wing 7.2's expanded support for virtualenv.
What Wing 7.2 Adds
Wing 7.2 improves support for virtualenv by allowing the command that activates the environment to be entered in the Python Executable in Project Properties, Launch Configurations, and when creating new projects. This is an easier and more natural way to configure virtualenvs than the old approach of finding and using the virtualenv's Python executable.
The New Project dialog now also includes the option to create a new virtualenv along with a new project, optionally specifying packages to install. This makes it much easier to get started on a new code base that uses virtualenv.
Using an Activated Env
Wing has always supported virtualenv by allowing the Python Executable in Project Properties to be set to the virtualenv's Python, which both activates the env and runs Python. In Wing 7.2 it is possible to instead set the Python Executable to the command that activates the virtualenv. When this is done, Wing activates the environment and runs python in it.
To use this approach, select Activated Env for the Python Executable in Project Properties and enter the activation command:

The drop down menu next to the entry area lists discovered environments and those which have been used recently:

Activated virtualenvs can be used in the same way in other settings where a Python Executable can be specified, for example for Launch Configurations and in a Remote Host configuraiton.
Creating New Projects
There are two options available for virtualenv, when creating a new project from the Project menu: (1) Creating a new virtualenv and new Wing project at the same time, or (2) Creating a new Wing project that uses an existing virtualenv.
Creating a New virtualenv
To create a new virtualenv along with your project, select New Project from the Project menu and set the project type to Create New Virtualenv. You will then need to enter the name for the virtualenv, select a parent directory where the virtualenv's directory will be written, and optionally specify packages to install and/or the base Python Executable to use. For example:
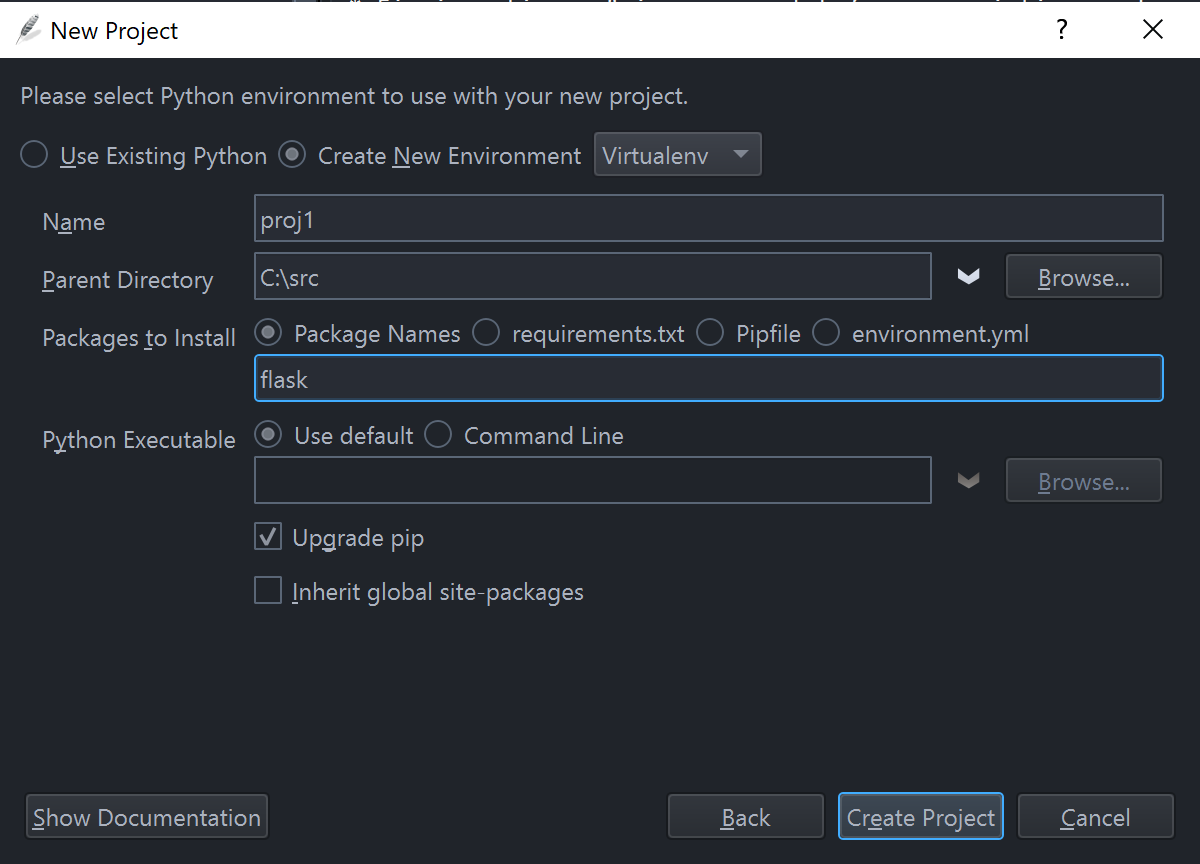
Wing will create the virtualenv, install packages, and then configure and save a project file. You can immediately start working in your new virtualenv, which Wing automatically activates for you whenever you have the project open.
Using an Existing virtualenv
To use an existing virtualenv, select New Project from the Project menu, set the project type to Use Existing Virtualenv, and then enter the activation command:
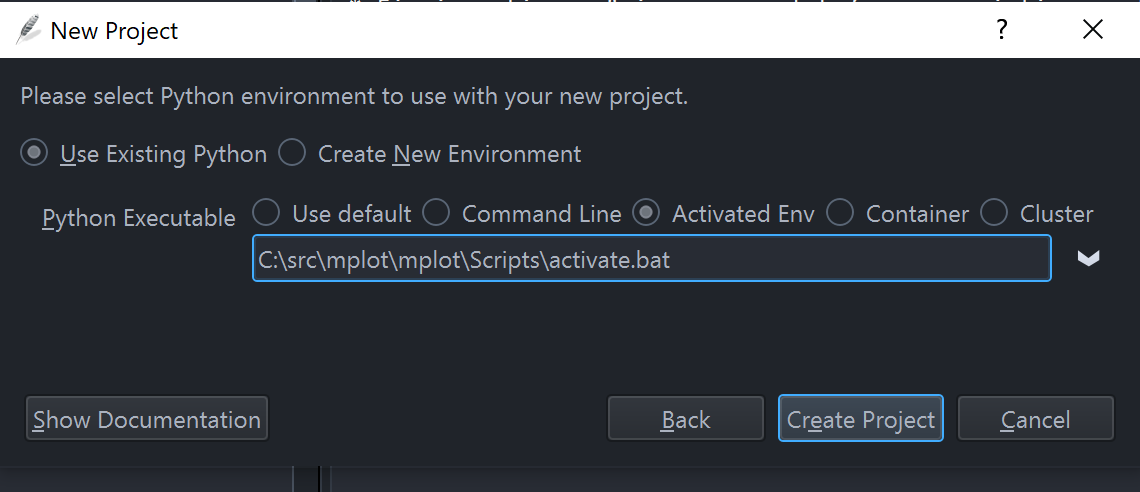
After the new project is created, use Add Existing Directory in the Project menu to add your source code directories to the project, and then save the project to disk.
For some additional details, see `Using Wing with virtual<https://wingware.com/doc/howtos/virtualenv>`__.
That's it for now! We'll be back next time soon with more Wing Tips for Wing Python IDE.
As always, please don't hesitate to email support@wingware.com if you run into problems or have any questions.
Docutils System Messages
from Planet Python
via read more


No comments:
Post a Comment