Tuesday, July 27, 2021

PyCoder’s Weekly: Issue #483 (July 27, 2021)

#483 – JULY 27, 2021
View in Browser »

The PyCoder’s Weekly Logo


Python’s collections: A Buffet of Specialized Data Types

Python has a number of useful data types beyond the built-in lists, tuples, dicts, and sets. In this tutorial, you’ll learn all about the series of specialized container data types in the collections module from the Python standard library. Learning the collections module is a great way to level up your Python programming knowledge!
REAL PYTHON

Moving SciPy to the Meson Build System

In accordance with PEP 632, distutils will be deprecated in Python 3.10 and in Python 3.12 it will be removed. This posed a big problem for SciPy, since it’s build system depends on NumPy’s distutils module — an extension of Python’s built-in distutils. The SciPy maintainers set out to find a new build system and settled on Meson, which solves a number of build issues and even scores a 4x speed-up on build times!
RALF GOMMERS

An Immersive Virtual Office For Your Team

alt

What if you could run into people at the office…while you work remotely? Gather makes it possible. Claim a desk, chat by the water cooler, and hold important meetings in an interactive space. Free up to 25 users →
GATHER sponsor

The Unknown Features of Python’s Operator Module

Have you heard of Python’s operator module? It includes functions for common operators, including mathematical operators like +, -, *, and /, and well as operators for getting items from dictionaries and accessing object attributes. The operator module might seem confusing at first glance. This article explores why it exists, what benefits you get from it, and when it makes sense to use it in your code.
MARTIN HEINZ • Shared by Martin Heinz

Discussions

Do Not Use Mutable Objects as Default Arguments in Python

Ah, mutable default arguments. If you haven’t come across them in your Python journey yet, this Reddit thread is full of examples of Python developers that lost time debugging functions with a mutable default argument. Avoiding mutable defaults is good advice in general, but blanket absolute statements are dangerous. To counter this discussion, here’s a Twitter thread exploring some genuine use cases.
REDDIT

Python Jobs

Backend Software Engineer (Remote)

Catalpa International

Python Developer (Remote)

Tessian

Software Developer (Remote)

Univention GmbH

Backend Software Engineer (Washington, D.C., USA)

Quorum

Senior Cloud Platform Engineer (Berlin, Germany)

Apheris

Software Engineer (Remote)

Close

Backend Software Engineer (Remote)

Tessian

Python Web Developer (Remote)

Premiere Digital Services

More Python Jobs >>>

Articles & Tutorials

The Pandas DataFrame: Working With Data Efficiently

In this tutorial, you’ll get started with Pandas DataFrames, which are powerful and widely used two-dimensional data structures. You’ll learn how to perform basic operations with data, handle missing values, work with time-series data, and visualize data from a Pandas DataFrame.
REAL PYTHON course

Testing the Diff

How do you write good tests? It’s a challenging problem because there are a number of layers involved. You need to write good test code that follows best practices. But you also need to write tests that aren’t fragile and make sure tests really test what you expect them to. This article gives an example of a seemingly harmless test that turns out to be pretty fragile. You’ll learn one technique for making a test more robust called “testing the diff.”
FILIPE XIMENES • Shared by Filipe Ximenes

Try Scout Free for 14-days, no CC Needed, and see why Developers Call Scout their Best Friend

alt

Scout uses tracing logic to tie bottlenecks to source code so devs can get back to building great products instead of wasting time fixing performance issues. Our real-time alerting and streamlined dashboards provide the data insights necessary for any developer to become a performance pro →
SCOUT APM sponsor

Beautiful Ideas in Programming: Generators and Continuations

This article explores how generators, which you can create in Python using the yield keyword in a function, are special cases of a more powerful construct called “continuations.” The author compares Python’s generator syntax to creating continuations in Scheme, a modern LISP dialect. The idea isn’t so much to learn how to write generators and continuations, but rather to explore how the ideas are related and to appreciate the elegance and beauty of both concepts.
HSIN-HAO YU

What Can You Do With Python and Counting Objects Using Counter

How is Python being used today, and what can you do with the language? Do you want to develop software, dive into data science and math, automate parts of your job and digital life, or work with electronics? This week on the Real Python Podcast, David Amos is back, and he’s brought another batch of PyCoder’s Weekly articles and projects.
REAL PYTHON podcast

Why Tracing Might Replace (Almost) All Logging

Lightstep CEO and Co-founder Ben Sigelman shares his vision for the future of distributed tracing.
LIGHTSTEP sponsor

Efficient Pagination in Django and Postgres

Pagination breaks up results from a query into chunks called “pages” so that only a few results are returned to the user at a time. In many cases, using native SQL tools like LIMIT and OFFSET can get you up and running with pagination quickly and work fairly well. But on datasets with millions of rows, this method breaks down. This helpful article shows you three methods for efficiently handling pagination using Django and Postgres.
RYAN WESTERBERG • Shared by Manuel Weiss

Your First Steps With Django: Set Up a Django Project

This tutorial provides a walkthrough and a reference for starting a Django project and app. You can use it as a quick setup guide for any future Django project and tutorial you’ll work on.
REAL PYTHON

Projects & Code

Events

EuroPython 2021 (Virtual)

July 26 – August 1, 2021
EUROPYTHON.EU

PyOhio 2021 (Virtual)

July 31 — August 1, 2021
PYOHIO.ORG

PyCon India 2021 (Virtual)

September 17 – 20, 2021
PYCON.ORG


Happy Pythoning!
This was PyCoder’s Weekly Issue #483.
View in Browser »

alt

[ Subscribe to ๐Ÿ PyCoder’s Weekly ๐Ÿ’Œ – Get the best Python news, articles, and tutorials delivered to your inbox once a week >> Click here to learn more ]


from Planet Python
via read more

Peter Bengtsson: How to install Python Poetry in GitHub Actions in MUCH faster way

We use Poetry in a GitHub project. There's a pyproject.toml file (and a poetry.lock file) which with the help of the executable poetry gets you a very reliable Python environment. The only problem is that adding the poetry executable is slow. Like 10+ seconds slow. It might seem silly but in the project I'm working on, that 10+s delay is the slowest part of a GitHub Action workflow which needs to be fast because it's trying to post a comment on a pull request as soon as it possibly can.

Installing poetry being the slowest partt
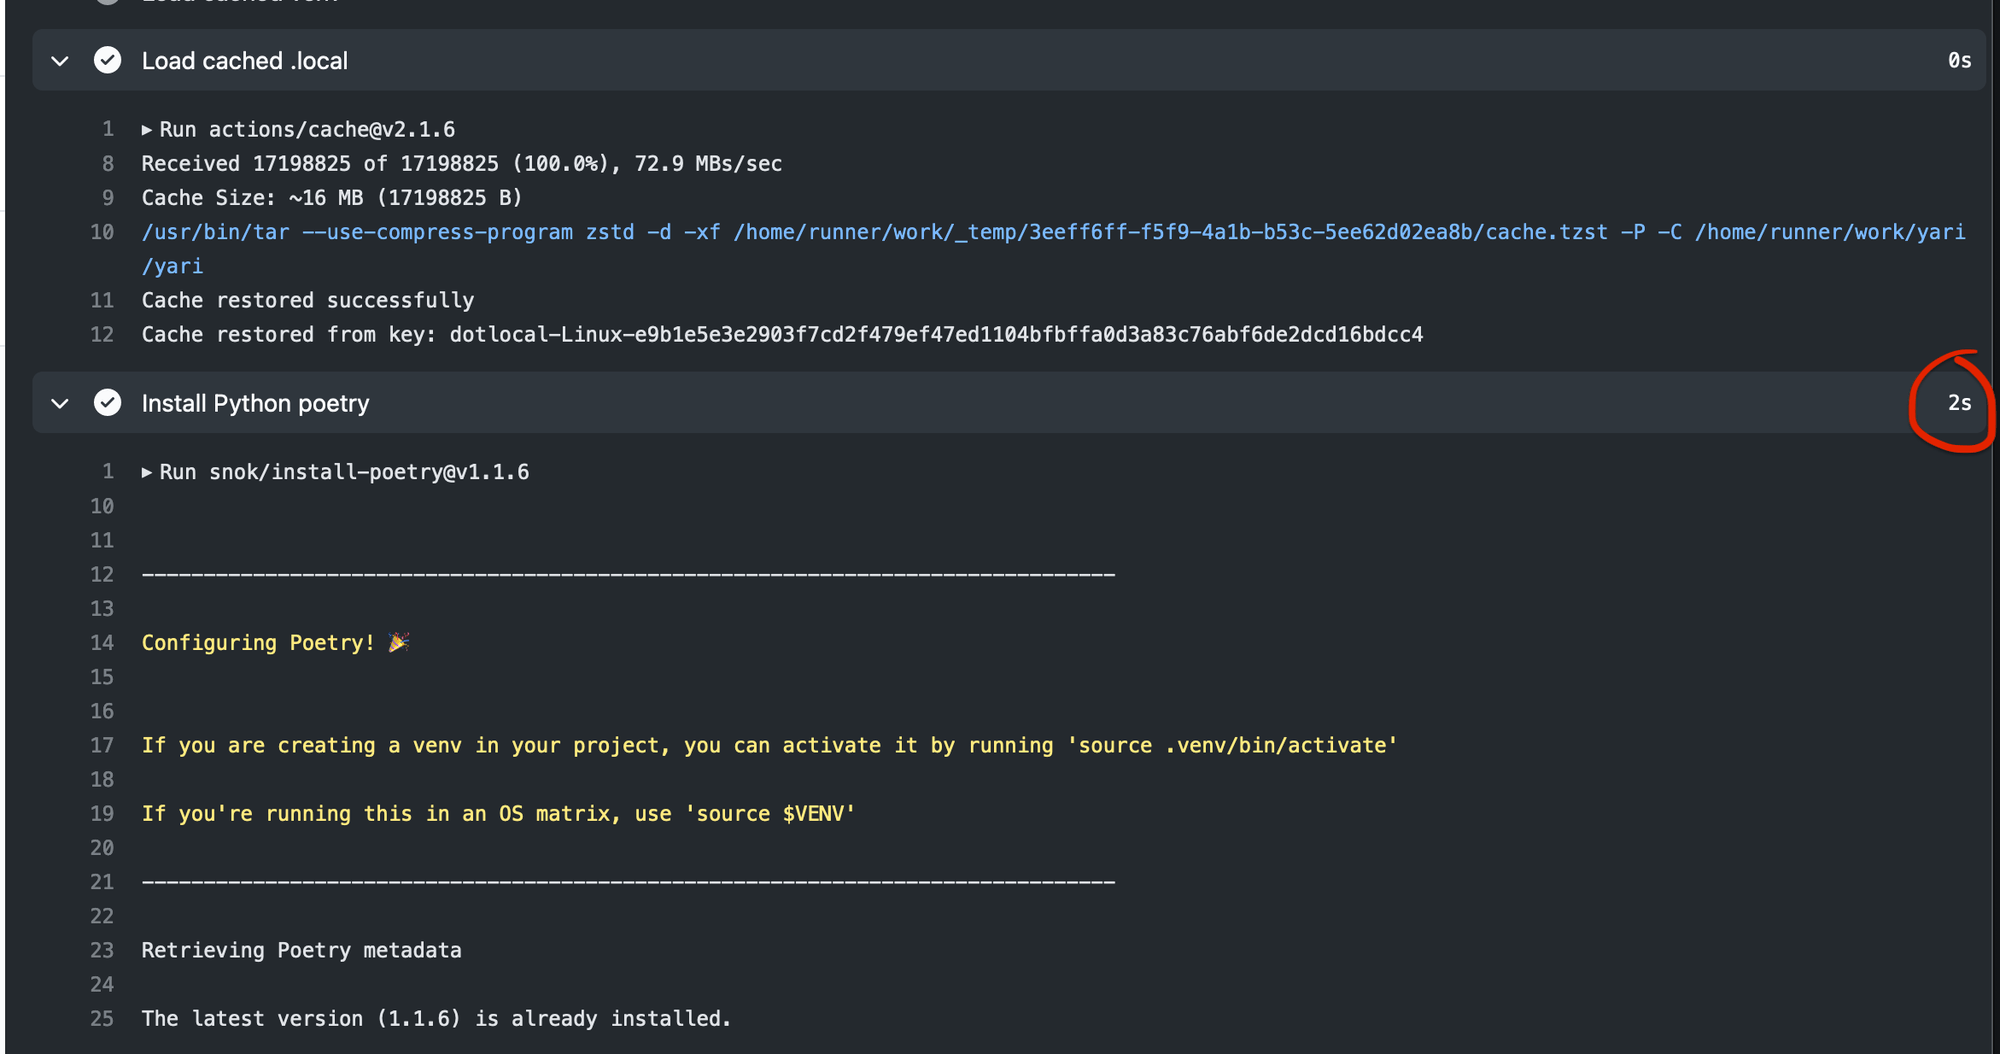
First I tried caching $(pip cache dir) so that the underlying python -v pip install virtualenv -t $tmp_dir that install-poetry.py does would get a boost from avoiding network. The difference was negligible. I also didn't want to get too weird by overriding how the install-poetry.py works or even make my own hacky copy. I like being able to just rely on the snok/install-poetry GitHub Action to do its thing (and its future thing).

The solution was to cache the whole $HOME/.local directory. It's as simple as this:

- name: Load cached $HOME/.local
  uses: actions/cache@v2.1.6
  with:
    path: ~/.local
    key: dotlocal-$-$

The key is important. If you do copy-n-paste this block of YAML to speed up your GitHub Action, please remember to replace .github/workflows/pr-deployer.yml with the name of your .yml file that uses this. It's important because otherwise, the cache might be overzealously hot when you make a change like:

       - name: Install Python poetry
-        uses: snok/install-poetry@v1.1.6
+        uses: snok/install-poetry@v1.1.7
         with:

...for example.

Now, thankfully install-poetry.py (which is the recommended way to install poetry by the way) can notice that it's already been created and so it can omit a bunch of work. The result of this is as follows:

A fast install poetry

From 10+ seconds to 2 seconds. And what's neat is that the optimization is very "unintrusive" because it doesn't mess with how the snok/install-poetry workflow works.

But wait, there's more!

If you dig up our code where we use poetry you might find that it does a bunch of other caching too. In particular, it caches .venv it creates too. That's relevant but ultimately unrelated. It basically caches the generated virtualenv from the poetry install command. It works like this:

- name: Load cached venv
  id: cached-poetry-dependencies
  uses: actions/cache@v2.1.6
  with:
    path: deployer/.venv
    key: venv-$-$-$

...

- name: Install deployer
  run: |
    cd deployer
    poetry install
  if: steps.cached-poetry-dependencies.outputs.cache-hit != 'true'

In this example, deployer is just the name of the directory, in the repository root, where we have all the Python code and the pyproject.toml etc. If you have yours at the root of the project you can just do: run: poetry install and in the caching step change it to: path: .venv.

Now, you get a really powerful complete caching strategy. When the caches are hot (i.e. no changes to the .yml, poetry.lock, or pyproject.toml files) you get the executable (so you can do poetry run ...) and all its dependencies in roughly 2 seconds. That'll be hard to beat!


from Planet Python
via read more

Real Python: The Pandas DataFrame: Working With Data Efficiently

The Pandas DataFrame is a structure that contains two-dimensional data and its corresponding labels. DataFrames are widely used in data science, machine learning, scientific computing, and many other data-intensive fields.

DataFrames are similar to SQL tables or the spreadsheets that you work with in Excel or Calc. In many cases, DataFrames are faster, easier to use, and more powerful than tables or spreadsheets because they’re an integral part of the Python and NumPy ecosystems.

In this course, you’ll learn:

  • What a Pandas DataFrame is and how to create one
  • How to access, modify, add, sort, filter, and delete data
  • How to handle missing values
  • How to work with time-series data
  • How to quickly visualize data

[ Improve Your Python With ๐Ÿ Python Tricks ๐Ÿ’Œ – Get a short & sweet Python Trick delivered to your inbox every couple of days. >> Click here to learn more and see examples ]


from Planet Python
via read more

The Pandas DataFrame: Working With Data Efficiently

The Pandas DataFrame is a structure that contains two-dimensional data and its corresponding labels. DataFrames are widely used in data science, machine learning, scientific computing, and many other data-intensive fields.

DataFrames are similar to SQL tables or the spreadsheets that you work with in Excel or Calc. In many cases, DataFrames are faster, easier to use, and more powerful than tables or spreadsheets because they’re an integral part of the Python and NumPy ecosystems.

In this course, you’ll learn:

  • What a Pandas DataFrame is and how to create one
  • How to access, modify, add, sort, filter, and delete data
  • How to handle missing values
  • How to work with time-series data
  • How to quickly visualize data

[ Improve Your Python With ๐Ÿ Python Tricks ๐Ÿ’Œ – Get a short & sweet Python Trick delivered to your inbox every couple of days. >> Click here to learn more and see examples ]


from Real Python
read more

Mike Driscoll: Creating Spreadsheets with OpenPyXL and Python

Reading Excel spreadsheets is all well and good. However, you also need to be able to create or edit a spreadsheet. The focus of this chapter will be on learning how to do that! OpenPyXL lets you create Microsoft Excel spreadsheets with a minimum of fuss.

Creating Excel spreadsheets using Python allows you to generate a new type of report that your users will use. For example, you might receive your data from a client in the form of JSON or XML. These data formats are not something that most accountants or business people are used to reading.

Once you learn how to create Excel spreadsheets with Python, you can leverage that knowledge to transform other data into Excel spreadsheets. This knowledge also allows you to do the reverse, taking in an Excel spreadsheet and output a different format, such as JSON or XML.

In this article, you will learn how to use OpenPyXL to do the following:

  • Create a spreadsheet
  • Write to a spreadsheet
  • Add and remove sheets
  • Insert and delete rows and columns
  • Edit cell data
  • Create merged cells
  • Fold rows and columns

Let’s get started by creating a brand new spreadsheet!

Editor’s note: This article is based on a chapter from the book: Automating Excel with Python. You can order a copy on Gumroad or Kickstarter.

Creating a Spreadsheet

Creating an empty spreadsheet using OpenPyXL doesn’t take much code. Open up your Python editor and create a new file. Name it creating_spreadsheet.py.

Now add the following code to your file:

# creating_spreadsheet.py

from openpyxl import Workbook


def create_workbook(path):
    workbook = Workbook()
    workbook.save(path)


if __name__ == "__main__":
    create_workbook("hello.xlsx")

The critical piece here is that you need to import the Workbook class. This class allows you to instantiate a workbook object that you can then save. All this code does is create the file that you pass to it and save it.

Your new spreadsheet will look like this:
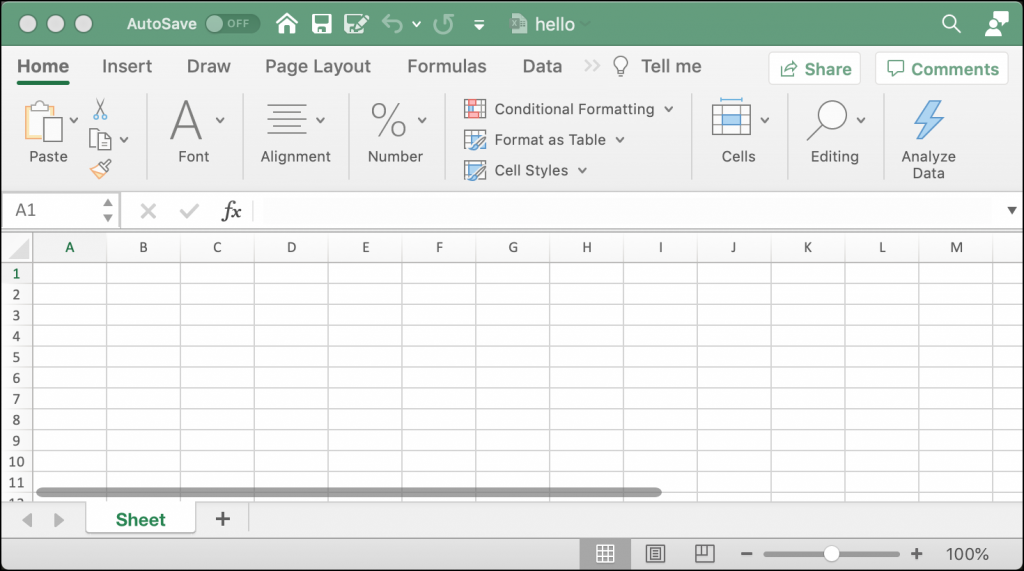
An empty Excel spreadsheet

Now you’re ready to learn how to add some data to the cells in your spreadsheet.

Writing to a Spreadsheet

When writing data in a spreadsheet, you need to get the “sheet” object. You learned how to do that in the previous chapter using workbook.active, which gives you the active or currently visible sheet. You could also explicitly tell OpenPyXL which sheet you want to access by passing it a sheet title.

For this example, you will create another new program and then use the active sheet. Open up a new file and name it adding_data.py. Now add this code to your file:

# adding_data.py

from openpyxl import Workbook


def create_workbook(path):
    workbook = Workbook()
    sheet = workbook.active
    sheet["A1"] = "Hello"
    sheet["A2"] = "from"
    sheet["A3"] = "OpenPyXL"
    workbook.save(path)


if __name__ == "__main__":
    create_workbook("hello.xlsx")

This code will overwrite the previous example’s Excel spreadsheet. After you create the Workbook() object, you grab the active Worksheet. Then you add text strings to the cells: A1, A2, and A3. The last step is to save your new spreadsheet.

When you run this code, your new spreadsheet will look like this:
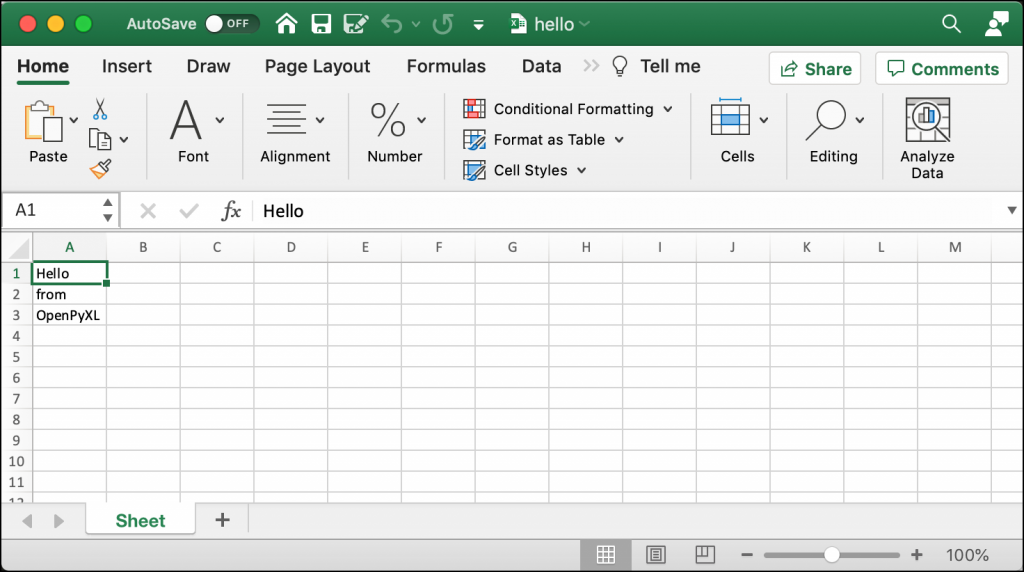
Hello World Excel Spreadsheet


You can use this technique to write data to any cell in your spreadsheet.

Now let’s find out how to add and remove a worksheet!

Adding and Removing Sheets

Adding a worksheet to a workbook happens automatically when you create a new Workbook. The Worksheet will be named “Sheet” by default. If you want, you can set the name of the sheet yourself.

To see how this works, create a new file named creating_sheet_title.py and add the following code:

# creating_sheet_title.py

from openpyxl import Workbook


def create_sheets(path):
    workbook = Workbook()
    sheet = workbook.active
    sheet.title = "Hello"
    sheet2 = workbook.create_sheet(title="World")
    workbook.save(path)


if __name__ == "__main__":
    create_sheets("hello_sheets.xlsx")

Here you create the Workbook and then grab the active Worksheet. You can then set the Worksheet’s title using the title attribute. The following line of code adds a new worksheet to the Workbook by calling create_sheet().

The create_sheet() method takes two parameters: title and index. The title attribute gives a title to the Worksheet. The index tells the Workbook where to insert the Worksheet, from left to right. If you specify zero, your Worksheet gets inserted at the beginning.

If you run this code, your new spreadsheet will look like this:
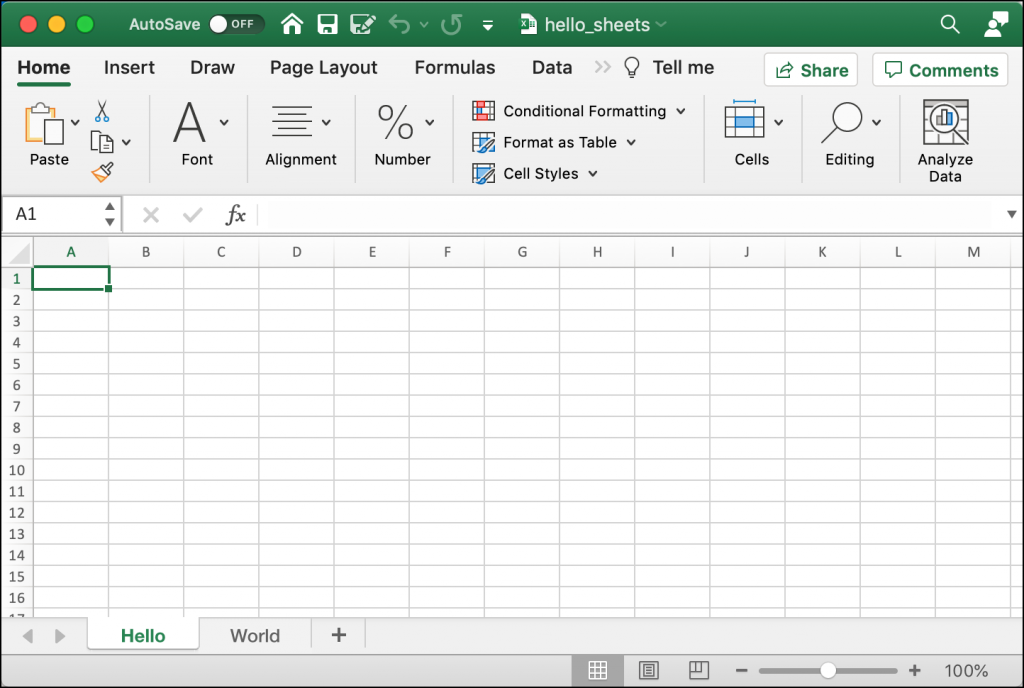
Creating Multiple Worksheets

Sometimes you will need to delete a worksheet. Perhaps that sheet no longer has valid information, or it was created by accident.

To see how to delete a worksheet, create another new file and name it delete_sheets.py. Then add this code:

# delete_sheets.py

import openpyxl


def create_worksheets(path):
    workbook = openpyxl.Workbook()
    workbook.create_sheet()
    print(workbook.sheetnames)
    # Insert a worksheet
    workbook.create_sheet(index=1, title="Second sheet")
    print(workbook.sheetnames)
    del workbook["Second sheet"]
    print(workbook.sheetnames)
    workbook.save(path)


if __name__ == "__main__":
    create_worksheets("del_sheets.xlsx")

In this example, you create two new sheets. The first Worksheet has no title specified, so it defaults to “Sheet1”. You supply a title to the second sheet, and then you print out all the current worksheet titles.

Next, you use Python’s del keyword to delete the Worksheet’s name from the workbook, which removes the sheet. Then you print out the current worksheet titles again.

Here is the output from running the code:

['Sheet', 'Sheet1']
['Sheet', 'Second sheet', 'Sheet1']
['Sheet', 'Sheet1']

The first Worksheet gets created automatically when you instantiate the Workbook. The Worksheet is named “Sheet”. Then you make “Sheet1”. Lastly, you create “Second sheet”, but you insert it at position 1, which tells the Workbook to shift ‘Sheet1’ to the right by one position.

You can see from the output above how the worksheets are ordered before and after you add and delete the “Second sheet”.

Now let’s learn about inserting and removing rows and columns!

Inserting and Deleting Rows and Columns

The OpenPyXL package provides you with several methods that you can use to insert or delete rows and columns. These methods are a part of the Worksheet object.

You will learn about the following four methods:

  • .insert_rows()
  • .delete_rows()
  • .insert_cols()
  • .delete_cols()

Each of these methods can take these two arguments:

  • idx – The index to insert into (or delete from)
  • amount – The number of rows or columns to add (or delete)

You can use the insert methods to insert rows or columns at the specified index.

Open up a new file and name it insert_demo.py. Then enter this code in your new file:

# insert_demo.py

from openpyxl import Workbook


def inserting_cols_rows(path):
    workbook = Workbook()
    sheet = workbook.active
    sheet["A1"] = "Hello"
    sheet["A2"] = "from"
    sheet["A3"] = "OpenPyXL"
    # insert a column before A
    sheet.insert_cols(idx=1)
    # insert 2 rows starting on the second row
    sheet.insert_rows(idx=2, amount=2)
    workbook.save(path)


if __name__ == "__main__":
    inserting_cols_rows("inserting.xlsx")

Here you create another new Spreadsheet. In this case, you add text to the first three cells in the “A” column. Then you insert one column at index one. That means you inserted a single column before “A”, which causes the cells in column “A” to shift to column “B”.

Next, you insert two new rows starting at index two. This code will insert two rows between the first and second rows.

You can see how this changes things by taking a look at the following screenshot:
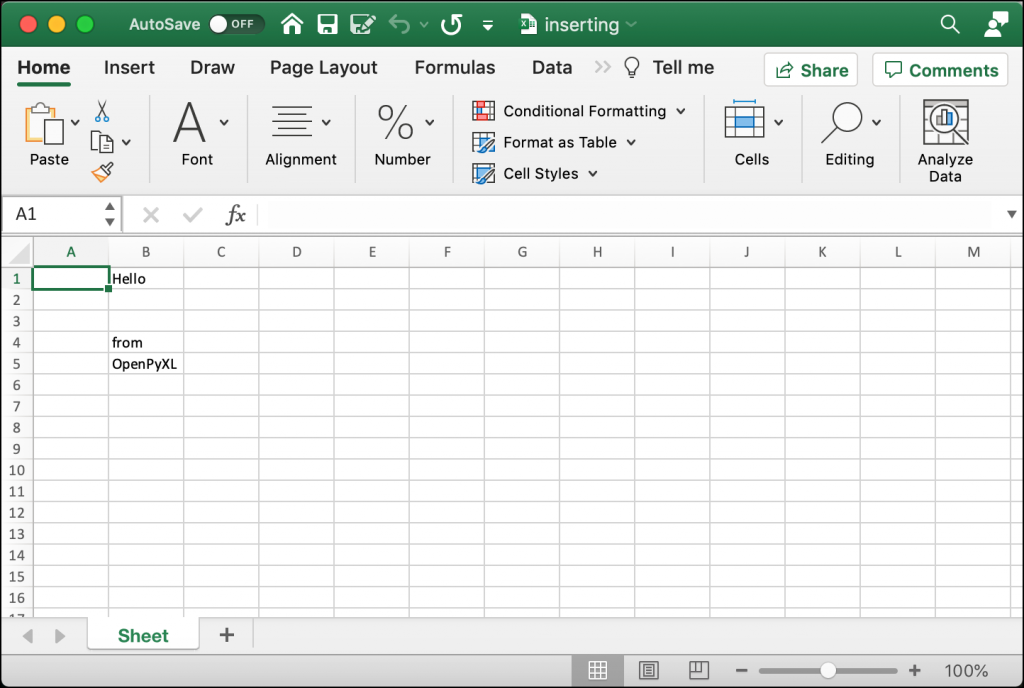
Inserting rows and columns

Try changing the indexes or number of rows and columns that you want to insert and see how it works.

You will also need to delete columns and rows from time to time. To do that you will use .delete_rows() and .delete_cols().

Open up a new file and name it delete_demo.py. Then add this code:

# delete_demo.py

from openpyxl import Workbook


def deleting_cols_rows(path):
    workbook = Workbook()
    sheet = workbook.active
    sheet["A1"] = "Hello"
    sheet["B1"] = "from"
    sheet["C1"] = "OpenPyXL"
    sheet["A2"] = "row 2"
    sheet["A3"] = "row 3"
    sheet["A4"] = "row 4"
    # Delete column A
    sheet.delete_cols(idx=1)
    # delete 2 rows starting on the second row
    sheet.delete_rows(idx=2, amount=2)
    workbook.save(path)


if __name__ == "__main__":
    deleting_cols_rows("deleting.xlsx")

In this example, you add text to six different cells. Four of those cells are in column “A”. Then you use delete_cols() to delete column “A”! That means you got rid of four values. Next, you delete two rows, starting at row number two.

When you run this code, your result should look like this:
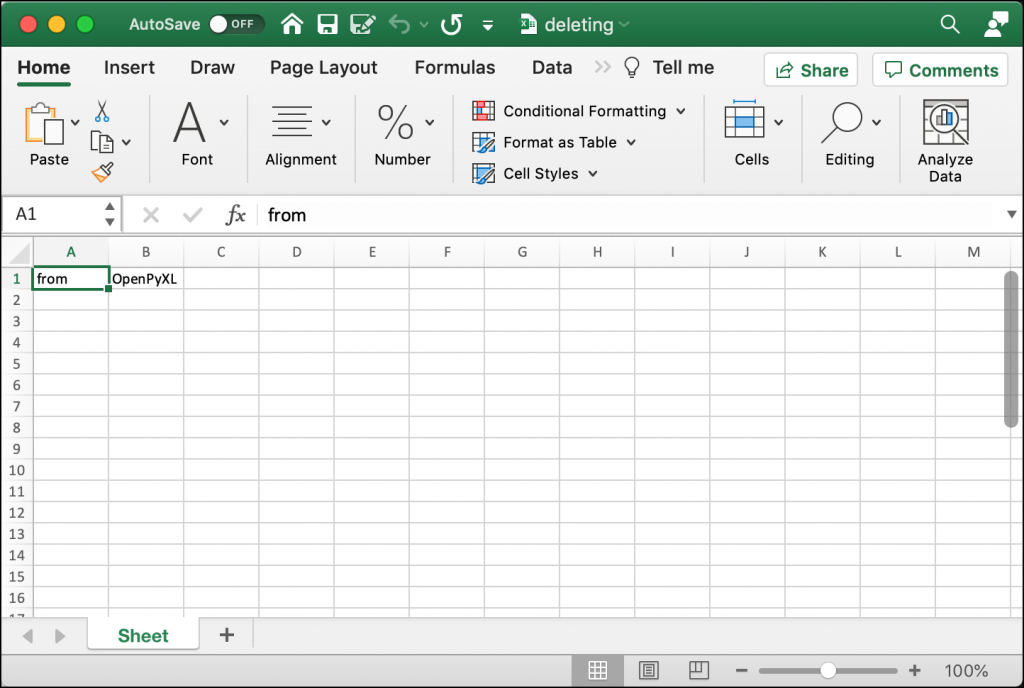
Deleting Rows and Columns

Try editing the index or amount values to get familiar with deleting rows and columns.

Now you are ready to learn about editing a spreadsheet’s values!

Editing Cell Data

You can use OpenPyXL to change the values in a pre-existing Excel spreadsheet. You can do that by specifying the cell you want to change and then setting it to a new value.

For this example, you will use the inserting.xlsx file you created in the previous section. Now create a new Python file named editing_demo.py. Then add the following code:

# editing_demo.py

from openpyxl import load_workbook


def edit(path, data):
    workbook = load_workbook(filename=path)
    sheet = workbook.active
    for cell in data:
        current_value = sheet[cell].value
        sheet[cell] = data[cell]
        print(f'Changing {cell} from {current_value} to {data[cell]}')
    workbook.save(path)

if __name__ == "__main__":
    data = {"B1": "Hi", "B5": "Python"}
    edit("inserting.xlsx", data)

This code loads up the Excel file that you created in the previous section. It then loops over each value in the data dictionary that you passed to the edit() function. You get the current value for the cell using a key in the dictionary. Then you change that cell’s value to match the value in the dictionary.

To make it more obvious what is going on, you print out the old and new values of the cell.

When you run this code, you will see the following output:

Changing B1 from Hello to Hi
Changing B5 from OpenPyXL to Python

Open up the new version of the inserting.xlsx file, and it should now look like this:
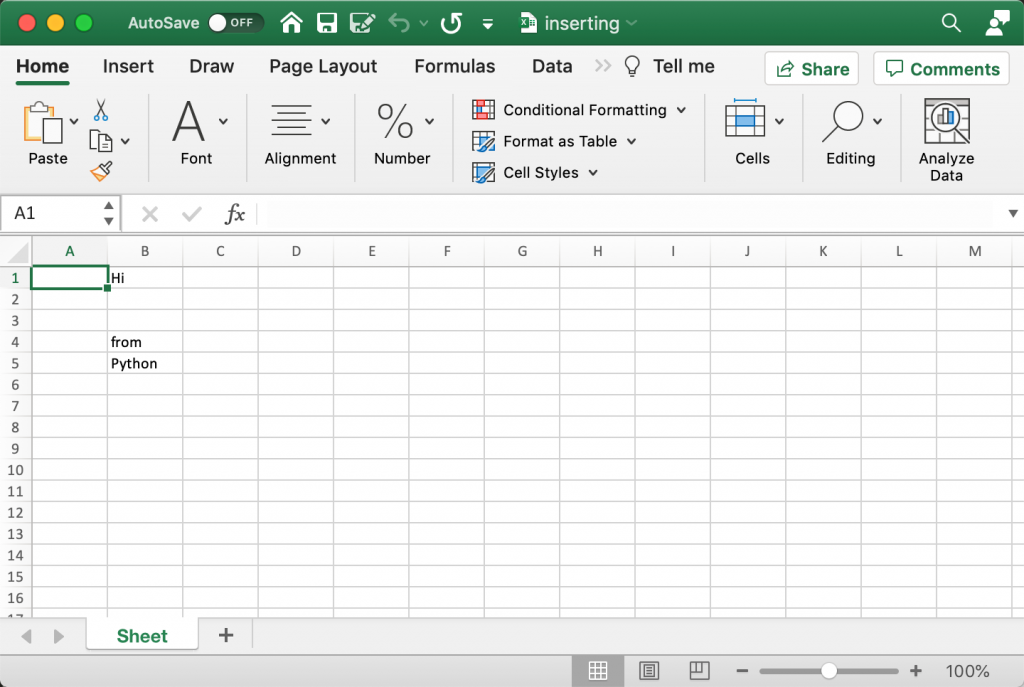
Editing Cells

Here you can see how the cell values have changed to match the one specified in the data dictionary.

Now you can move on and learn how to create merged cells!

Creating Merged Cells

A merged cell is where two or more cells get merged into one. To set a MergedCell’s value, you have to use the top-left-most cell. For example, if you merge “A2:E2”, you would set the value of cell “A2” for the merged cells.

To see how this works in practice, create a file called merged_cells.py and add this code to it:

# merged_cells.py

from openpyxl import Workbook
from openpyxl.styles import Alignment


def create_merged_cells(path, value):
    workbook = Workbook()
    sheet = workbook.active
    sheet.merge_cells("A2:E2")
    top_left_cell = sheet["A2"]
    top_left_cell.alignment = Alignment(horizontal="center",
                                        vertical="center")
    sheet["A2"] = value
    workbook.save(path)


if __name__ == "__main__":
    create_merged_cells("merged.xlsx", "Hello World")

OpenPyXL has many ways to style cells. In this example, you import Alignment from openpyxl.styles. You will learn more about styles and formatting cells in a later chapter.

Here you merge the cells “A2:E2” and set the alignment to the center of the cell. Then you set the value of “A2” to a string that you passed to the create_merged_cells() function.

When you run this example, your new Excel spreadsheet will look like this:
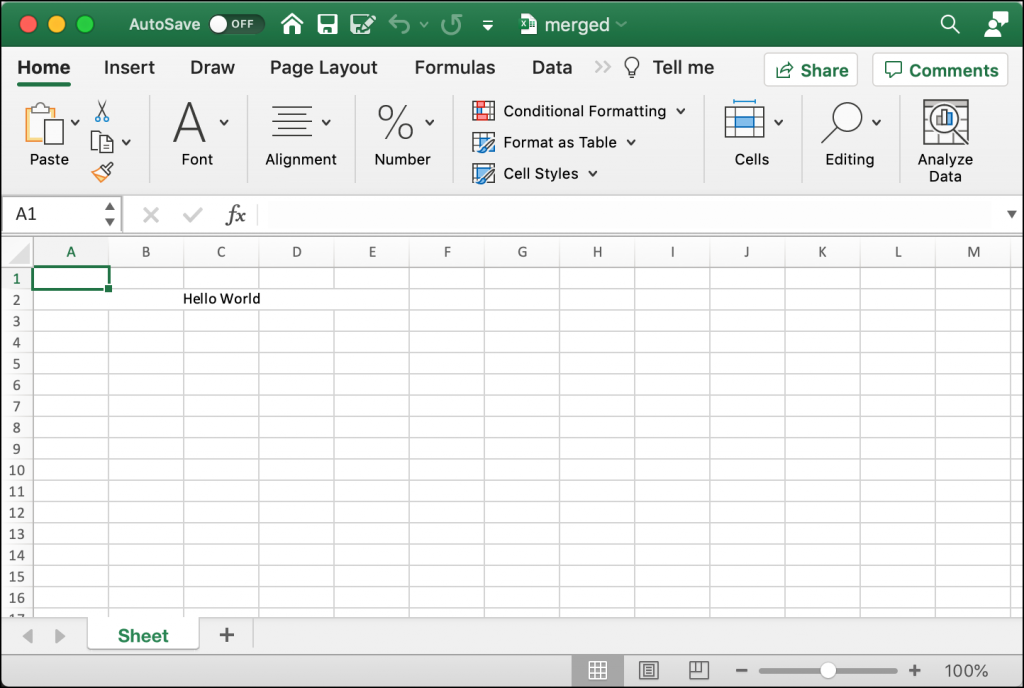
Merged Cells

To get some hands-on experience, change the range of cells you want to merge and try it with and without the alignment set.

Now you are ready to learn about folding columns or rows!

Folding Rows and Columns

Microsoft Excel supports the folding of rows and columns. The term “folding” is also called “hiding” or creating an “outline”. The rows or columns that get folded can be unfolded (or expanded) to make them visible again. You can use this functionality to make a spreadsheet briefer. For example, you might want to only show the sub-totals or the results of equations rather than all of the data at once.

OpenPyXL supports folding too. To see how this works, create a new file named folding.py and enter the following code:

# folding.py

import openpyxl


def folding(path, rows=None, cols=None, hidden=True):
    workbook = openpyxl.Workbook()
    sheet = workbook.active

    if rows:
        begin_row, end_row = rows
        sheet.row_dimensions.group(begin_row, end_row, hidden=hidden)

    if cols:
        begin_col, end_col = cols
        sheet.column_dimensions.group(begin_col, end_col, hidden=hidden)

    workbook.save(path)


if __name__ == "__main__":
    folding("folded.xlsx", rows=(1, 5), cols=("C", "F"))

Your folding() function accepts a tuple of rows or columns or both. You can tell OpenPyXL whether or not you want those rows and columns to be hidden, or folded. In this example, you fold rows 1-5 and columns C-F. To cause the folding to occur, you need to call sheet.row_dimensions.group().

When you run this code, your spreadsheet will look like this:
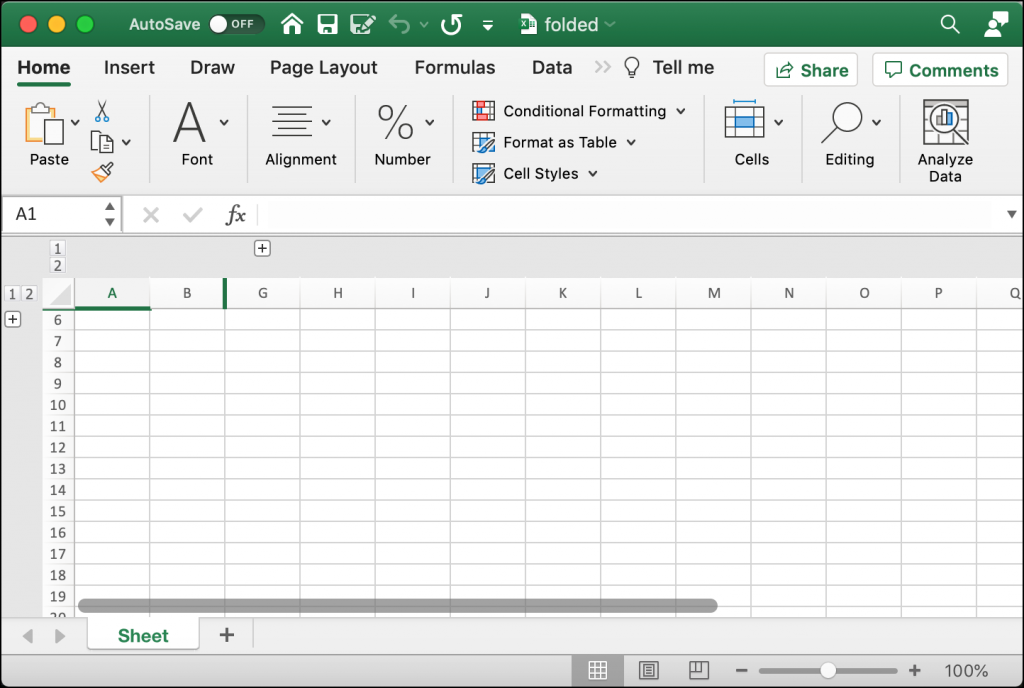
Folding Cells

You can see in this spreadsheet that some of the rows and columns are folded or hidden. There is a “+” symbol next to row 6 and another “+” symbol above column “G”. If you click on either of those buttons, it will expand the folded rows or columns.

Give this code a try. You can also experiment with different row or column ranges.

Now you are ready to learn how to freeze a pane!

Freezing Panes

Microsoft Excel allows you to freeze panes. What that means is that you can freeze one or more columns or rows. One popular use case is to freeze a row of headers so that the headers are always visible while scrolling through a lot of data.

OpenPyXL provides a freeze_panes attribute on the Worksheet object that you can set. You need to select a cell below and to the right of the columns that you want to freeze. For example, if you want to freeze the first row in your spreadsheet, then you would select cell at “A2” to apply the freeze to that row.

You can see how this works by writing some code. Open up a new file and name it freezing_panes.py. Then enter the following into it:

# freezing_panes.py

from openpyxl import Workbook


def freeze(path, row_to_freeze):
    workbook = Workbook()
    sheet = workbook.active
    sheet.title = "Freeze"
    sheet.freeze_panes = row_to_freeze
    headers = ["Name", "Address", "State", "Zip"]
    sheet["A1"] = headers[0]
    sheet["B1"] = headers[1]
    sheet["C1"] = headers[2]
    sheet["D1"] = headers[3]
    data = [dict(zip(headers, ("Mike", "123 Storm Dr", "IA", "50000"))),
            dict(zip(headers, ("Ted", "555 Tornado Alley", "OK", "90000")))]
    row = 2
    for d in data:
        sheet[f'A{row}'] = d["Name"]
        sheet[f'B{row}'] = d["Address"]
        sheet[f'C{row}'] = d["State"]
        sheet[f'D{row}'] = d["Zip"]
        row += 1
    workbook.save(path)


if __name__ == "__main__":
    freeze("freeze.xlsx", row_to_freeze="A2")

Here you create a new Workbook and set the active sheet’s title to “Freeze”. Then you set the freeze_panes attribute to “A2”. The rest of the code in the function adds a couple of rows of data to the Worksheet.

When you run this code, the spreadsheet that you create will look like this:
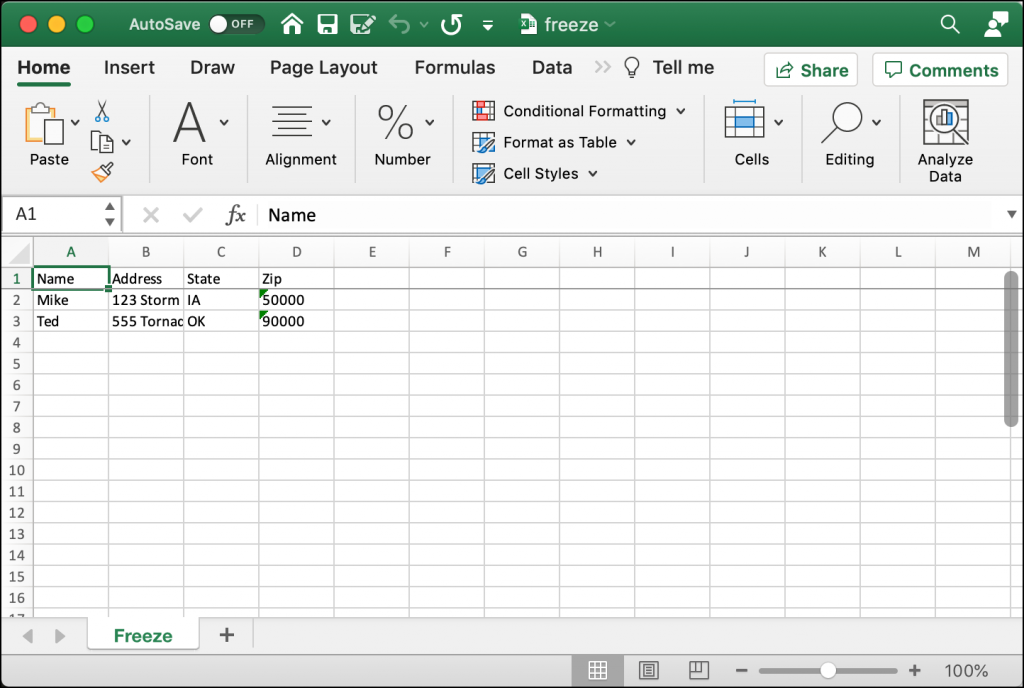
Freeze Panes

Try scrolling down through some rows in the spreadsheet. The top row should always remain visible because it has been “frozen”.

Wrapping Up

You can use OpenPyXL not only to create an Excel spreadsheet, but modify a pre-existing one. In this chapter, you learned how to do the following:

  • Create a spreadsheet
  • Write to a spreadsheet
  • Add and remove sheets
  • Insert and delete rows and columns
  • Edit cell data
  • Create merged cells
  • Freeze panes

Give the examples in this chapter a try. Then modify them a bit to see what else you can do on your own.

The post Creating Spreadsheets with OpenPyXL and Python appeared first on Mouse Vs Python.


from Planet Python
via read more

Stack Abuse: How to Get the Max Element of a Pandas DataFrame - Rows, Columns, Entire DataFrame

How to Get the Max Element of a Pandas DataFrame

A DataFrame is a data structure that represents a special kind of two-dimensional array, built on top of multiple Series objects. These are the central data structures of Pandas - an extremely popular and powerful data analysis framework for Python.

If you're not already familiar with DataFrames and how they work, read our Guide to DataFrames.

DataFrames have the ability to give a name to rows and/or columns, and in a sense, represent tables.

Let's import Pandas and create a DataFrame from a dictionary:

import pandas as pd

df_data = {
    "column1": [24, 9, 20, 24],
    "column2": [17, 16, 201, 16]
}

df = pd.DataFrame(df_data) 
print(df)

Pandas has a great integration with Python and we can easily create DataFrames from dictionaries. The df we've constructed now contains the columns and their respective values:

   column1  column2
0       24       17
1        9       16
2       20      201
3       24       16

Each column has a list of elements, and we can search for the maximum element of each column, each row or the entire DataFrame.

Find Maximum Element in Pandas DataFrame's Column

To find the maximum element of each column, we call the max() method of the DataFrame class, which returns a Series of column names and their largest values:

max_elements = df.max()
print(max_elements)

This will give us the max value for each column of our df, as expected:

column1     24
column2    201
dtype: int64

However, to find the max() element of a single column, you first isolate it and call the max() method on that specific Series:

max_element = df['column1'].max()
print(max_element)
24

Find Maximum Element in Pandas DataFrame's Row

Finding the max element of each DataFrame row relies on the max() method as well, but we set the axis argument to 1.

The default value for the axis argument is 0. If the axis equals to 0, the max() method will find the max element of each column. On the other hand, if the axis equals to 1, the max() will find the max element of each row.

max_elements = df.max(axis=1)
print(max_elements)

This will give us the max value for each row of our df, as expected:

0     24
1     16
2    201
3     24
dtype: int64

Alternatively, if you'd like to search through a specific row, you can access it via iloc[]:

print(df)

for row in df.index:
    print(f'Max element of row {row} is:', max(df.iloc[row]))

We've printed the df for reference to make it easier to verify the results, and obtained the max() element of each row, obtained through iloc[]:

column1  column2
0       24       17
1        9       16
2       20      201
3       24       16

Max element of row 0 is: 24
Max element of row 1 is: 16
Max element of row 2 is: 201
Max element of row 3 is: 24

Find Maximum Element in Entire Pandas DataFrame

Finally, we can take a look at how to find the max element in an entire DataFrame.

Based on what we've previously seen, this should be pretty simple. We'll just use the built-in max() method and pass it one of two previously created lists of max elements - either for all rows or all columns. These are two facets of the same data, so the same result is guaranteed.

This should give us a single highest value in the entire df:

max_by_columns = df.max()
max_by_rows = df.max(axis=1)

df_max = max(max_by_columns)
print("Max element based on the list of columns: ", df_max)

df_max2 = max(max_by_rows)
print("Max element based on the list of rows: ", df_max2)

This will output:

Max element based on the list of columns:  201
Max element based on the list of rows:  201

This is both expected and correct! The max element of a list of max elements of each row should be the same as the max element of a list of max elements of each column and both of them should be the same as the max element of the entire DataFrame.

Conclusion

In this short tutorial, we've taken a look at how to find the maximum element of a Pandas DataFrame, for columns, rows and the entire DataFrame instance.


from Planet Python
via read more
Python for Beginners: When to Use Comments vs. Docstrings in Python

Adding comments to your program will help other programmers understand your work. Without comments, it can be difficult to understand other people’s code. This is why it’s important to know when to use comments vs. docstrings as a Python programmer.

Knowing when to use comments and how to use them can be confusing. Do you know the difference between a docstring and a string comment? 

In this tutorial, we’ll cover best practices for writing comments in Python. We’ll also show you how to use docstrings and explain how they differ from ordinary comments. Hopefully we can demystify the process of documenting Python code.

By the end of this post, you should have a firm grasp of when to use comments vs. docstrings in Python.

Using Python Block Comments

Making comments in Python is done in a variety of ways. This can be a little confusing for beginners. Understanding the difference between block comments and string comments will bring some clarity to the situation.

In Python, most comments are written using block comments. Block comments are preceded by a # sign. Python will ignore these statements when the program runs. Use block comments to provide short, explanatory notes.

Example 1: How to write a Block Comment in Python

# this is a Python block comment 

It’s also possible to write a comment at the end of a Python statement. These comments are called inline comments. Inline comments are great for explaining non-obvious code.

Example 2: Inline Comments in Python

offset = width + 1 # compensate for the screen border

Inline comments can be extremely useful, but it’s best to use them sparingly. Less is more is a good rule to follow here.

Using Python String Comments

Block comments only take up a single line. If you need a comment that spans multiple lines, you’ll need to use more block comments. If you have a really long comment, or need to comment out a block of code, you can use a string comment. String comments are written using quotation marks.

Example 3: How to write a String Comment in Python

"""
This is an example of a string comment.
String comments can be many lines long.

Python will ignore them when you run the program.

"""

With string comments, there’s no limit on how long your comment can be. But there is a need for caution. String comments can be mistaken for docstrings if you put them in the wrong place. 

For example, a string comment following a function will be interpreted as a docstring. For this reason, some Python programmers don’t use string comments at all.

Is it wrong to use Python string comments?

Some programmers frown on using strings as Python comments. Because they can be confused with docstrings, some Python coders even argue it’s best to avoid them altogether.

But the official words is that using string comments is perfectly fine. Even Guido Van Rossum, the creator of Python, has okayed the technique.

When to Use Python Comments

Use comments to leave notes about the code for others, and for yourself. Comments have several uses, but they are generally made for the developers.

Unlike docstrings, comments will not be turned into documentation. There are no rules for writing comments, only guidelines. If you look around, you’ll find varying opinions about when and when not to make comments.

In general, most programmers will tell you that comments are necessary in the following cases:

  • When you need to explain complex algorithms.
  • If you want to leave a TODO or explanatory note about unfinished code.
  • If you need to provide a warning.
  • When you want to include optional code.

Here are some other tips to keep in mind when you’re making comments:

  • Keep comments as short as possible.
  • Always be respectful and helpful to others.
  • Use comments to explain why a decision was made.
  • Use comments to explain how something works.

What is a Python Docstring?

Docstrings stand for Documents Strings and they provide a way of documenting a Python program. Using a docstring, programs can provide a description of the functions, classes, and modules that other programmers might want to use.

Using docstrings, Python developers can provide a simple explanation of what a function or class is used for. Without such documentation, it would be very difficult—if not impossible—to learn new Python modules.

Docstrings can also be used to generate API’s (Application Programming Interfaces). API’s are used to send data across the web. To use an API, it’s necessary to consult the documentation and learn how it works. Docstrings make generating this documentation easier by allowing programs to include it directly in the code.

How to Use Docstrings in Python

Now that we’ve made a distinction between docstrings vs. comments in Python, let’s take a closer look at how docstrings work and how to use them.

How to declare a docstring: Create a new docstring using triple quotation marks. For this reason, docstrings can be confused with string comments.  

How to Access a Docstring: Docstrings can be read using the __doc__ attribute.

What Should a Docstring Look Like?

Unlike comments, docstrings have some formal requirements. To begin with, every docstring begins with a short summary of the function or class it’s related to. 

The summary should be clear and concise. It’s important that programmers immediately grasp what a function does. This, however, is sometimes easier said than done, but should always be the goal.

Further documentation can be provided below the summary, following a blank line. The details of the docstring should serve as a quick reference for functions and arguments.

Documenting Python Functions

When documenting functions in Python, be sure to include descriptions of the function’s parameters. Also, give a detailed explanation of the return value of the function, if it has one.

Example 4: How to document a function in Python

def get_neighbors(some_list, index):
    """Returns the neighbors of a given index in a list.

        Parameters:
            some_list (list): Any basic list.
            index (int): Position of an item in some_list.

        Returns:
            neighbors (list): A list of the elements beside the index in some_list.

    """
    neighbors = []

    if index - 1 >= 0:
        neighbors.append(some_list[index-1])
    if index < len(some_list):
        neighbors.append(some_list[index+1])

    return neighbors

some_list = [8,7,"car","banana",10]

print(get_neighbors(some_list, 2))

Output

[7, 'banana']

Accessing a Document String in Python

To access a docstring in Python, use the __doc__ attribute. This is a special attribute that will retrieve the docstring of a Python function or class. We can use the __doc__ attribute to print a docstring from the command line.

Example 5: Accessing a docstring with the __doc__ attribute

print(get_neighbors.__doc__)

Output

Returns the neighbors of a given index in a list.

        Parameters:
            some_list (list): Any basic list.
            index (int): Position of an item in some_list.

        Returns:
            neighbors (list): A list of the neighboring elements of the index in some_list.

Documenting a Python Class with Docstrings

When documenting classes in Python, it’s important to include a summary of what the class represents as well as an explanation of the classes’ attributes and methods.

Each method in the class will also require a docstring. Below, you’ll find an example of a blog post class. Python docstrings are used to provide a detailed description of the class and it’s methods.

Example 5: How to document a class in Python

class BlogPost:
    """
    A generic blog post model.

    ...

    Attributes
    ----------
    author: str
        who wrote the blog post
    title: str
        the title of the blog post
    content: str
        the body content of the blog post

    Methods
    ----------
    description():
        Prints the author, title, and content of the blog post

    """

    def __init__(self, author, title, content):
        """Constructs all the necessary attributes of the blog post object.

        Parameters
        ----------
            author: str
                who wrote the blog post
            title: str
                the title of the blog post
            content: str
                the body content of the blog post
        """

        self.author = author
        self.title = title
        self.content = content

    def description(self):
        """Prints the author, title, and content of the blog post.

        Returns
        -------
        None
        """

        print(f'{self.author}\n{self.title}\n{self.content}')

Programmers differ when it comes to the styling choices used to write docstrings. With a little research, you can find many style guides. How you choose to format your docstring will depend on many factors, the least of which may be personal choice. Keep in mind who your documentation is aimed at.

Summary

Knowing when to use comments vs. docstrings in Python is crucial to building robust, complex programs. Learning how and when to make comments will not only aid you in collaborative efforts, it will also save you time.

Unlike string comments, docstrings are meant to be read by the public. They provide an insight into how to use functions, classes, and modules. This makes it easier for other programmers to learn how to use the module in their own projects.

A quick recap on comments vs docstrings:

  • Use comments to explain how code works.
  • Comments are great for leaving notes for people working on your program.
  • Docstrings provide documentation about functions, classes, and modules.
  • Use docstrings to teach other developers how to use your program.

Related Posts

The post When to Use Comments vs. Docstrings in Python appeared first on PythonForBeginners.com.


from Planet Python
via read more

TestDriven.io: Working with Static and Media Files in Django

This article looks at how to work with static and media files in a Django project, locally and in production. from Planet Python via read...