Tuesday, January 17, 2017

Big Data Experiments - Running Apache Spark on Windows 7

It is a different thing to run Spark on Linux and a very different experience to run Spark in Windows. Last few days had been very frustrating for me from the perspective that I have been trying hard to setup Apache Spark on my desktop and run a very simple example and finally it completed today. In the following post I will be documenting my experience and how anyone else can avoid these problems.

First let me explain my environment:
OS: Windows 7 64 Bit
Processor: i5
RAM: 8 GB

Based on a project requirement I wanted to test I chose the following version of Spark which I downloaded from Spark Website.
spark-1.6.0-bin-hadoop2.6.tgz
As a pre-requisite I had the following version of Oracle Java
java version "1.8.0_25" and JAVA_HOME was setup appropriately.
I use a batch script for the setup which is very handy.
jdk1.8.bat 
 @echo off
echo Setting JAVA_HOME
set JAVA_HOME=C:\jdk1.8.0_25-windows\java-windows
echo setting PATH
set PATH=%JAVA_HOME%\bin;%PATH%
echo Display java version
java -version

And then I setup Scala & SBT which I downloaded from the following links.
scala version 2.11.0-M8 
sbt 0.13.13
Downloaded the winutils.exe based on the advice of this stack overflow answer
http://stackoverflow.com/questions/25481325/how-to-set-up-spark-on-windows
winutils.exe link 
And then setup the necessary access for c:\tmp\hive based on advice from this blog


Then created a batch script to set it up all
envscala.bat 
@echo off
REM set SPARK & Scala related Dirs
set USERNAME=pridash4
set HADOOP_HOME=c:\rcs\hadoop-2.6.5
set SCALA_HOME=C:\scala-2.11.0-M8\scala-2.11.0-M8
set SPARK_HOME=C:\spark-1.6.0-bin-hadoop2.6
set SBT_HOME=C:\sbt-launcher-packaging-0.13.13
set PATH=%HADOOP_HOME%\bin;%SCALA_HOME%\bin;%SBT_HOME%\bin;%SPARK_HOME%\bin;%PATH%
Then I followed the following command:
>jdk1.8.bat
>envscala.bat
>spark-shell.bat

All started but again all stopped at one error:
    The root scratch dir: /tmp/hive on HDFS should be writable. Current permissions are: rw-rw-rw- 
This almost wasted one full day and despite trying all the steps I still got this error.

Then I re-read and found this stack overflow post "http://stackoverflow.com/questions/40409838/the-root-scratch-dir-tmp-hive-on-hdfs-should-be-writable-current-permissions" which gave the idea to install hadoop binaries itself and run the below command.

hadoop fs -chmod -R 777 /tmp/hive/;
Thus started my new adventure to install hadoop 2.6 based on the below Apache documentation:
https://wiki.apache.org/hadoop/Hadoop2OnWindows

I downloaded the binaries from Apache website and tried extracting the binaries and copied the winutils.exe to the hadoop bin directory. And though I ran the above hadoop command but when I ran spark-shell again I started getting new errors. And with lot of searching I restored back to the below binaries for Hadoop 2.6 and installed Microsoft Visual C++ 2010 Redistributable Package (x86) package for the correct Microsoft DLL binding for winutils to reflect. And then I re-ran the steps as in the above apache documentation.

Though Hadoop did not start but spark-shell started and I was able to use it.

Now I know this is not as detailed or as concrete an experiment as one would expect but this was helpful where I did not have to rebuild spark & hadoop from scratch for my system.

Hoping that this will be of help to others bye bye and have a great day. 

Monday, January 16, 2017

2017 Is the year of Backbenchers ... & Shall I say generalists

Today I read this inspiring article from the Shradha Sharma Founder and Chief Editor of YourStory. And it was titled 2017 is the year of Back benchers. Personally I should call myself a backbencher who became a middle bencher then came to the front and then in last years has faded to the back. Yes I talk a lot, I question a lot, I have an air about myself and also slog a lot to learn what ever is there around in tech industry that excites me. But I also feel I am lost and hence when I heard the word Generalist I liked it. Because I am one of them. I am sure many of us are. If we observe closely much of the enterprise in India always calls for specialists. But in truth when they get recruited they do the work so unrelated that end of the day their specialization is diluted. They sometimes publish a generalist role but in our Industry we always want a Specialist. Take for an example of a call today. They wanted some one who knows Jquery, Java, Angular, Big Data, Ruby, Python, Jenkin, Docker, Devops and God knows what and yet the final question they asked me you know it all and are you comfortable to switch back to Java. My though was here the question again comes back they need a specialist not a generalist. Let me explain who is a Generalist for the ignorant. A person who is jack of all trades and master of none is not a generalist. Rather generalist is a jack of all trades and master of some and who has a passion to learn/master any new skill as the situation demands. As given in the article like back benchers even generalists toil hard to gain skills and even hard for them to unlearn it if required but they are never appreciated, they are overlooked and people with fancy titles are sought. 

Yes you may say I am sulking but the truth is its the case with many who have multiple skills but can never utilize it. One reason can be that they are never given a chance to showcase it or their bosses think that what they are currently doing that is safe for them for who will replace them. That is one reason also why in our country innovation is stunted. We are doing the cheap work which world does not want to do. And when I speak about Entrepreneurship and putting the effort in creating value for ourselves many defend the necessity for job citing the fear of risk and the comfort zone that they have created around themselves. What I rather feel is that be it this year or any year for India to truly grow and pose a significant sustainable financial power the generalists has to come out and contribute to add value as Entrepreneurs and break the vicious cycles of stereotypes and dogmas that plague our businesses and enterprise.

At the end I can only say we should learn from the informal economy which this government is so hell bent to destroy. This is the economy of  Entrepreneurs, a shared economy who work hard to bring value to us middle class and support our food, transport and labor demands. They and generalists like us should come ahead and add value to the growth of our motherland.

Tuesday, January 3, 2017

Raspberry Pi Experiments - OpenVPN for secure network

In my previous blog http://priyabgeek.blogspot.in/2016/08/raspberry-pi-experiment-ssh-reverse.html I talked about opening a reverse proxy to access Raspberry Pi using a AWS EC2 instance. While the above solution was only good for exposing some web services or even ssh but I wanted a more robust solution where I wanted to experiment using a VPN solution where a Virtual Private network will from between Raspberry Pi's that I have and any other computers that I would want to connect from anywhere and will work just as the LAN that we operate in our house.

As a solution I wanted to use OpenVPN and used partly instructions from https://dotslashnotes.wordpress.com/2013/08/05/how-to-set-up-a-vpn-private-internet-access-in-raspberry-pi/http://www.pivpn.io/ to setup my VPN server.

I also referred the below blogs to get some more info about OpenVPN.
http://readwrite.com/2014/04/10/raspberry-pi-vpn-tutorial-server-secure-web-browsing/
http://www.bbc.com/news/technology-33548728
http://www.instructables.com/id/Host-Your-Own-Virtual-Private-Network-VPN-with-O/

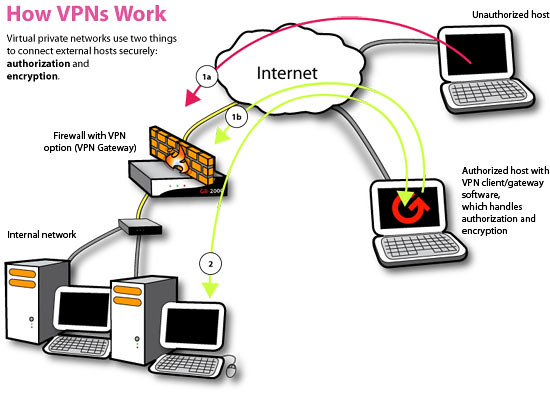
At a high level the below diagram explains the concept of a VPN:


VPNFR3X8GTHIW8FOTM

Now in OpenVPN there is a VPN server that help to generate the necessary keys and the necessary VPN configuration files and runs the VPN daemon creating a VPN network gateway to which all the other computers connect via a VPN gateway using a VPN client.

In my case I have configured my Raspberry PI as a VPN Gateway server and let other computers in my home and laptops connect to it. But the biggest issues were the bandwidth and also the necessary setup that I need to do in my router which DHCP setup for incoming connections to discover my Raspberry PI server. But many ISP providers do not support reverse connections to our home network and as it needs a static IP I was not sure if I can get such a setup. So I chose to setup my VPN on my AWS EC2 instance. With this setup  I was able to connect to my Rapsberry PI with a secure VPN network same as I may connect from my home network.

I followed the below steps to get the setup completed.

1. First I connected to my AWS instance via SSH:
ssh -i <AWS PEM File>.pem ubuntu@ec2<Server>.compute.amazonaws.com

2. Then I installed PiVPN which makes the setup of OpenVPN server a breeze. To run the setup please run:
sudo curl -L https://install.pivpn.io | bash 
Please make sure just to followup with the default setup and once done you will get a message like

Raspberry1.ovpn has been copied to /home/ubuntu/ovpns

(Note: While doing the above setup it will ask you to give a private pass phrase. Please remember that as you will be using it to log into your VPN server from the client)

3.  After that please restart the server and once you re-login you can check the openvpn server as given below:

ps -ef | grep openvpn
Output will be something like this:
nobody    1033     1  0 Jan02 ?        00:00:01 /usr/sbin/openvpn --writepid /run/openvpn/server.pid --daemon ovpn-server --cd /etc/openvpn --config /etc/openvpn/server.conf --script-security 2
4. Now to connect to your VPN server from Raspberry Pi log into your Raspberry Pi via SSH
ssh pi@<Your Raspberry PI IP Address>
5. Next install OpenVPN
sudo apt-get install openvpn
6. Next copy the  .ovpn from the VPN Server

scp -r -i <AWS Security Key>.pem ubuntu@<EC2 Server Name>.compute.amazonaws.com:/home/ubuntu/ov* .
7. Next create a pass.txt and add the following value which we put in step 2 as secret passphrase.
password 
 8. Add the following line at the end of Raspberry1.ovpn or the .ovpn file that you download:
askpass /home/pi/ovpns/pass.txt
So the output of the file should look like:
-----END OpenVPN Static key V1-----
</tls-auth>
askpass /home/pi/ovpns/pass.txt


9. Call the following command:
sudo openvpn /home/pi/openvpn/Raspberry1_wrk.ovpn
10. Finally you should be able to establish VPN connectivity and check it.
  ifconfig

You should see like below:
tun0      Link encap:UNSPEC  HWaddr 00-00-00-00-00-00-00-00-00-00-00-00-00-00-00
-00
          inet addr:10.8.0.3  P-t-P:10.8.0.3  Mask:255.255.255.0
          UP POINTOPOINT RUNNING NOARP MULTICAST  MTU:1500  Metric:1
          RX packets:218 errors:0 dropped:0 overruns:0 frame:0
          TX packets:271 errors:0 dropped:0 overruns:0 carrier:0
          collisions:0 txqueuelen:100
          RX bytes:21911 (21.3 KiB)  TX bytes:30389 (29.6 KiB)
11. Finally you can test if the ssh is working over VPN by giving ssh command live below:

ssh -i <AWS Server Key>.pem ubuntu@10.8.0.1
And you should be able to connect to it as in step 1.

Hope this post was helpful hope to share more such posts.

(Note: You can skip step 1 and 2 and can use other VPN service providers who provide OpenVPN service please refer the below links for more details:
https://www.bestvpn.com/best-vpn-openvpn/
https://securitygladiators.com/2014/09/27/5-best-free-openvpn-service-providers-2014/
https://securethoughts.com/3-best-vpns-for-open-vpn/
http://in.pcmag.com/software/38911/guide/the-best-vpn-services-of-2017
)

Saturday, December 31, 2016

Raspberry Pi Experiments - Setting Samba Network File Sharing


First of all Happy New Year to all. In this new post I will be focusing on how to convert  Raspberry Pi to a network file server.

For this I used the instructions from http://raspberrywebserver.com/serveradmin/share-your-raspberry-pis-files-and-folders-across-a-network.html and I am happy it worked.

In my previous post http://priyabgeek.blogspot.in/2016/12/raspberry-pi-experiments-file-server.html I had talked about attaching my Hard disk to raspberry pi and accessing files via a web server. While discussing this over Facebook I got a comment to use samba as a file server. Though I knew about it but was not sure how easy it is to set up.

So here are the steps I followed to setup samba in my Raspberry Pi 3.
1. Download the samba binaries
sudo apt-get install samba samba-common-bin
 In case you face issues please type sudo apt-get update and do the above step again for the installation to take place.

2. Take backup of /etc/samba/smb.conf
sudo cp /etc/samba/smb.conf /etc/samba/smb.conf.bkp
3. Edit /etc/samba/smb.conf to make the necessary changes for network sharing
sudo vi /etc/samba/smb.conf
4. Please find the below options and make the necessary changes:

# Change this to the workgroup/NT-domain name your Samba server will part of
   workgroup = WORKGROUP

# Windows Internet Name Serving Support Section:
# WINS Support - Tells the NMBD component of Samba to enable its WINS Server
#   wins support = no

   wins support = yes
5. Also add the path that you want to share. In my case I wanted to share my mounted External hard drive. I added this part to the end of the file /etc/samba/smb.conf
[filedrive]
   comment= FileDrive
   path=/mnt/usbdrive
   browseable=Yes
   writeable=Yes
   only guest=no
   create mask=0777
   directory mask=0777
   public=no
 6. Mounting the hard disk
sudo mount /dev/sda1 /mnt/usbdrive/

7. Set up a samba password for pi user
sudo smbpasswd -a pi 
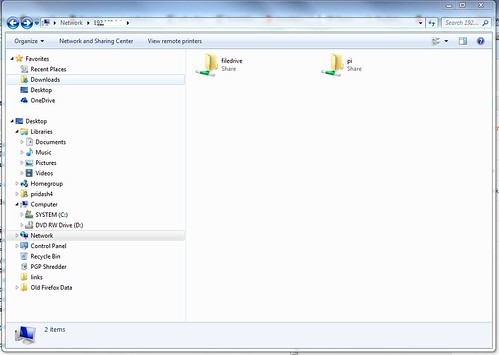
 8. Finally access the samba server from windows.

SambaServer 

Hope this short post is helpful to you  as it was to me.

Monday, December 26, 2016

Raspberry Pi Experiments - File Server using Hard Drive


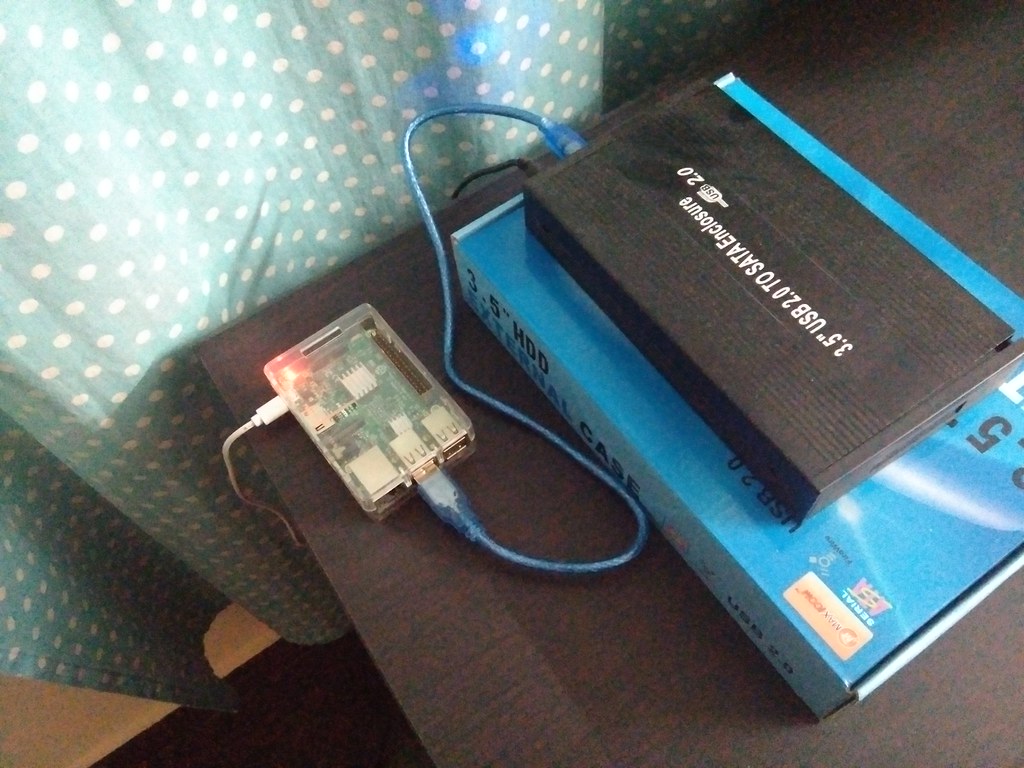
IMG_20161226_230403


For long I wanted to host a cloud file server for my needs. As my file collection was growing bulky and taking a lot of space on my laptop and on my wife's hard disk. It was absolutely necessary that I would have to buy a external hard disk. There were two features that I wanted in my cloud file server solution.
1. To be hosted from my home
2. To be accessible from any place

For point 2 I restored to opening a ssh tunnel from home Raspberry Pi to my AWS instance. For more details check my blog http://priyabgeek.blogspot.in/2016/08/raspberry-pi-experiment-ssh-reverse.html

Having read about the how a hard disk can be connected to Raspberry pi and can be mounted like in any other linux system I got a Seagate 2 TB SATA Barracuda 3.5" internal Desktop Hard Disk - ST2000DM006 from eBay and got a local 3.5 Inch USB 2 Hard disk case. The important thing here is that I used a Hard disk case with external power supply as this is important because the Hard disk can not work by taking current from Raspberry Pi via USB. And with Barracuda hard disk I also got an external fan which really made it a great deal as now I do not have to worry of cooling the hard disk. Now the tricky part was the USB connector. The case did not have one but the compatible USB cable that comes with Arduino UNO did work well and after connecting did not have any issues.

Now coming to the commands that I used to setup the file system.

First check if hard disk is detected
pi@raspberrypi:~ $ lsusb
Bus 001 Device 004: ID 152d:2329 JMicron Technology Corp. / JMicron USA Technology Corp. JM20329 SATA Bridge
Bus 001 Device 003: ID 0424:ec00 Standard Microsystems Corp. SMSC9512/9514 Fast Ethernet Adapter
Bus 001 Device 002: ID 0424:9514 Standard Microsystems Corp.
Bus 001 Device 001: ID 1d6b:0002 Linux Foundation 2.0 root hub


If you detect a SATA Bridge driver it means your disk is detected.


Though there are known issues with NTFS on Raspberry PI and Raspbian I chose the file system because of the sheer portability and support I can get out of NTFS as a network files system which I did not expect out of a fat32 file system because of its formatting issues and its max 2gb limit for the file size. The issue with ext4 or similar linux file formats is that they are not supported natively on Mac or Windows. Hence I went ahead with NTFS as the file system for my external hard disk.

List your file systems:
sudo fdisk -l 
Device     Boot Start        End    Sectors  Size Id Type
/dev/sda1        2048 3907029167 3907027120  1.8T 83 Linux


Before formatting unmount the USB drive to be safe:


sudo umount /dev/sda1
For more clarity on the disk used and partition details I use test disk which can be installed as given below:


sudo apt-get update
sudo apt-get install testdisk
Launch testdisk command as given in the below screencast:


sudo testdisk


Now we need to install the ntfs drivers:

sudo apt-get install ntfs-3g

After installing it we can format the hard disk as below

sudo mkfs.ntfs /dev/sda1 -f -v -I -L disk-name 

We can check the disk details using the command:

pi@raspberrypi:~ $ sudo blkid
/dev/mmcblk0p1: SEC_TYPE="msdos" LABEL="boot" UUID="22E0-C711" TYPE="vfat" PARTUUID="4bad8776-01"
/dev/mmcblk0p2: UUID="202638e1-4ce4-45df-9a00-ad725c2537bb" TYPE="ext4" PARTUUID="4bad8776-02"
/dev/sda1: LABEL="segate-dash" UUID="0EEB5BXXXXXXXX" TYPE="ntfs"
/dev/mmcblk0: PTUUID="4bad8776" PTTYPE="dos"

Next activity was to setup the file server. For this I needed very basic HTTP Server of showing the list of files and a basic service of uploading some files. And to expose this server via ssh tunnel I used the instructions given in http://priyabgeek.blogspot.in/2016/08/raspberry-pi-experiment-ssh-reverse.html

For the file server I used one of my projects https://github.com/bobquest33/gofileserver. You can download it using git and install the golang from the binaries at https://golang.org/dl/ and download the latest ARM version of go binaries. As the scope of how to install go and compile the above project is out of scope of this blog I will cover it in a different post or leave you to explore it for your self. Finally what you get is a file server. Now its not mandatory that you use my approach you can also use your own approach as well.

What I did however was to first mount the formatted hard disk to the below path:

sudo mkdir /mnt/usbdrive
sudo mount /dev/sda1 /mnt/usbdrive
ls /mnt/usbdrive
Then pointed the gofileserver to the given path /mnt/usbdrive and added it to crontab:
@reboot nohup sudo /home/pi/code/gofileserver/gofileserver :8001 /mnt/usbdrive & 
Now this setup is subjective and you can do a better job but this is what I felt as the best option given the circumstances.

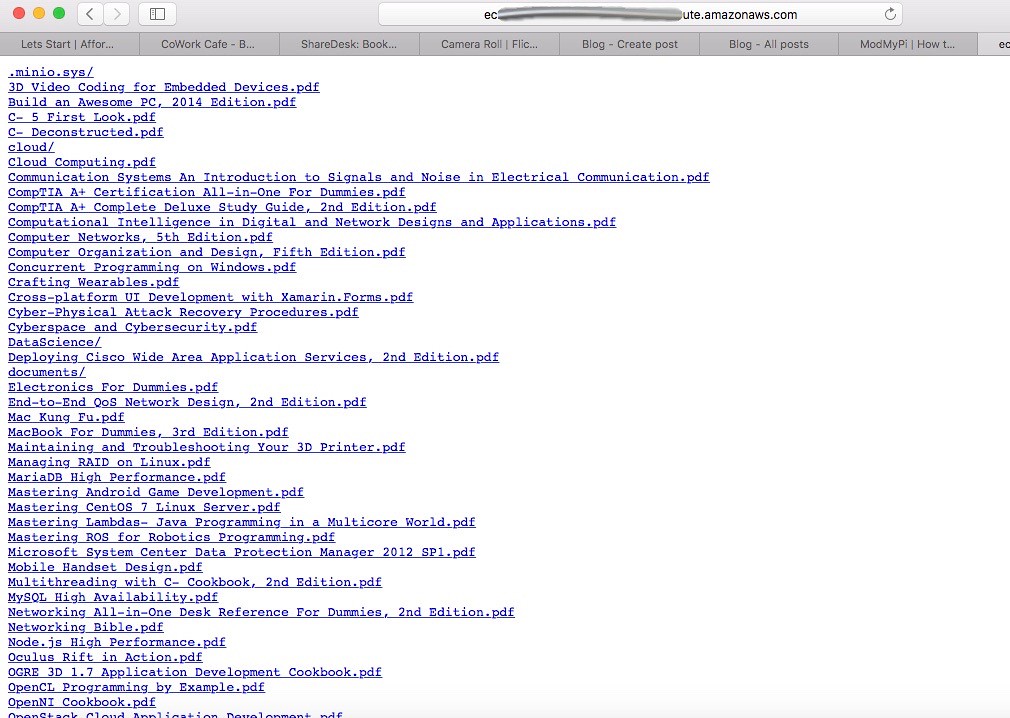
And finally I was able to see the files:

Screen Shot 2016-12-26 at 11.53.33 PM

Now for most of the cases it works fine and I am also having a interface where I can upload the files but that is still work in progress and I am trying to fix. But at the end what matters most is that where ever I am I am getting a read only version of my file which is great. Now the only thing I want to do next it to add https support and more user friendly UI which I will take as my future project.

Coming to the issues, one of the biggest issues which I faced was if I try to use a file upload program like scp or html multi-part file upload the file upload is fast but the server hangs. Also some times the server goes offline. Now I do not know if this is because of the NTFS driver or some other reason. But as a start now I can access my files from anywhere and use it.

If you have any better suggestions of feedback please do comment below.

Tuesday, December 13, 2016

Hadoop experience


I get call from many recruiters where they ask for 4-7 years experience in Hadoop for a technology that just started in 2010 and just picked in 2014 how can people demand such high experience and that to for the role of a developer.

It is in this context I strongly feel that recruiters should also do some background work for a role and skills needed before blindly cold calling people for roles. Even if they ask someone that will also help. Many recruiters have called me and some even ask about what's the expected experience and I do help. The companies and the recruiters should be realistic about the skills and experience that is required should be prepared for skill enhancement and training.

Unlike other skills big data skills are ever changing and need constant update and the technologies are irrelevant in months not even years hence realistic and a new approach to big data hiring is needed with focus on aptitude and skill development than throwing cash.

Tuesday, October 18, 2016

Raspberry Pi Experiments - Taking my Gmail Backup

An existential issue for me had been the issue of taking backup of my Gmail with size of 11 GB.
I tried many things but nothing guaranteed seamless backup when I was away doing something else. I tried with my Laptop but despite taking the backup worth days after days I had to do it taking breaks as I also needed to use my laptop for other things.

So it was a good test to see if I can take backup of my emails using my Raspberry Pi 3. The good thing is that its support for python and I also got a supporting project on github with which I am able to take backup of my Gmail using just python and no extra libraries.

Github link:
https://github.com/RaymiiOrg/NoPriv

I just cloned the git into my Raspberry Pi, made the necessary changes to setup the email account details in nopriv.ini.

For Gmail before using the script please make sure you make the below setup:

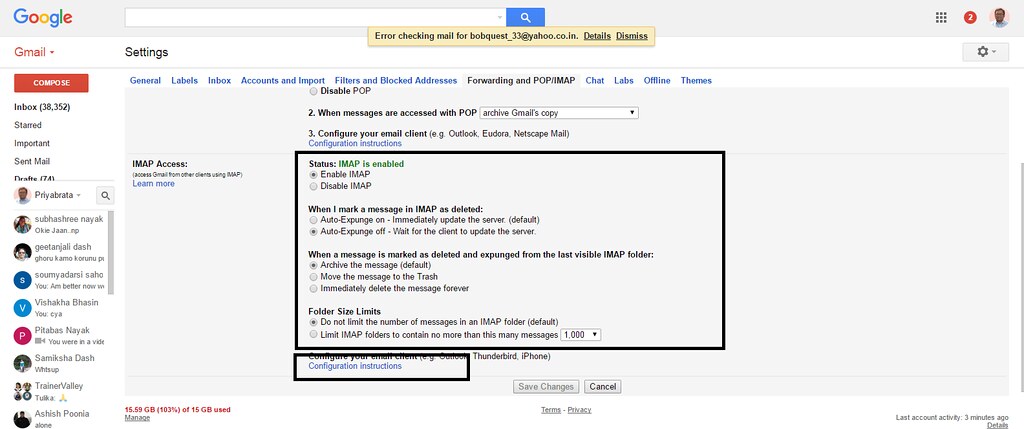
1. Setup the IMAP Access
https://mail.google.com/mail/u/0/#settings/fwdandpop


UntitledGmail

2. If two factor authentication is enabled setup App password for Gmail details given in the below link:
https://support.google.com/accounts/answer/185833. In nopriv.ini you need to provide the app password instead of you gmail/google password.

Once this setup is done you can run nopriv.py as below:
python nopriv.py  

If you want to run in background you can run as below:

 nohup python nopriv.py &

The rundown of the steps is given below in the screencast:


Hope this post was helpful.

TestDriven.io: Working with Static and Media Files in Django

This article looks at how to work with static and media files in a Django project, locally and in production. from Planet Python via read...