Sunday, March 31, 2019

Podcast.__init__: Building Scalable Ecommerce Sites On Saleor

Ecommerce is an industry that has largely faded into the background due to its ubiquity in recent years. Despite that, there are new trends emerging and room for innovation, which is what the team at Mirumee focuses on. To support their efforts, they build and maintain the open source Saleor framework for Django as a way to make the core concerns of online sales easy and painless. In this episode Mirek Mencel and Patryk Zawadzki discuss the projects that they work on, the current state of the ecommerce industry, how Saleor fits with their technical and business strategy, and their predictions for the near future of digital sales.

Summary

Ecommerce is an industry that has largely faded into the background due to its ubiquity in recent years. Despite that, there are new trends emerging and room for innovation, which is what the team at Mirumee focuses on. To support their efforts, they build and maintain the open source Saleor framework for Django as a way to make the core concerns of online sales easy and painless. In this episode Mirek Mencel and Patryk Zawadzki discuss the projects that they work on, the current state of the ecommerce industry, how Saleor fits with their technical and business strategy, and their predictions for the near future of digital sales.

Announcements

  • Hello and welcome to Podcast.__init__, the podcast about Python and the people who make it great.
  • When you’re ready to launch your next app or want to try a project you hear about on the show, you’ll need somewhere to deploy it, so take a look at our friends over at Linode. With 200 Gbit/s private networking, scalable shared block storage, node balancers, and a 40 Gbit/s public network, all controlled by a brand new API you’ve got everything you need to scale up. And for your tasks that need fast computation, such as training machine learning models, they just launched dedicated CPU instances. Go to pythonpodcast.com/linode to get a $20 credit and launch a new server in under a minute. And don’t forget to thank them for their continued support of this show!
  • Visit the site to subscribe to the show, sign up for the newsletter, and read the show notes. And if you have any questions, comments, or suggestions I would love to hear them. You can reach me on Twitter at @Podcast__init__ or email hosts@podcastinit.com)
  • To help other people find the show please leave a review on iTunes and tell your friends and co-workers
  • Join the community in the new Zulip chat workspace at pythonpodcast.com/chat
  • Check out the Practical AI podcast from our friends at Changelog Media to learn and stay up to date with what’s happening in AI
  • You listen to this show to learn and stay up to date with what’s happening in databases, streaming platforms, big data, and everything else you need to know about modern data management. For even more opportunities to meet, listen, and learn from your peers you don’t want to miss out on this year’s conference season. We have partnered with organizations such as O’Reilly Media, Dataversity, and the Open Data Science Conference. Go to pythonpodcast.com/conferences to learn more and take advantage of our partner discounts when you register.
  • Your host as usual is Tobias Macey and today I’m interviewing Mirek Mencel and Patryk Zawadzki about their work at Mirumee, building ecommerce applications in Python, based on their open source framework Saleor

Interview

  • Introductions
  • How did you get introduced to Python?
  • Can you start by describing the types of projects that you work on at Mirumee and how the company got started?
  • There are a number of libraries and frameworks that you build and maintain. What is your motivation for providing these components freely and how does that play into your overall business strategy?
  • The most substantial project that you maintain is Saleor. Can you describe what it is and the story behind its creation?
    • How does it compare to other ecommerce implementations in the Python space?
    • If someone is agnostic to language and web framework, what would make them choose Saleor over other options that would be available to them?
  • What are some of the most challenging aspects of building a successful ecommerce platform?
    • How do the technical needs of an ecommerce site differ as it grows from small to medium and large scale?
  • Which components of an online store are often overlooked?
  • One of the common features of ecommerce sites that can drive substantial revenue is a well-built recommender system. What are some best practice strategies that you have discovered during your client work?
  • What are some projects that you have seen built with Saleor that were particular interesting, innovative, or unexpected?
  • What are your predictions for the future of the ecommerce industry?
  • What do you have planned for the future of the Saleor framework and the Mirumee business?

Keep In Touch

Picks

Links

The intro and outro music is from Requiem for a Fish The Freak Fandango Orchestra / CC BY-SA


from Planet Python
via read more

Vasudev Ram: rmline: Python command-line utility to remove lines from a file [Rosetta Code solution]


- By Vasudev Ram - Online Python training / SQL training / Linux training


Pipeline image attribution

Hi readers,

Long time no post. Sorry.

I saw this programming problem about removing lines from a file on Rosetta Code.

Rosetta Code (Wikipedia) is a programming chrestomathy site.

It's a simple problem, so I thought it would make a good example for Python beginners.

So I wrote a program to solve it. To get the benefits of reuse and composition (at the command line), I wrote it as a Unix-style filter.

Here it is, in file rmline.py:
# Author: Vasudev Ram
# Copyright Vasudev Ram
# Product store:
# https://gumroad.com/vasudevram
# Training (course outlines and testimonials):
# https://jugad2.blogspot.com/p/training.html
# Blog:
# https://jugad2.blogspot.com
# Web site:
# https://vasudevram.github.io
# Twitter:
# https://twitter.com/vasudevram

# Problem source:
# https://rosettacode.org/wiki/Remove_lines_from_a_file

from __future__ import print_function
import sys

from error_exit import error_exit

# globals
sa, lsa = sys.argv, len(sys.argv)

def usage():
print("Usage: {} start_line num_lines file".format(sa[0]))
print("Usage: other_command | {} start_line num_lines".format(
sa[0]))

def main():
# Check number of args.
if lsa < 3:
usage()
sys.exit(0)

# Convert number args to ints.
try:
start_line = int(sa[1])
num_lines = int(sa[2])
except ValueError as ve:
error_exit("{}: ValueError: {}".format(sa[0], str(ve)))

# Validate int ranges.
if start_line < 1:
error_exit("{}: start_line ({}) must be > 0".format(sa[0],
start_line))
if num_lines < 1:
error_exit("{}: num_lines ({}) must be > 0".format(sa[0],
num_lines))

# Decide source of input (stdin or file).
if lsa == 3:
in_fil = sys.stdin
else:
try:
in_fil = open(sa[3], "r")
except IOError as ioe:
error_exit("{}: IOError: {}".format(sa[0], str(ioe)))

end_line = start_line + num_lines - 1

# Read input, skip unwanted lines, write others to output.
for line_num, line in enumerate(in_fil, 1):
if line_num < start_line:
sys.stdout.write(line)
elif line_num > end_line:
sys.stdout.write(line)

in_fil.close()

if __name__ == '__main__':
main()

Here are a few test text files I tried it on:
$ dir f?.txt/b
f0.txt
f5.txt
f20.txt
f0.txt has 0 bytes.
Contents of f5.txt:
$ type f5.txt
line 1
line 2
line 3
line 4
line 5
f20.txt is similar to f5.txt, but with 20 lines.

Here are a few runs of the program, with output:
$ python rmline.py
Usage: rmline.py start_line num_lines file
Usage: other_command | rmline.py start_line num_lines

$ dir | python rmline.py
Usage: rmline.py start_line num_lines file
Usage: other_command | rmline.py start_line num_lines
Both the above runs show that when called with an invalid set of
arguments (none, in this case), it prints a usage message and exits.
$ python rmline.py f0.txt
Usage: rmline.py start_line num_lines file
Usage: other_command | rmline.py start_line num_lines
Same result, except I gave an invalid first (and only) argument, a file name. See the usage() function in the code to know the right order and types of arguments.
$ python rmline.py -3 4 f0.txt
rmline.py: start_line (-3) must be > 0

$ python rmline.py 2 0 f0.txt
rmline.py: num_lines (0) must be > 0
The above two runs shows that it checks for invalid values for the
first two expected integer argyuments, start_line and num_line.
$ python rmline.py 1 2 f0.txt
For an empty input file, as expected, it both removes and prints nothing.
$ python rmline.py 1 2 f5.txt
line 3
line 4
line 5
The above run shows it removing lines 1 through 2 (start_line = 1, num_lines = 2) of the input from the output.
$ python rmline.py 7 4 f5.txt
line 1
line 2
line 3
line 4
line 5
The above run shows that if you give a starting line number larger than the last input line number, it removes no lines of the input.
$ python rmline.py 1 10 f20.txt
line 11
line 12
line 13
line 14
line 15
line 16
line 17
line 18
line 19
line 20
The above run shows it removing the first 10 lines of the input.
$ python rmline.py 6 10 f20.txt
line 1
line 2
line 3
line 4
line 5
line 16
line 17
line 18
line 19
line 20
The above run shows it removing the middle 10 lines of the input.
$ python rmline.py 11 10 f20.txt
line 1
line 2
line 3
line 4
line 5
line 6
line 7
line 8
line 9
line 10
The above run shows it removing the last 10 lines of the input.

Read more:

Pipeline (computing)

Redirection (computing)

The image at the top of the post is of a Unix-style pipeline, with standard input (stdin), standard output (stdout) and standard error (stderr) streams of programs, all independently redirectable, and with the standard output of a preceding command piped to the standard input of the succeeding command in the pipeline. Pipelines and I/O redirection are one of the powerful features of the Unix operating system and shell.

Read a brief introduction to those concepts in an article I wrote for IBM developerWorks:

Developing a Linux command-line utility

The above link is to a post about that utility on my blog. For the
actual code for the utility (in C), and for the PDF of the article,
follow the relevant links in the post.

I had originally written the utility for production use for one of the
largest motorcycle manufacturers in the world.

Enjoy.


from Planet Python
via read more

Doug Hellmann: sphinxcontrib-spelling 4.2.1

sphinxcontrib-spelling is a spelling checker for Sphinx-based documentation. It uses PyEnchant to produce a report showing misspelled words. What’s new in 4.2.1? fix remaining logging issue (contributed by Timotheus Kampik) Remove usage of deprecated logging API (contributed by Tim Graham)


from Planet Python
via read more

sphinxcontrib-spelling 4.2.1

sphinxcontrib-spelling is a spelling checker for Sphinx-based documentation. It uses PyEnchant to produce a report showing misspelled words. What’s new in 4.2.1? fix remaining logging issue (contributed by Timotheus Kampik) Remove usage of deprecated logging API (contributed by Tim Graham)

from Doug Hellmann
via read more

Weekly Python StackOverflow Report: (clxxi) stackoverflow python report

These are the ten most rated questions at Stack Overflow last week.
Between brackets: [question score / answers count]
Build date: 2019-03-31 10:06:26 GMT


  1. Python: How to get the similar-sounding words together - [16/1]
  2. Why does numpy.sin return a different result if the argument size is greater than 8192? - [12/1]
  3. How to check if all elements of 1 list are in the *same quantity* and in any order, in the list2? - [11/2]
  4. Repeated import path patterns in python - [9/2]
  5. Maximum sum of subsequence of length L with a restriction - [8/4]
  6. Flag only first row where condition is met in a DataFrame - [8/4]
  7. Search in Rotated Sorted Array in O(log n) time - [7/2]
  8. Maximize consumption Energy - [7/1]
  9. Cycle over list indefinitely - [6/6]
  10. How to rearrange an Ordered Dictionary with a based on part of the key from a list - [6/5]


from Planet Python
via read more

Codementor: Python: trace recursive function

Let me share example of "pure programming" task, which I've faced recently here, on Codementor. I like how the solution looks like and want to hear your feedback from you.

from Planet Python
via read more

Saturday, March 30, 2019

Shyama Sankar Vellore: Monkey Patching in Python: Explained with Examples

In this post, we will learn about monkey patching, i.e., how to dynamically update code behavior at runtime. We will also see some useful examples of monkey patching in Python.

Table of contents

Monkey patching

What is monkey patching?

Monkey patching is a technique used to dynamically update the behavior of a piece of code at run-time.

Why use monkey patching?

It allows us to modify or extend the behavior of libraries, modules, classes or methods at runtime without actually modifying the source code.

When is monkey patching used?

Some common applications of monkey patching are:
  • To extend or modify the behavior of third-party or built-in libraries or methods at runtime without touching the original code.
  • During testing to mock the behavior of libraries, modules, classes or any objects.
  • To quickly fix some issues if we do not have the time or resources to roll-out a proper fix to the original software.

Cautionary note: Why monkey patching should be used carefully

Monkey patching should be used very carefully, especially if used in production software (would not recommend unless absolutely necessary). Some of the reasons are:
  • If we change the behavior of a method by monkey patching, it no longer behaves the way it was documented. So unless every client or user is aware of this change, it could cause their code to behave unexpectedly.
  • It makes it harder to troubleshoot issues.
  • If we are monkey patching a method in one module and another module is using that same method after the patch is applied, then the second module will also end up seeing the monkey patched method instead of its original version. This can lead to unwanted bugs.

Monkey patching in Python

In Python, modules or classes are just like any other mutable objects like lists, i.e., we can modify them or their attributes including functions or methods at runtime. Let us go through some examples to understand this clearly and learn how to monkey patch in Python.

Example 1: Monkey patching the value of a module's attribute

As a basic example, let us see how we could update a module's attribute. We will be updating the value of "pi" in the "math" module so that its precision is reduced to 3.14.

Note how we took a backup of the original value before our computation and then removed the patch at the end. This is a good practice, especially in tests, to avoid messing up the whole test suite.

Example 2: Monkey patching to extend the behavior of a method

In this example, we will see how to extend the behavior of a method using monkey patching. We will take a look at how to update the builtin print method in Python3 to include a timestamp.

Example 3: Monkey patching to change the behavior of a method

Now let us see how to completely change the behavior of a method. This can be particularly useful in unit tests to mock complex methods, with external dependencies (network, database, etc). Here, we will take a look at how to replace a method with another.

Example 4: Monkey patching class attributes

So far, we have been updating attributes or methods at the module level. Now let us take a look at how to monkey patch a class attribute. Note that this modifies the attribute for the class itself, all of its instances will see the patched attribute.

Example 5: Monkey patching a specific instance's attributes

The previous example showed how to monkey patch a class attribute. Here we will see how to patch just a specific instance's attribute.

Note that we made use of the MethodType method from types module in Python to bind the patched method to just one instance. This assures that other instances of the class are not affected.

Example 6: Monkey patching a class

Now let us see how we would monkey patch a class. Since a class is also just an object, we can monkey patch it with any other object. Here we will see an example of patching it with another class.

Example 7: Monkey patching a module

As the last example, let us see how we can patch an entire module. This works the same way as any other Python object.

Conclusion

Monkey patching is a cool technique and now we have learned how to do that in Python. However, as we discussed, it has its own drawbacks and should be used carefully.


from Planet Python
via read more

Davy Wybiral: Arduino-friendly 240x320 LCD Display Tutorial (ILI9341)

Have you ever needed to add a UI to any of your embedded projects? For instance, maybe you want to display a sensor reading graph or build your own handheld gaming system. In this video I'll take a look at some cheap 240x320 color LCD display devices that you can add to almost any microcontroller or Single Board Computer project.


from Planet Python
via read more

Catalin George Festila: Testing the python IMDbPY module with simple commands.

Today we tested a more innovative but useful method with python aaa mode. The main reason I used this method is the lack of documentation. Using this method, we have reached elements related to the use of reported methods and errors. The test was done on a Fedora 29 Linux system with a classic install with the pip utility: [mythcat@desk ~]$ pip install imdbpy --user Collecting imdbpy ...

from Planet Python
via read more

Friday, March 29, 2019

Will Kahn-Greene: Code of conduct: supporting in projects

CODE_OF_CONDUCT.md

This week, Mozilla added PRs to all the repositories that Mozilla has on GitHub that aren't forks, Servo, or Rust. The PRs add a CODE_OF_CONDUCT.md file and also include some instructions on what projects can do with it. This standardizes inclusion of the code of conduct text in all projects.

I'm a proponent of codes of conduct. I think they're really important. When I was working on Bleach with Greg, we added code of conduct text in September of 2017. We spent a bunch of time thinking about how to do that effectively and all the places that users might encounter Bleach.

I spent some time this week trying to figure out how to do what we did with Bleach in the context of the Mozilla standard. This blog post covers those thoughts.

This blog post covers Python-centric projects. Hopefully, some of this applies to other project types, too.

What we did in Bleach in 2017 and why

In September of 2017, Greg and I spent some time thinking about all the places the code of conduct text needs to show up and how to implement the text to cover as many of those as possible for Bleach.

PR #314 added two things:

  • a CODE_OF_CONDUCT.rst file
  • a copy of the text to the README

In doing this, the code of conduct shows up in the following places:

In this way, users could discover Bleach in a variety of different ways and it's very likely they'll see the code of conduct text before they interact with the Bleach community.

[1] It no longer shows up on the "new issue" page in GitHub. I don't know when that changed.

The Mozilla standard

The Mozilla standard applies to all repositories in Mozilla spaces on GitHub and is covered in the Repository Requirements wiki page.

It explicitly requires that you add a CODE_OF_CONDUCT.md file with the specified text in it to the root of the repository.

This makes sure that all repositories for Mozilla things have a code of conduct specified and also simplifies the work they need to do to enforce the requirement and update the text over time.

This week, a bot added PRs to all repositories that didn't have this file. Going forward, the bot will continue to notify repositories that are missing the file and will update the file's text if it ever gets updated.

How to work with the Mozilla standard

Let's go back and talk about Bleach. We added a file and a blurb to the README and that covered the following places:

With the new standard, we only get this:

In order to make sure the file is in the source tarball, you have to make sure it gets added. The bot doesn't make any changes to fix this. You can use check-manifest to help make sure that's working. You might have to adjust your MANIFEST.in file or something else in your build pipeline--hence the maybe.

Because the Mozilla standard suggests they may change the text of the CODE_OF_CONDUCT.md file, it's a terrible idea to copy the contents of the file around your repository because that's a maintenance nightmare--so that idea is out.

It's hard to include .md files in reStructuredText contexts. You can't just add this to the long description of the setup.py file and you can't include it in a Sphinx project [2].

Greg and I chatted about this a bit and I think the best solution is to add minimal text that points to the CODE_OF_CONDUCT.md in GitHub to the README. Something like this:

Code of Conduct
===============

This project and repository is governed by Mozilla's code of conduct and
etiquette guidelines. For more details please see the `CODE_OF_CONDUCT.md
file <https://github.com/mozilla/bleach/blob/master/CODE_OF_CONDUCT.md>`_.

In Bleach, the long description set in setup.py includes the README:

def get_long_desc():
    desc = codecs.open('README.rst', encoding='utf-8').read()
    desc += '\n\n'
    desc += codecs.open('CHANGES', encoding='utf-8').read()
    return desc

...

setup(
    name='bleach',
    version=get_version(),
    description='An easy safelist-based HTML-sanitizing tool.',
    long_description=get_long_desc(),
    ...

In Bleach, the index.rst of the docs also includes the README:

.. include:: ../README.rst

Contents
========

.. toctree::
   :maxdepth: 2

   clean
   linkify
   goals
   dev
   changes


Indices and tables
==================

* :ref:`genindex`
* :ref:`search`

In this way, the README continues to have text about the code of conduct and the link goes to the file which is maintained by the bot. The README is included in the long description of setup.py so this code of conduct text shows up on the PyPI page. The README is included in the Sphinx docs so the code of conduct text shows up on the front page of the project documentation.

So now we've got code of conduct text pointing to the CODE_OF_CONDUCT.md file in all these places:

Plus the text will get updated automatically by the bot as changes are made.

Excellent!

[2] You can have Markdown files in a Sphinx project. It's fragile and finicky and requires a specific version of Commonmark. I think this avenue is not worth it. If I had to do this again, I'd be more inclined to run the Markdown file through pandoc and then include the result.

Future possibilities

GitHub has a Community Insights page for each project. This is the one for Bleach. There's a section for "Code of conduct", but you only get a green checkmark if and only if you use one of GitHub's pre-approved code of conduct files.

There's a discussion about that in their forums.

Is this checklist helpful to people? Does it mean something to have all these items checked off? Is there someone checking for this sort of thing? If so, then maybe we should get the Mozilla text approved?

Hope this helps!

I hope to roll this out for the projects I maintain on Monday.

I hope this helps you!


from Planet Python
via read more

Test and Code: 70: Non-traditional paths to software and the skills required - Dane Hillard

Dane and Brian discuss skills needed for people that become software developers from non-traditional paths.

Dane is also writing a book to address many of these skill gaps, Code Like a Pro, that's currently in an early access phase. Use code podtest&code19 to get a discount. And, sign up as a Friend of the Show to enter for a chance to win a free copy of the eBook version.

We also discuss the writing process, testing with a multi-language stack, music, art, photography, and more.

Special Guest: Dane Hillard.

Sponsored By:

Support Test & Code - Software Testing, Development, Python

Links:

<p>Dane and Brian discuss skills needed for people that become software developers from non-traditional paths.</p> <p>Dane is also writing a book to address many of these skill gaps, <a href="https://ift.tt/2WwxWpx" rel="nofollow">Code Like a Pro</a>, that&#39;s currently in an early access phase. Use code podtest&amp;code19 to get a discount. And, sign up as a <a href="https://ift.tt/2HLpjEj" rel="nofollow">Friend of the Show</a> to enter for a chance to win a free copy of the eBook version.</p> <p>We also discuss the writing process, testing with a multi-language stack, music, art, photography, and more.</p><p>Special Guest: Dane Hillard.</p><p>Sponsored By:</p><ul><li><a rel="nofollow" href="https://testandcode.com/morsels">Python Morsels</a>: <a rel="nofollow" href="https://testandcode.com/morsels">Expand your knowledge of Python at your pace, with expertly curated problems and solutions.</a></li></ul><p><a rel="payment" href="https://www.patreon.com/testpodcast">Support Test &amp; Code - Software Testing, Development, Python</a></p><p>Links:</p><ul><li><a title="Dane Hillard" rel="nofollow" href="https://dane.engineering/">Dane Hillard</a></li><li><a title="Code Like a Pro" rel="nofollow" href="https://www.manning.com/books/code-like-a-pro">Code Like a Pro</a> &mdash; Dane's book</li><li><a title="Noisely" rel="nofollow" href="https://www.noisely.com/">Noisely</a></li><li><a title="Little Leviathan" rel="nofollow" href="https://littleleviathan.com/">Little Leviathan</a> &mdash; Dane's music</li><li><a title="Dane Hillard Photography" rel="nofollow" href="https://www.danehillard.com/">Dane Hillard Photography</a> &mdash; Dane's photography</li><li><a title="Nvidia AI turns sketches into photorealistic landscapes in seconds" rel="nofollow" href="https://techcrunch.com/2019/03/18/nvidia-ai-turns-sketches-into-photorealistic-landscapes-in-seconds/">Nvidia AI turns sketches into photorealistic landscapes in seconds</a></li></ul>

from Planet Python
via read more

Python Bytes: #123 Time to right the py-wrongs


from Planet Python
via read more

Reuven Lerner: Announcing: My new NumPy course is live!

Guess what?  Python is the #1 language for data science.  I know, it doesn’t seem like this should be true.  Python is a great language, and easy to learn, but it’s not the most efficient language, either in execution speed or in its memory usage.

That’s where NumPy comes in: NumPy lets you have the best of both worlds, enjoying Python’s friendliness with C’s efficiency. As a result:

  • Companies are switching from C, C++, and Java to Python — because NumPy allows them to do so, with no loss of execution speed and with huge gains in their programmer productivity.
  • Companies are switching from Matlab to Python — because Python’s open-source license saves them huge amounts of money, and NumPy provides the functionality they need
  • Developers who never saw themselves as analysts or data scientists are learning these disciplines, because NumPy gives them an easy onramp into doing so
  • Students are discovering that you don’t need to choose between a high-level language and ruthless program efficiency, thanks to NumPy.

So, what’s the problem?  Well, NumPy works differently from regular Python data structures.  Learning the ins and outs, and how to apply these ideas to your own work, can take some time, even (or especially) if you have lots of Python experience.

It shouldn’t come as a surprise, then, that my “Intro to data science with Python” course has become one of my most popular.  Companies around the world, from Apple to Ericsson, IBM to PayPal, VMWare to Western Digital, have asked me to teach it to their engineers.  What do I teach on the first day of that course?  NumPy.  Because without NumPy, you can’t do any serious data science with Python. 

Companies keep inviting me back, time after time, to teach this course.  Almost immediately, their people use the techniques I teach to do more in less time — which is, after all, the promise that Python has offered to us.

I’m thus delighted to announce that my new “NumPy” course is available online.  This course includes nearly 5 hours of videos and nearly 60 exercises, designed to help you understand how to use NumPy — along with its companion software, Jupyter and Matplotlib.  It includes the same content as I present to these Fortune 500 companies, but for your own personal use, whenever and wherever you want to learn.

  • If you’re a programmer itching to learn data science, then this course is for you — providing an introduction to data science.
  • If you’re a data scientist interested in learning Python, then this course is for you — showing you how Python can serve your analysis needs.
  • If you’re an analyst who wants to use Python instead of Excel, then this course is for you — giving you a step-by-step introduction to the NumPy library.
  • If your job involves heavy doses of math, then this course is for you — showing you how NumPy can, together with Python, help you write easy-to-maintain code that executes at blazing speeds.

In short: If you want to learn one of the hottest topics in the computer industry, gaining skills that are highly in demand, then this course is for you.

Want to learn more?  Just go to the course page, and see what topics I cover.  You can even watch a few of the videos for free.  And then start your data-science journey with the tool that is getting lots of people excited: NumPy.

Learn more about my NumPy course at https://store.lerner.co.il/numpy .

The post Announcing: My new NumPy course is live! appeared first on Reuven Lerner's Blog.


from Planet Python
via read more

Codementor: Python interview question: tuple vs list

Tuples vs Lists in Python

from Planet Python
via read more

3 Ways to Upskill in Python with DataCamp and Anaconda

DataCamp is proud to partner with Anaconda to offer eight courses on Conda and Python—in addition to the more than 70 total Python courses in DataCamp’s ever-expanding data science and analytics curriculum. Not sure where…

The post 3 Ways to Upskill in Python with DataCamp and Anaconda appeared first on Anaconda.


from Planet SciPy
read more

Shyama Sankar Vellore: Iteration in Python: The for, while, break, and continue statements

In this post, we will discuss iterations in Python. We will go over what iteration is, the two types of iterations (definite and indefinite), and the Python statements used for implementing iterations- for and while. We will also discuss the break and continue statements and see how they are used to alter the flow of an iteration.

What is an iteration?

Iteration is defined as the repetition of a process.

Let's say, we have a set of files on our computer and we wanted to append their names with a serial number. What would we do? We would rename every file one by one. So basically, we are iterating over every file and renaming them.

In programming, iteration or looping is the act of repeatedly executing a block of code.

Types of iteration

Depending on the way in which the number of iterations is determined, there are two types of iterations or loops:
  1. Definite iteration or loop
    If the number of iterations is predetermined when we start the loop, then it is called definite. For example, repeat renaming a file for 10 files in a directory.
  2. Indefinite iteration or loop
    If the number of iterations is not known when we start the loop, then it is called indefinite. For example, repeat moving the first file in a directory to another while it is not empty.
Now let us see how we can implement iteration in Python.

The while statement: Indefinite iteration in Python

The while statement is used to execute a set of statements as long as an expression evaluates to true. In Python, the while statement comes with an optional else condition which allows us to execute another set of statements if the expression evaluates to false. Let's take a look at the syntax.

Syntax


The expression is repeatedly evaluated and set_of_statements_1 is executed as long as the expression evaluates to true. Once the expression evaluates to false, then set_of_statements_2 is executed. Note that the else clause is optional. If the else block is not there, we just break out of the loop once the expression becomes false.

As you can see, we do not specify the exact number of times the loop would execute. Hence, the while statement is suited for implementing indefinite loops.

Examples

1. Basic while loop

The following example shows a basic while loop used to pop elements from a list and print them.


2. while loop with else

Now let us see how we can modify the previous example to print some message when the list becomes empty. Note that if the expression never evaluates to true, then only the code block associated with else will get executed.


3. Infinite while loop

We would end up with an infinite loop (a loop that would never end) if the expression always evaluates to true. Let us see an example.


4. Nested while loop

Loops can be nested. Let us see an example for nested-while loops.


The for statement: Definite iteration in Python

In Python, the for statement is used to iterate over the elements of an iterable object. A set of statements is executed for every item in the iterable. Similar to the while statement, the for statement also has an optional else clause. Let's see the syntax.

Syntax

The expression is evaluated once. It is expected to yield an iterable, i.e., an object that can give us an iterator when called using the built-in iter() function. The set_of_statements_1 is executed once for every element obtained from the iterator. Once the iterator raises the StopIteration exception or once it becomes empty, the loop terminates. If the else clause is provided, then set_of_statements_2 is executed before terminating the loop.

As you can see, the for loop would do a definite number of iterations, depending on how many elements are present in the iterator. So for loops are suited for implementing definite loops in Python.

Examples

1. Basic for loop

The following code snippet shows a basic for loop that iterates over a list.


2. for loop with else

The following example shows a basic for loop with an else clause.


3. Nested for loop

Now let us see an example for nested-for loops.


The break statement: Break out of a loop

The break statement can be used to terminate the execution of a loop. It can only appear within a for or while loop. It allows us to break out of the nearest enclosing loop. If the loop has an else clause, then the code block associated with it will not be executed if we use the break statement. Let us see some examples.

1. break within a while loop

Let us see how to break out of a while loop if and when a certain condition is met. We will also see how a while loop with an else behaves when a break statement is added to it. Note that the statements within the else condition are not executed if we break out of the while loop.

2. break within an infinite while loop

Now let us see how we can modify an infinite while loop to break on a certain condition.

3. break within a for loop

Now we will see how to use break within a basic for loop. Similar to while loops, we will see that the statements within else condition do not get executed if we break out of the for loop.

4. break within nested loops

Now we will see an example of nested for and while loops. Let us see how break behaves with nested loops. Note that break statement only breaks out of the nearest enclosing for or while loop.

The continue statement: Continue with the next iteration

The continue statement allows us to skip the rest of the statements within one cycle of the loop and forces it to continue to the next cycle. Let's take a look at some examples.

1. continue within a while loop

Let us see how the continue statement works in a while loop. Note that when continue is encountered in a while loop, it forces the loop to jump to the expression.

2. continue within a for loop

Now let us see how it works in a for loop. Note that if continue is encountered when we are at the last element of the iterable, then the loop is terminated or we move on to the else block if it is present.

3. continue within nested loops

The following code samples show how continue works within nested loops. Note that the continue statement causes the nearest enclosing for or while loop to continue with its next cycle.

Useful Resources and Reference


from Planet Python
via read more

Wingware Blog: Auto-Editing in Wing Pro (Part 1 of 3)

Wing Pro implements a suite of auto-editing operations that take care of common low-level editing tasks, like moving Python code into a new block, entering invocation arguments, and maintaining PEP 8 compliance as you type. Some of the simpler auto-editing operations, like auto-closing ( or [, are enabled by default and easy to understand. Others may be missed unless you know about them, and some need to be enabled in preferences before they can be used.

In this and the next two installments of Wing Tips we'll be looking at some useful Wing Pro auto-editing operations that are not so easy to discover.

Note: If you have Wing Personal, you don't have these features. Please bear with us through this and the next two installments. We'll return to features that are also present in Wing Personal after that. Or try Wing Pro on a free trial.

Creating Blocks with the Colon Key

To quickly turn an existing section of Python code into a new block, select it and then press the colon key. Wing Pro indents the selected lines and positions the caret so you can type if, for, while, def or any other keyword that starts a block.

/images/blog/wingpro-auto-editing/apply-colon.gif

Shown above: Select lines then type ":if ar" followed by Tab for auto-completion; a new block is created from the selection.

Creating a Try/Except Block

If you select lines of Python code and type :try Wing adds except automatically and selects it so you can either replace except with finally, press the right arrow key to enter an exception specifier, and/or use Tab to move into the except or finally block.

/images/blog/wingpro-auto-editing/apply-colon-try.gif

Shown above: Select lines then type ":try" followed Right Arrow, Space, "P", Tab to auto-complete "ParseError", and then Tab to move into the except block.

Note: Other keys can also be applied to selections. For example " encloses the selection in quotes, ( encloses it in parenthesis, and # toggles whether it is commented out.

Creating Blocks without Selecting

It's also possible to create new blocks without selecting any lines first. In some versions of Wing, this option needs to be enabled with the Editor > Auto-Editing > Manage Blocks on Repeated Colon Presses preference. Once that is done and a new block is entered, the colon key can be pressed a second time to move the next line into the new block, and a third time to also move the rest of a contiguous block of lines into the new block.

/images/blog/wingpro-auto-editing/colon-manage.gif

Shown above: Type "if use_" followed by Tab for completion and ``:`` three times to pull more and more code into the new block.

Note that you can also just select a block of code and press the Tab key to reindent it. If multiple indentations are possible for that block, Wing toggles between them each time you press Tab.


That's it for now. In the next part of this 3-part Wing Tips series on auto-editing in Wing Pro we'll be looking at auto-invocation, which makes writing Python code that calls functions and methods easier and less prone to errors.


from Planet Python
via read more

Thursday, March 28, 2019

Codementor: Writing a Minimum-Heap in Python3

it is in the title...how much more clear can I make it?

from Planet Python
via read more

Continuum Analytics Blog: 3 Ways to Upskill in Python with DataCamp and Anaconda

DataCamp is proud to partner with Anaconda to offer eight courses on Conda and Python—in addition to the more than 70 total Python courses in DataCamp’s ever-expanding data science and analytics curriculum. Not sure where…

The post 3 Ways to Upskill in Python with DataCamp and Anaconda appeared first on Anaconda.


from Planet Python
via read more

Doing Math with Python: Doing Math with Python in Coder's Bookshelf Humble Bundle

"Doing Math with Python" is part of No Starch Press's "Pay what you want" Coder's Bookshelf Bundle. Your purchases will help support a charity of your choice.

Humble Bundle

Get the bundle here!


from Planet Python
via read more

NumFOCUS: Now Hiring: Development Director

The post Now Hiring: Development Director appeared first on NumFOCUS.


from Planet Python
via read more

Wingware Blog: Auto-Editing in Wing Pro (Part 1 of 3)

Wing Pro implements a suite of auto-editing operations that take care of common low-level editing tasks, like moving Python code into a new block, entering invocation arguments, and maintaining PEP 8 compliance as you type. Some of the simpler auto-editing operations, like auto-closing ( or [, are enabled by default and easy to understand. Others may be missed unless you know about them, and some need to be enabled in preferences before they can be used.

In this and the next two installments of Wing Tips we'll be looking at some useful Wing Pro auto-editing operations that are not so easy to discover.

Note: If you have Wing Personal, you don't have these features. Please bear with us through this and the next two installments. We'll return to features that are also present in Wing Personal after that. Or try Wing Pro on a free trial.

Creating Blocks with the Colon Key

To quickly turn an existing section of Python code into a new block, select it and then press the colon key. Wing Pro indents the selected lines and positions the caret so you can type if, for, while, def or any other keyword that starts a block.

/images/blog/wingpro-auto-editing/apply-colon.gif

Shown above: Select lines then type ":if ar" followed by Tab for auto-completion; a new block is created from the selection.

Creating a Try/Except Block

If you select lines of Python code and type :try Wing adds except automatically and selects it so you can either replace except with finally, press the right arrow key to enter an exception specifier, and/or use Tab to move into the except or finally block.

/images/blog/wingpro-auto-editing/apply-colon-try.gif

Shown above: Select lines then type ":try" followed Right Arrow, Space, "P", Tab to auto-complete "ParseError", and then Tab to move into the except block.

Note: Other keys can also be applied to selections. For example " encloses the selection in quotes, ( encloses it in parenthesis, and # toggles whether it is commented out.

Creating Blocks without Selecting

It's also possible to create new blocks without selecting any lines first. In some versions of Wing, this option needs to be enabled with the Editor > Auto-Editing > Manage Blocks on Repeated Colon Presses preference. Once that is done and a new block is entered, the colon key can be pressed a second time to move the next line into the new block, and a third time to also move the rest of a contiguous block of lines into the new block.

/images/blog/wingpro-auto-editing/colon-manage.gif

Shown above: Type "if use_" followed by Tab for completion and ``:`` three times to pull more and more code into the new block.

Note that you can also just select a block of code and press the Tab key to reindent it. If multiple indentations are possible for that block, Wing toggles between them each time you press Tab.


That's it for now. In the next part of this 3-part Wing Tips series on auto-editing in Wing Pro we'll be looking at auto-invocation, which makes writing Python code that calls functions and methods easier and less prone to errors.


from Planet Python
via read more

Data School: Six easy ways to run your Jupyter Notebook in the cloud

Six easy ways to run your Jupyter Notebook in the cloud

There are many ways to share a static Jupyter notebook with others, such as posting it on GitHub or sharing an nbviewer link. However, the recipient can only interact with the notebook file if they already have the Jupyter Notebook environment installed.

But what if you want to share a fully interactive Jupyter notebook that doesn't require any installation? Or, you want to create your own Jupyter notebooks without installing anything on your local machine?

In this post, I'm going to review six services you can use to easily run your Jupyter notebook in the cloud. All of them have the following characteristics:

  • They don't require you to install anything on your local machine.
  • They are completely free (or they have a free plan).
  • They give you access to the Jupyter Notebook environment (or a Jupyter-like environment).
  • They allow you to import and export notebooks using the standard .ipynb file format.
  • They support the Python language (and most support other languages as well).

Since all of these are cloud-based services, none of them will work for you if you are restricted to working with your data on-premise.

Table of Contents

Note: If you just want a quick summary, check out the comparison table.


Criteria for comparison

Here are the criteria on which I compared each of the six services:

Supported languages: Does this service support any programming languages other than Python?

Ability to install packages: Does this service allow you to install additional packages (or a particular version of a package), beyond the ones that are already installed?

Interface similarity: If the service provides a "Jupyter-like" interface (rather than the native Jupyter interface), how similar is its interface to Jupyter? (This makes it easier for existing Jupyter users to transition to this service.)

Keyboard shortcuts: Does this service use the same keyboard shortcuts as the Jupyter Notebook?

Missing features: Is there anything that the Jupyter Notebook can do that this service does not support?

Added features: Is there anything this service can do that the Jupyter Notebook does not support?

Ease of working with datasets: How easy does this service make it to work with your own datasets?

Internet access: Does this service give you Internet access from within the Notebook, so that you can read data from URLs when necessary?

Ability to work privately: Does this service allow you to keep your work private?

Ability to share publicly: Does this service provide a way for you to share your work publicly?

Ability to collaborate: Does this service allow you to invite someone to collaborate on a notebook, and can the collaboration occur in real-time?

Performance of the free plan: What computational resources (RAM and CPU) does this service provide? Does it give you access to a GPU (which is useful for deep learning)? How much disk space is included? How long can a session run?

Ability to upgrade for better performance: Can you pay for this service in order to access more computational resources?

Documentation and technical support: Is the service well-documented? Can you get in touch with someone if you run into a problem?


1. Binder

Six easy ways to run your Jupyter Notebook in the cloud

Binder is a service provided by the Binder Project, which is a member of the Project Jupyter open source ecosystem. It allows you to input the URL of any public Git repository, and it will open that repository within the native Jupyter Notebook interface. You can run any notebooks in the repository, though any changes you make will not be saved back to the repository. You don't have to create an account with Binder and you don't need to be the owner of the repository, though the repository must include a configuration file that specifies its package requirements.

Supported languages: Python (2 and 3), R, Julia, and any other languages supported by Jupyter.

Ability to install packages: You can specify your exact package requirements using a configuration file (such as environment.yml or requirements.txt).

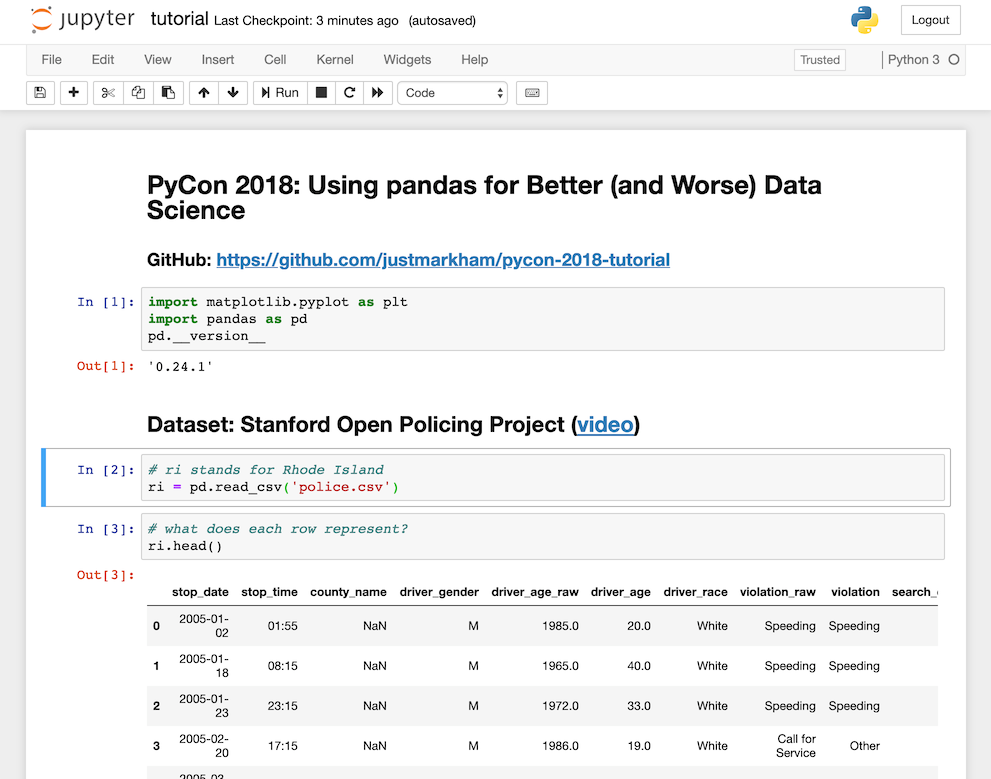
Interface similarity: Binder uses the native Jupyter Notebook interface.

Keyboard shortcuts: Binder uses all of the same keyboard shortcuts as Jupyter.

Missing features: None.

Added features: None.

Ease of working with datasets: If your dataset is in the same Git repository, then it will automatically be available within Binder. If your dataset is not in that repository but is available at any public URL, then you can add a special file to the repository telling Binder to download your dataset. However, Binder does not support accessing private datasets.

Internet access: Yes.

Ability to work privately: No, since it only works with public Git repositories.

Ability to share publicly: Yes. You can share a URL that goes directly to your Binder, or someone can run your notebooks using the Binder website (as long as they know the URL of your Git repository).

Ability to collaborate: No. If you want to work with someone on the same notebook and your repository is hosted on GitHub, then you can instead use the normal pull request workflow.

Performance of the free plan: You will have access to up to 2 GB of RAM. There is no specific limit to the amount of disk space, though they ask you not to include "very large files" (more than a few hundred megabytes). Binder can be slow to launch, especially when it's run on a newly updated repository. Sessions will shut down after 20 minutes of inactivity, though they can run for 12 hours or longer. Binder has other usage guidelines, including a limit of 100 simultaneous users for any given repository.

Ability to upgrade for better performance: No. However, you do have the option of setting up your own BinderHub deployment, which can provide the same functionality as Binder while allowing you to customize the environment (such as increasing the computational resources or allowing private files).

Documentation and technical support: Binder has extensive documentation. Community support is available via Gitter chat and a Discourse forum, and product issues are tracked on GitHub.

Conclusion: If your notebooks are already stored in a public GitHub repository, Binder is the easiest way to enable others to interact with them. Users don't have to create an account, and they'll feel right at home if they already know how to use the Jupyter Notebook. However, you'll want to keep the performance limitations and user limits in mind!


2. Kaggle Kernels

Six easy ways to run your Jupyter Notebook in the cloud

Kaggle is best known as a platform for data science competitions. However, they also provide a free service called Kernels that can be used independently of their competitions. After creating a Kaggle account (or logging in with Google or Facebook), you can create a Kernel that uses either a notebook or scripting interface, though I'm focusing on the notebook interface below.

Supported languages: Python (3 only) and R.

Ability to install packages: Hundreds of packages come pre-installed, and you can install additional packages using pip or by specifying the GitHub repository of a package. However, any additional packages you install will need to be reinstalled at the start of every session. Alternatively, you can ask Kaggle to include additional packages in their default installation.

Interface similarity: Visually, the Kernels interface looks quite different from the Jupyter interface. There's no menu bar or toolbar at the top of the screen, there's a collapsible sidebar on the right for adjusting settings, and there's a console docked below the notebook. However, working in the Kernels notebook actually feels very similar to working in the Jupyter Notebook, especially if you're comfortable with Jupyter's keyboard shortcuts. Also, note that a redesigned interface (shown in the screenshot above) will soon be released, which is more similar to the Jupyter interface and includes a simple menu bar.

Keyboard shortcuts: Kernels uses all of the same keyboard shortcuts as Jupyter.

Missing features:

  • Because Kernels doesn't (yet) include a menu bar or a toolbar, many actions can only be done using keyboard shortcuts or the command palette.
  • You can't download your notebook into other useful formats such as a Python script, HTML webpage, or Markdown file.

Added features:

  • Kernels includes a lightweight version control system. Every time you want to save your work, there's a "commit" button which runs the entire notebook from top to bottom and adds a new version to the history. (You can keep working while this process takes place, which is essential for long-running notebooks.) Although you can't name the versions, you can display the "diff" between any two versions.
  • Kernels allows you to selectively hide the input and/or output of any code cell, which makes it easy to customize the presentation of your notebook.

Ease of working with datasets: You can upload a dataset to Kaggle from your local computer, a URL, or a GitHub repository, and it will be hosted for free by another Kaggle service called Datasets. You can make the dataset private or public. Any dataset you upload, as well as any public dataset uploaded by a Kaggle user, can be accessed by any of your Kernels. The maximum size of each dataset is 20 GB, and a single Kernel can access multiple datasets.

Internet access: Yes.

Ability to work privately: Yes.

Ability to share publicly: Yes. If you choose to make your Kernel public, anyone can access it without creating a Kaggle account, and anyone with a Kaggle account can comment on your Kernel or copy it to their own account. Additionally, Kaggle also provides you with a public profile page, which displays all of your public Kernels and datasets.

Ability to collaborate: Yes. You can keep your Kernel private but invite specific Kaggle users to view or edit it. There's no real-time collaboration: It's more like working on separate copies of the Kernel, except that all commits are added to the same version history.

Performance of the free plan: You can access either a 4-core CPU with 17 GB of RAM, or a 2-core CPU with 14 GB of RAM plus a GPU. You will have 5 GB of "saved" disk space and 17 GB of "temporary" disk space, though any disk space used by your dataset does not count towards these figures. Sessions will shut down after 60 minutes of inactivity, though they can run for up to 9 hours.

Ability to upgrade for better performance: No.

Documentation and technical support: Kernels has adequate documentation. Support is available via a contact form and a forum.

Conclusion: As long as you're comfortable with a slightly cluttered interface (which has already been improved in the redesign), you'll have access to a high-performance environment in which it's easy to work with your datasets and share your work publicly (or keep it private). The included version control and collaboration features are also nice additions, though neither are fully-featured.


3. Google Colaboratory (Colab)

Six easy ways to run your Jupyter Notebook in the cloud

Google Colaboratory, usually referred to as "Google Colab," is available to anyone with a Google account. As long as you are signed into Google, you can quickly get started by creating an empty notebook, uploading an existing notebook, or importing a notebook from any public GitHub repository. Your Colab notebooks are automatically saved in a special folder in your Google Drive, and you can even create new notebooks directly from Drive.

Supported languages: Python (2 and 3) and Swift (which was added in January 2019). Kernels can also be installed for other languages, though the installation process varies by language and is not well-documented.

Ability to install packages: Hundreds of packages come pre-installed, and you can install additional packages using pip. However, any additional packages you install will need to be reinstalled at the start of every session.

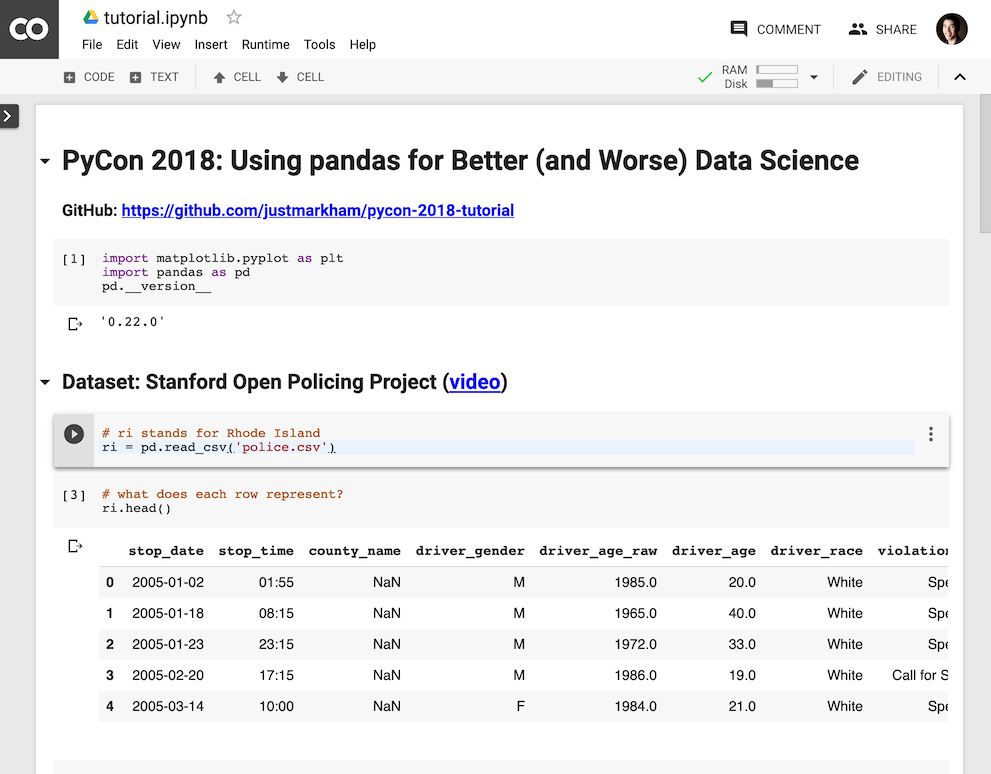
Interface similarity: Visually, the Colab interface looks quite similar to the Jupyter interface. However, working in Colab actually feels very dissimilar to working in the Jupyter Notebook:

  • Most of the menu items are different.
  • Colab has changed some of the standard terminology ("runtime" instead of "kernel", "text cell" instead of "markdown cell", etc.)
  • Colab has invented new concepts that you have to understand, such as "playground mode."
  • Command mode and Edit mode in Colab work differently than they do in Jupyter.

Keyboard shortcuts: In Colab, most of the single letter keyboard shortcuts used by Jupyter (such as "a" to "insert cell above") have been changed to a multi-step process ("Ctrl+m" followed by "a"), though Colab does allow you to customize the shortcuts.

Missing features:

  • Because the Colab menu bar is missing some items and the toolbar is kept very simple, some actions can only be done using keyboard shortcuts.
  • You can't download your notebook into other useful formats such as an HTML webpage or Markdown file (though you can download it as a Python script).

Added features:

  • Colab includes a lightweight version control system. It frequently saves the current state of your notebook, and you can browse through the revision history. However, you can't display the "diff" between versions, which means that you would have to do any comparisons manually.
  • Colab allows you to add form fields to your notebook, which enables you to parameterize your code in an interactive way. However, these fields only work within Colab.
  • When you create a section heading in your notebook, Colab makes every section collapsible and automatically creates a "table of contents" in the sidebar, which makes large notebooks easier to navigate.

Ease of working with datasets: You can upload a dataset to use within a Colab notebook, but it will automatically be deleted once you end your session. Alternatively, you can allow Colab to read files from your Google Drive, though it's more complicated than it should be. Colab also includes connectors to other Google services, such as Google Sheets and Google Cloud Storage.

Internet access: Yes.

Ability to work privately: Yes.

Ability to share publicly: Yes. If you choose to make your notebook public and you share the link, anyone can access it without creating a Google account, and anyone with a Google account can copy it to their own account. Additionally, you can authorize Colab to save a copy of your notebook to GitHub or Gist and then share it from there.

Ability to collaborate: Yes. You can keep your notebook private but invite specific people to view or edit it (using Google's familiar sharing interface). You and your collaborator(s) can edit the notebook at the same time and see each other's changes, as well as add comments for each other (similar to Google Docs), though there's a 30-second lag between when you make changes and when collaborators will see them. Also, you are not actually sharing your environment with your collaborators (meaning there is no syncing of what code has been run), which significantly limits the usefulness of near real-time collaboration.

Performance of the free plan: Colab does give you access to a GPU or a TPU. Otherwise, Google does not provide any specifications for their environments. If you connect Colab to Google Drive, that will give you up to 15 GB of disk space for storing your datasets. Sessions will shut down after 60 minutes of inactivity, though they can run for up to 12 hours.

Ability to upgrade for better performance: No. However, you do have the option of connecting to a local runtime, which allows you to execute code on your local hardware and access your local file system.

Documentation and technical support: Colab has minimal documentation, which is contained within an FAQ page and a variety of sample notebooks. Support is available via GitHub issues, and community support is available via Stack Overflow.

Conclusion: The greatest strength of Colab is that it's easy to get started, since most people already have a Google account, and it's easy to share notebooks, since the sharing functionality works the same as Google Docs. However, the cumbersome keyboard shortcuts and the difficulty of working with datasets are significant drawbacks. The ability to collaborate on the same notebook is useful, but less useful than it could be since you're not sharing an environment.


4. Microsoft Azure Notebooks

Six easy ways to run your Jupyter Notebook in the cloud

To get started with Azure Notebooks, you first sign in with a Microsoft or Outlook account (or create one). The next step is to create a "project", which is structured identically to a GitHub repository: it can contain one or more notebooks, Markdown files, datasets, and any other file you want to create or upload, and all of these can be organized into folders. Also like GitHub, you can initialize a project with a README file, which will automatically be displayed on the project page. If your work is already stored on GitHub, you can import the entire repository directly into a project.

Supported languages: Python (2 and 3), R, and F#.

Ability to install packages: Hundreds of packages come pre-installed, you can install additional packages using pip or conda, and you can specify your exact package requirements using a configuration file (such as environment.yml or requirements.txt).

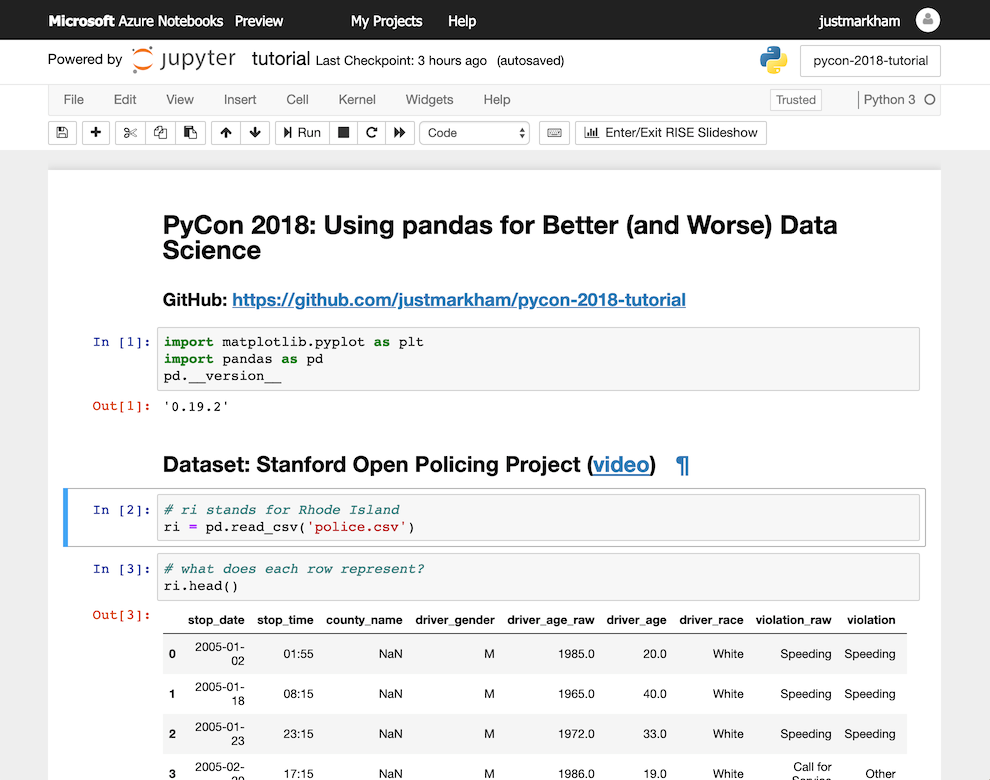
Interface similarity: Azure uses the native Jupyter Notebook interface.

Keyboard shortcuts: Azure uses all of the same keyboard shortcuts as Jupyter.

Missing features: None.

Added features:

  • The RISE extension comes pre-installed, which allows you to instantly present your notebook as a live reveal.js-based slideshow.
  • The jupyter_contrib_nbextensions package comes pre-installed, which gives you easy access to a collection of 50+ Jupyter Notebook extensions for enhancing the notebook interface.

Ease of working with datasets: You can upload a dataset to your project from your local computer or a URL, and it can be accessed by any notebook within your project. Azure also includes connectors to other Azure services, such as Azure Storage and various Azure databases.

Internet access: Yes.

Ability to work privately: Yes.

Ability to share publicly: Yes. If you choose to make your project public, anyone can access it without creating a Microsoft account, and anyone with a Microsoft account can copy it to their own account. Additionally, Azure also provides you with a public profile page (very similar to a GitHub profile), which displays all of your public projects.

Ability to collaborate: No, though this is a planned feature.

Performance of the free plan: You will have access to 4 GB of RAM and 1 GB of disk space (per project). Sessions will shut down after 60 minutes of inactivity, though they can run for 8 hours or longer.

Ability to upgrade for better performance: Yes. You can pay for an Azure subscription, though the setup process is non-trivial and the pricing is complicated.

Documentation and technical support: Azure has extensive documentation. Support is available via GitHub issues.

Conclusion: The greatest strength of Azure Notebooks is its ease of use: the project structure (borrowed from GitHub) makes it simple to work with multiple notebooks and datasets, and the use of the native Jupyter interface means that existing Jupyter users will have an easy transition. However, the RAM and disk space are not particularly generous, and the lack of collaboration is a big gap in the functionality.


5. CoCalc

Six easy ways to run your Jupyter Notebook in the cloud

CoCalc, short for "collaborative calculation", is an online workspace for computation in Python, R, Julia, and many other languages. It allows you to create and edit Jupyter Notebooks, Sage worksheets, and LaTeX documents. After creating a CoCalc account, the first step is to create a "project", which can contain one or more notebooks, Markdown files, datasets, and any other file you want to create or upload, and all of these can be organized into folders. The project interface is a bit overwhelming at first, but it looks much more familiar once you create or open a notebook.

Supported languages: Python (2 and 3), R, Julia, and many other languages.

Ability to install packages: Hundreds of packages come pre-installed. You can install additional packages using pip, but this is not available when using a free plan. Alternatively, you can ask CoCalc to include additional packages in their default installation.

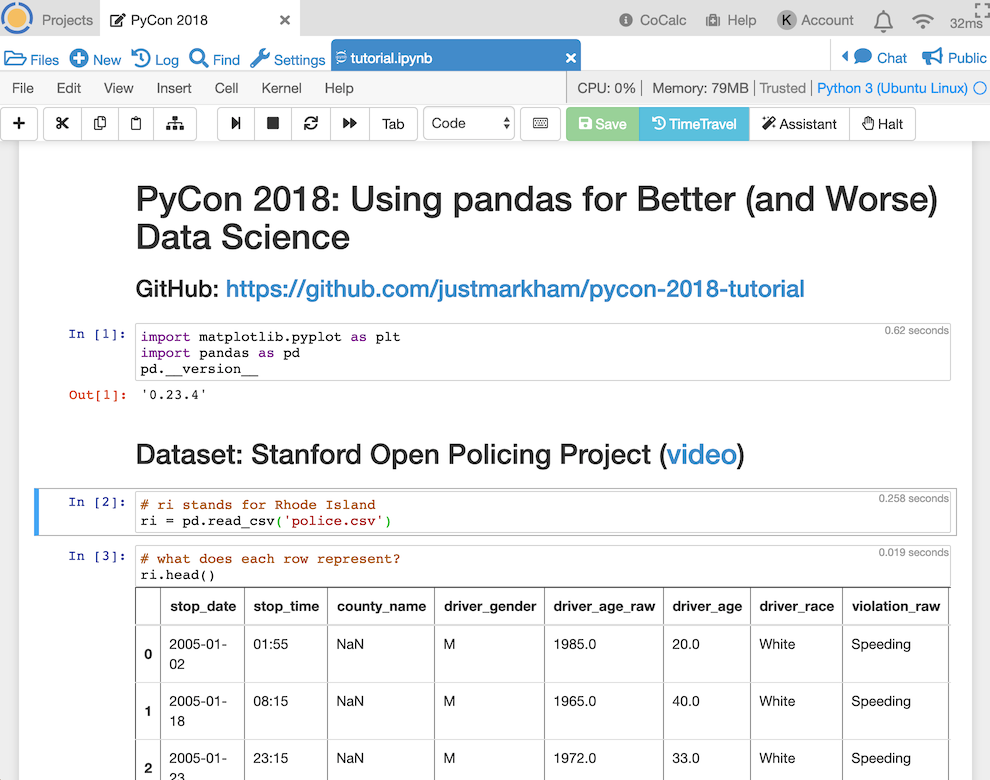
Interface similarity: Although CoCalc does not use the native Jupyter Notebook interface (they rewrote it using React.js), the interface is very similar to Jupyter, with only a few minor modifications. You can actually switch to using the native Jupyter Notebook from within CoCalc, though it's not recommended since you would lose access to the most valuable CoCalc features ("time travel" and real-time collaboration, which are discussed below).

Keyboard shortcuts: CoCalc uses almost all of the same keyboard shortcuts as Jupyter.

Missing features: CoCalc does not currently support interactive widgets.

Added features:

  • CoCalc includes a powerful version control feature called time travel, which records all of your changes to the notebook in fine detail, and allows you to browse those changes using an intuitive slider control.
  • CoCalc saves a backup of all of your project files every few minutes, which means you can recover older versions of your files if needed.
  • CoCalc includes additional features for instructors, such as the ability to distribute and grade assignments, and the ability to watch students while they work and chat with them about the assignment.

Ease of working with datasets: You can upload a dataset to your project from your local computer, and it can be accessed by any notebook within your project.

Internet access: No, this is not available when using a free plan.

Ability to work privately: Yes.

Ability to share publicly: Yes. If you choose to make your notebook public and you share the link, anyone can access it without creating a CoCalc account, and anyone with a CoCalc account can copy it to their own account.

Ability to collaborate: Yes. You can keep your notebook private but invite specific people to edit it. You and your collaborator(s) can edit the notebook at the same time and see each other's changes (and cursors) in real-time, as well as chat (using text or video) in a window next to the notebook. The status and the results of all computations are also synchronized, which means that everyone involved will experience the notebook in the same way.

Performance of the free plan: You will have access to a 1-core shared CPU with 1 GB of shared RAM, and 3 GB of disk space (per project). Sessions will shut down after 30 minutes of inactivity, though they can run for up to 24 hours.

Ability to upgrade for better performance: Yes. You can pay for a CoCalc subscription, which starts at $14/month. Alternatively, you can install the CoCalc Docker image on your own computer, which allows you to run a private multi-user CoCalc server for free.

Documentation and technical support: CoCalc has extensive documentation. Support is available via email and a contact form, and product issues are tracked on GitHub.

Conclusion: The most compelling reasons to use CoCalc are the real-time collaboration and the "time travel" version control features, as well as the course management features (if you're an instructor). Although the interface is a bit cluttered, existing Jupyter users would have a relatively easy time transitioning to CoCalc. However, the free plan does have some important limitations (inability to install additional packages or access the Internet), and the performance of the free plan is modest.


6. Datalore

Six easy ways to run your Jupyter Notebook in the cloud

Datalore was created by JetBrains, the same company who makes PyCharm (a popular Python IDE). Getting started is as easy as creating an account, or logging in with a Google or JetBrains account. You can either create a new Datalore "workbook" or upload an existing Jupyter Notebook. Datalore workbooks are stored in a proprietary format, though it does support importing and exporting the standard .ipynb file format.

Supported languages: Python 3 only.

Ability to install packages: Hundreds of packages come pre-installed, and you can install additional packages using pip or conda, or by specifying the GitHub repository of a package.

Interface similarity: When you open Datalore, the interface does resemble a Jupyter Notebook in the sense that there are code and Markdown cells as well as output below those cells. However, there are some important differences between the Datalore and Jupyter interfaces:

  • Cells (which Datalore calls "blocks") are not numbered, because the ordering of cells is enforced. In other words, all of your code must be written in the order in which you ultimately want it to run.
  • The notebook (which Datalore calls a "workbook") can have multiple worksheets, similar to Google Sheets, which is a convenient way to break long workbooks into logical sections. If you create multiple worksheets in a workbook, all of the worksheets share the same environment. Because cell order is important in Datalore, the cells in the second worksheet are treated as coming after the cells in the first worksheet, the third worksheet comes after the second worksheet, and so on.
  • There are many other interface differences, which are explained in the "added features" section.

Keyboard shortcuts: Keyboard shortcuts are available for most actions in Datalore, but the shortcuts are wildly different from those used by Jupyter.

Missing features:

  • Datalore does not use the IPython kernel, and thus IPython magic functions and shell commands are not available. (However, optional access to the IPython kernel is a planned feature.)
  • Because the Datalore menu bar is kept very simple and there's no toolbar, many actions can only be done using keyboard shortcuts.
  • You can't download your workbook into other useful formats such as a Python script, HTML webpage, or Markdown file.
  • Datalore does not support all of the commonly supported Markdown features in its Markdown cells. (However, improved Markdown support is a planned feature.)
  • Datalore does not support interactive widgets.
  • Datalore does not include multicursor support.

Added features:

  • Cells are automatically run as you write them, which Datalore calls "live computation". This actually makes it easier to debug code as you write it, since you can see the results of your code immediately. (Live computation can be disabled, in which case you can manually trigger cells to run.)
  • Because cells will always run in the order in which they are arranged, Datalore can track cell dependencies. This means that when a given cell is edited, Datalore will determine which cells below it are potentially affected and will immediately re-run those cells (assuming live computation is enabled). If the edit causes an error in a dependent cell, those errors will immediately be flagged.
  • Datalore allows you to display cell inputs and outputs sequentially (like in Jupyter) or in "split view", in which case the inputs and outputs are in two separate panes. When using sequential view, Datalore also makes it easy to hide all inputs or hide all outputs.
  • Datalore includes more "intelligence" than Jupyter in its code completion.
  • As you write code, Datalore provides context-aware suggestions (called "intentions") for which actions you might want to take. For example, after typing the name of a DataFrame, the intentions might include "drop string columns", "histogram", and "train test split". When you click an intention, Datalore actually generates the code for you, which can be a useful way to learn the code behind certain tasks.
  • Datalore includes a well-designed version control system. It frequently saves the current state of your workbook, and you can quickly browse the diffs between the current version and any past versions. You can also choose to add a message when saving the workbook, and then filter the list of versions to only include those versions with a message.
  • Datalore gives you access to a plotting library called datalore.plot, which is very similar to R's ggplot2, though you can only use it inside of Datalore.

Ease of working with datasets: You can upload a dataset to your workbook from your local computer or a URL, but it can only be accessed by that particular workbook. This would be a significant annoyance if you work with the same dataset(s) across many workbooks. (However, sharing datasets between workbooks is a planned feature.)

Internet access: Yes.

Ability to work privately: Yes.

Ability to share publicly: No.

Ability to collaborate: Yes. You can keep your workbook private but invite specific people to view or edit it. You and your collaborator(s) can edit the notebook at the same time and see each other's changes (and cursors) in real-time. The status and the results of all computations are also synchronized, which means that everyone involved will experience the notebook in the same way.

Performance of the free plan: You will have access to a 2-core CPU with 4 GB of RAM, and 10 GB of disk space. Sessions will shut down after 60 minutes of inactivity, though there is no specific limit on the length of individual sessions. You can use the service for up to 120 hours per month.

Ability to upgrade for better performance: No, though there will soon be a paid plan which offers more disk space and a more powerful CPU (or GPU).

Documentation and technical support: Datalore has minimal documentation, which is contained within sample workbooks. Support is available via a Discourse forum.

Conclusion: Rather than being an adaptation of the Jupyter Notebook, Datalore is more like a reinvention of the Notebook. It includes an innovative feature set, including live computation, dependency tracking, real-time collaboration, and built-in version control. However, existing Jupyter users may have a challenging time transitioning to Datalore, especially since cell ordering is enforced and all of the keyboard shortcuts are quite different. As well, Datalore currently includes some notable limitations, namely that workbooks can't be shared publicly and uploaded datasets can't be shared between workbooks.


How to choose the right service for you

Out of the six options presented, there's not one clear "winner". Instead, the right choice for you will depend on your priorities. Below are my suggestions for what you should choose, based on your particular needs. (Note: You can also view this as a comparison table.)

You use a language other than Python: Binder and CoCalc support tons of languages. Azure supports Python, R and F#, Kernels supports Python and R, Colab supports Python and Swift, and Datalore only supports Python.

You need to use Python 2: Binder, Colab, Azure, and CoCalc all support Python 2 and 3, whereas Kernels and Datalore only support Python 3.

You work with non-standard packages: Binder and Azure allow you to specify your exact package requirements using a configuration file. CoCalc and Datalore allow you to install additional packages, which will persist across sessions, though this is not available with CoCalc's free plan. Kernels and Colab also allow you to install additional packages, though they do not persist across sessions. Kernels and CoCalc accept user requests for which packages should be included in their default installation.

You love the existing Jupyter Notebook interface: Binder and Azure use the native Jupyter Notebook interface, and CoCalc uses a nearly identical interface. Kernels is visually different from Jupyter but works like it, whereas Colab is visually similar to Jupyter but does not work like it. Datalore is the furthest from the existing Jupyter Notebook.

You are a heavy user of keyboard shortcuts: Binder, Kernels, and Azure use the same keyboard shortcuts as Jupyter, and CoCalc uses almost all of the same shortcuts. Datalore uses completely different keyboard shortcuts, and Colab uses cumbersome multi-step keyboard shortcuts (though they can be customized).

You prefer a point-and-click interface: Binder, Azure, and CoCalc allow you to perform all actions by pointing and clicking, whereas Kernels, Colab, and Datalore require you to use keyboard shortcuts for certain actions.

You want an integrated version control system: CoCalc and Datalore provide the best interfaces for version control. Kaggle's version control system is more limited, and Colab's system is even more limited. Binder and Azure do not provide a version control system.

You work with a lot of datasets: Kernels works seamlessly with Kaggle Datasets, a full-featured (and free) service for hosting datasets of up to 20 GB each. CoCalc offers 3 GB of disk space per project, and any dataset you upload can be accessed by any notebook in your project. Azure has similar functionality, except it offers 1 GB of disk space per project. Datalore offers 10 GB of total disk space, though every dataset you upload has to be linked to a particular workbook. Colab will discard any datasets you upload when your session ends, unless you link Colab to your Google Drive. Binder is best for small datasets that are either stored in your Git repository or located at a public URL.

Your project is already hosted on GitHub: Binder can run your notebooks directly from GitHub, Azure will allow you to import an entire GitHub repository, and Colab can import a single notebook from GitHub. Kernels, CoCalc, and Datalore don't provide any similar functionality.

You need to keep your work private: All of the options except for Binder support working in private.

You need to keep your data on-premise: None of these cloud-based services allow you to keep your data on-premise. However, you can set up Binder or CoCalc on your own server, since BinderHub and the CoCalc Docker image are both open source, which would allow you to keep your data on-premise.

You want to share your work publicly: Binder creates the least friction possible when sharing, since people can view and run your notebook without creating an account. Kernels, Colab, Azure, and CoCalc allow you to share a URL for read-only access, while requiring users to create an account if they want to run your notebook. Kernels and Azure make sharing even easier by providing you with a public profile page. Datalore does not allow for public sharing.

You need to collaborate with others: CoCalc and Datalore support real-time collaboration. Colab supports collaborating on the same document, though it's not quite real-time and you're not sharing the same environment. Kernels supports a form of collaboration in which you're sharing a version history. Binder and Azure don't include any collaboration functionality, though with Binder it could easily occur through the normal GitHub pull request workflow.

You want a high performance environment: Kernels provides the most powerful environment (4-core CPU and 17 GB RAM), followed by Datalore (2-core CPU and 4 GB RAM), Azure (4 GB RAM), Binder (up to 2 GB RAM), and CoCalc (1-core CPU and 1 GB RAM). Colab does not provide specifications for its environment.

You need access to a GPU: Kernels and Colab both provide free access to a GPU. GPU access is available to paying customers of Azure and (soon) Datalore. GPU access is not available through Binder or CoCalc.

You prefer to use a non-commercial tool: Binder is the only option that is managed by a non-commercial entity.


Similar services which were not reviewed

The following services are similar to the six options above, but were not included in my comparison:

  • I didn't include any service that only provides access to JupyterLab, such as Notebooks AI, Kyso, and CyVerse. (Note that Binder, Azure, and CoCalc all allow you to use JupyterLab instead of Jupyter Notebook if you prefer.)
  • I didn't include IBM Watson Studio Cloud because the process of getting started is cumbersome, the interface is overly complicated, the free plan has lots of limitations, and there were lots of error messages during my testing.
  • I didn't include Gryd because the free plan requires an academic email address, and I didn't include Code Ocean because the free plan is severely limited without an academic email address.
  • I didn't include ZEPL because it doesn't allow you to export notebooks using the standard .ipynb format.
  • I didn't include any paid services, such as Saturn Cloud, Crestle.ai, Paperspace, and Salamander.

My fact-checking process

This article is the result of 50+ hours of research, testing, and writing. In addition, I shared drafts of this article with the relevant teams from Binder, Kaggle, Google, Microsoft, CoCalc, and Datalore in March 2019. I received detailed feedback from all six companies/organizations (thank you!), which I incorporated into the article before publishing.

That being said, these services are constantly changing, and it's likely that some of this information will become outdated in the future. If you believe that something in this article is no longer correct, please leave a comment below, and I'd be happy to consider updating the article.

P.S. Want to master the Jupyter Notebook? Subscribe to the Data School newsletter to find out when my new course launches!


from Planet Python
via read more

TestDriven.io: Working with Static and Media Files in Django

This article looks at how to work with static and media files in a Django project, locally and in production. from Planet Python via read...