Thursday, January 31, 2019

Tryton News: Newsletter February 2019

@ced wrote:

Tryton continues its road of improvements for more performance and more scaling.

Contents:

Changes For The User

The arrows on columns are now always synchronized with the actual order. If the order is not on a single column then all arrows are displayed.

The records created by XML files in modules are by default protected against modification and deletion. But if they have the attribute noupdate set, they can be modified. Now they can also be deleted and updating the database will not recreate them.

On the wizard that allows to pay multiple lines at once, we added back a field to define the date of the payment.

Refining a search in a long list can lead to no results on the actual page of the pagination.
This can be astonishing and annoying because the user may think that there is no result at all. To prevent this, now the client automatically reduces the pagination until it finds a result.

New Modules

account_statement_rule

The module allows rules to be defined to complete statement lines from imported files. When the “Apply Rule” button is clicked on a statement, each rule is tested in order, against each origin that does not have any lines, until one is found that matches. Then the rule found is used to create the statement lines linked to the origin. Get the account_statement_rule module.

Changes For The Developer

We added two tables ir.calendar.month and ir.calendar.day which store the translations of months and week days. This allowed to replace the hard-coded values to format time with locale and re-use the translation infrastructure.
In addition, it provides also a common way for modules to store month or day like in the payment term, instead of duplicate many times the same selections. All standard modules have been migrated.

An old constraint inherited from TinyERP was removed from analytic account. It checked that debit and credit were always positive. We finally remove it to follow the same design as the general accounting.

We use by default soffice to convert report into different formats. But sometime (rarely), soffice command does not stop and so it blocks the request for ever. In order to release the locks of the request transaction, we added a default timeout of 5 minutes to execute the conversion.

We added the option to have ModuleTestCase, the generic test case for a module, to run with extra modules installed. This is useful for module that have extra_depends so the depending code is also tested.

We have speed the startup time of trytond for about 10% by improving the depends computation of the fields.

The plugins for clients are small piece of code that are added to the client in order to preform some specific actions (usually to interact locally with the OS or to define a new widget). We can now define such plugins on the web client too.

Tryton supports a minimal cross-origin resource sharing mechanism. You just have to list the authorized origin in the configuration. For more complex rules, we advise to use a front-end proxy like nginx.

Thanks to the CORS support, we can now redirect the request for the bus to a different host or service. This allows to reduce the load on the main server.

We can now search on keys of Dict of fields using the Tryton’s ORM. On PostgreSQL back-end, Dict fields can be stored as a JSON. In this case, the database can use indexes to speed-up the query.
It is also possible to order the search result based on the keys of Dict fields.

The cache management has been improved to be more transactional. It has now a more transactional-like API by using sync, commit and rollback. Only committed data can be stored in it.

Some times it may be needed to lock a record or a list of records for the transaction. To simplify this task, we added a dualmethod ModelSQL.lock which takes care of the different ways to lock depending of the back-end.

Posts: 1

Participants: 1

Read full topic


from Planet Python
via read more

Test and Code: 63: Teaching Python as a Corporate Trainer - Matt Harrison

I hear and I forget.
I see and I remember.
I do and I understand.
-- Confucius

Matt Harrison is an author and instructor of Python and Data Science. This episode focuses on his training company, MetaSnake, and corporate training.

Matt's written several books on Python, mostly self published. So of course we talk about that.

But the bulk of the conversation is about corporate training, with Brian playing the role of someone considering starting a corporate training role, and asking Matt, an experienced expert in training, how to start and where to go from there.

I think you'll learn a lot from this.

Special Guest: Matt Harrison.

Sponsored By:

Support Test & Code - Software Testing, Development, Python

Links:

<blockquote> <p><em>I hear and I forget.</em><br> <em>I see and I remember.</em><br> <em>I do and I understand.</em><br> <em>-- Confucius</em></p> </blockquote> <p>Matt Harrison is an author and instructor of Python and Data Science. This episode focuses on his training company, MetaSnake, and corporate training.</p> <p>Matt&#39;s written several books on Python, mostly self published. So of course we talk about that.</p> <p>But the bulk of the conversation is about corporate training, with Brian playing the role of someone considering starting a corporate training role, and asking Matt, an experienced expert in training, how to start and where to go from there.</p> <p>I think you&#39;ll learn a lot from this.</p><p>Special Guest: Matt Harrison.</p><p>Sponsored By:</p><ul><li><a rel="nofollow" href="http://testandcode.com/pycharm">PyCharm Professional</a>: <a rel="nofollow" href="http://testandcode.com/pycharm">Try PyCharm Pro for an extended 4 month trial before deciding which version you need. If you value your time, you owe it to yourself to try PyCharm.</a> Promo Code: TESTNCODE2019</li></ul><p><a rel="payment" href="https://www.patreon.com/testpodcast">Support Test &amp; Code - Software Testing, Development, Python</a></p><p>Links:</p><ul><li><a title="MetaSnake" rel="nofollow" href="https://www.metasnake.com/">MetaSnake</a> &mdash; Python Consultant and Training</li><li><a title="Illustrated Guide to Python 3" rel="nofollow" href="https://amzn.to/2WuvCQZ">Illustrated Guide to Python 3</a> &mdash; A Complete Walkthrough of Beginning Python with Unique Illustrations Showing how Python Really Works</li><li><a title="Learning the Pandas Library" rel="nofollow" href="https://amzn.to/2WvoDag">Learning the Pandas Library</a> &mdash; Python Tools for Data Munging, Analysis, and Visualization</li><li><a title="Beginning Python Programming" rel="nofollow" href="https://amzn.to/2S2scpG">Beginning Python Programming</a> &mdash; Learn Python in 7 Days</li></ul>

from Planet Python
via read more

Peter Bengtsson: hashin 0.14.5 and canonical pip hashes

Prior to version 0.14.5 hashin would write write down the hashes of PyPI packages in the order they appear in PyPI's JSON response. That means there's a slight chance that two distinct clients/computers/humans might actually get different output when then run hashin Django==2.1.5.

The pull request has a pretty hefty explanation as it demonstrates the fix.

Do note that if the existing order of hashes in a requirements file is not in the "right" order, hashin won't correct it unless any of the hashes are different.

Thanks @SomberNight for patiently pushing for this.


from Planet Python
via read more

PyCon: PyCon 2019 Reminders and Information!

The first 30 days of 2019 have come and gone so quickly, we want to take a minute to provide some conference reminders and information.

  • January 31 2019: Deadline to submit a proposal for Startup Row.  Please go here to submit your proposal
  • February 12, 2019: Deadline to submit applications for Financial Aid
  • February 24, 2019: Financial Assistance grants awarded
  • March 3, 2019: Deadline to respond to the offer of Financial Assistance
PyCon 2019 Early Bird tickets have sold out but registration at regular price is still available. If you are planning to attend, register soon as tickets will sell out and you don't want to miss out on the largest Python Conference.

Our goal is to make PyCon accessible for all of our attendees.  We are once again proud to offer childcare for PyCon 2019. Bring your children along and for a fee of $50 per day*, they can enjoy their own conference experience. This is the fourth year that Big Time Kid Care (www.bigtimekidcare.com) is providing this service.  There will be activities for all ages as well as snacks and lunch daily.
    *if you sign up for all three conference days, you will get one day complimentary!

Tutorials will be launching in mid February.  Please watch for the launch on us.pycon.org or follow us on Twitter. The tutorials are very popular and will sell out quickly so don't wait to register once they launch.

For all those living in the cold areas, stay warm! 
We are looking forward to seeing everyone in Cleveland in May!

[photo] Cleveland sign at Lake Erie


from Planet Python
via read more

PyCon 2019 Reminders and Information!

The first 30 days of 2019 have come and gone so quickly, we want to take a minute to provide some conference reminders and information.

  • January 31 2019: Deadline to submit a proposal for Startup Row.  Please go here to submit your proposal
  • February 12, 2019: Deadline to submit applications for Financial Aid
  • February 24, 2019: Financial Assistance grants awarded
  • March 3, 2019: Deadline to respond to the offer of Financial Assistance
PyCon 2019 Early Bird tickets have sold out but registration at regular price is still available. If you are planning to attend, register soon as tickets will sell out and you don't want to miss out on the largest Python Conference.

Our goal is to make PyCon accessible for all of our attendees.  We are once again proud to offer childcare for PyCon 2019. Bring your children along and for a fee of $50 per day*, they can enjoy their own conference experience. This is the fourth year that Big Time Kid Care (www.bigtimekidcare.com) is providing this service.  There will be activities for all ages as well as snacks and lunch daily.
    *if you sign up for all three conference days, you will get one day complimentary!

Tutorials will be launching in mid February.  Please watch for the launch on us.pycon.org or follow us on Twitter. The tutorials are very popular and will sell out quickly so don't wait to register once they launch.

For all those living in the cold areas, stay warm! 
We are looking forward to seeing everyone in Cleveland in May!

[photo] Cleveland sign at Lake Erie


from The PyCon Blog
via read more

codingdirectional: Add one to the last element of a list

Hello and welcome to another one day one answer series. In this article, we will create a python method which will do the following actions.

  1. Takes in a list of numbers.
  2. If the number is less than 0 or it is a double digits number then returns None.
  3. If it is an empty list then returns None.
  4. Else joins the numbers in the list together to create a larger number, for example, if a list consists of [1, 2, 3] then the larger number will become 123. Next, add one to that new number, so 123 becomes 124.
  5. Finally turns that new number back to a list, so 124 becomes [1, 2, 4] and returns that new list.

Below is the solution for this question.

def up_array(arr):

    str_ = ''
  
    if(len(arr) == 0):
        return None
        
    for num in arr:
        if(num < 0 or num > 9):
            return None
        else:
            str_ += str(num)
    
    total = str(int(str_) + 1)
    arr = []

    for number in total:
        arr.append(int(number))

    return arr

That is it, hope you like this article.

Announcement:

I have decided to restart one of mine old websites again starting from today onward. This website is not about programming but if you are interested in online stuff and software then do visit this site regularly through this link! I have just created my first article about bitcoin on this site which you can read through this link. Like, subscribe to this new site if you want to! This new site has a lot of goodies that I would like to show it to you all!


from Planet Python
via read more

PyCharm: PyCharm 2019.1 EAP 2

Our Early Access Program (EAP) continues, and we have some great features in this second version:

New in PyCharm

Syntax Highlighting in Vagrantfiles

Vagrant Highlighting

If you’re developing an application that will be deployed in a virtual machine, Vagrant is a great tool to automate the creation and deletion of your VM while you’re developing. Even though PyCharm has long had support for running Python code in a Vagrant box using the Vagrant interpreter, we haven’t had any support for Vagrantfiles until now.

Haven’t tried Vagrant before? Read our blog post on developing with Vagrant and Ansible, to prepare for deploying an application on Amazon EC2.

Sudo Support for SSH Interpreters

SSH Root

Writing some administration automation scripts? Or experimenting with GPIO on your Raspberry Pi? You’ll need root privileges to execute your scripts. PyCharm now let’s you run scripts with elevated privileges over SSH, letting you debug these scripts as easily as a any other script.

Further Improvements

Interested?

Download this EAP from our website. Alternatively, you can use the JetBrains Toolbox App to stay up to date throughout the entire EAP.

If you’re on Ubuntu 16.04 or later, you can use snap to get PyCharm EAP, and stay up to date. You can find the installation instructions on our website.

PyCharm 2019.1 is in development during the EAP phase, therefore not all new features are already available. More features will be added in the coming weeks. As PyCharm 2019.1 is pre-release software, it is not as stable as the release versions. Furthermore, we may decide to change and/or drop certain features as the EAP progresses.

All EAP versions will ship with a built-in EAP license, which means that these versions are free to use for 30 days after the day that they are built. As EAPs are released weekly, you’ll be able to use PyCharm Professional Edition EAP for free for the duration of the EAP program, as long as you upgrade at least once every 30 days.


from Planet Python
via read more

EuroPython: Announcing the Guido van Rossum Core Developer Grant

europythonsociety:

At the last General Assembly of the EPS at EuroPython 2018 in Edinburgh, we voted on a new grant program we want to put in place for future EuroPython conferences.

We all love Python and this is one of the main reasons we are putting on EuroPython year after year, serving the “cast of thousands” which support Python. But we also believe it is important to give something back to the main team of developers who have contributed lots of their time and energy to make Python happen: the Python Core Developers.

This group is small, works countless hours, often in their free time and often close to burnout due to not enough new core developers joining the team.

Free Tickets for Python Core Developers

To help with growing the team, putting it more into the spotlight and give them a place to meet, demonstrate their work and a stage to invite new developers, we decided to give Python Core Developers free entry to future EuroPython conferences, starting with EuroPython 2019 in Basel, Switzerland

In recognition of Guido’s almost 20 years of leading this team, and with his permission, we have named the grant “Guido van Rossum Core Developer Grant”.

Details of the grant program are available on our core grant page:

https://www.europython-society.org/core-grant

PS: If you are a core developer and want to organize a workshop, language summit or similar event at EuroPython 2019, please get in touch with our program workgroup soon, so that we can arrange rooms, slots, etc.

PPS: If you want to become a core developer, please have a look at the Python Dev Guide.

Enjoy,

EuroPython Society Board
https://www.europython-society.org/


from Planet Python
via read more

EuroPython Society: Announcing the Guido van Rossum Core Developer Grant

At the last General Assembly of the EuroPython Society (EPS) at EuroPython 2018 in Edinburgh, we voted on a new grant program we want to put in place for future EuroPython conferences.

We all love Python and this is one of the main reasons we are putting on EuroPython year after year, serving the “cast of thousands” which support Python. But we also believe it is important to give something back to the main team of developers who have contributed lots of their time and energy to make Python happen: the Python Core Developers.

This group is small, works countless hours, often in their free time and often close to burnout due to not enough new core developers joining the team.

Free Tickets for Python Core Developers

To help with growing the team, putting it more into the spotlight and give them a place to meet, demonstrate their work and a stage to invite new developers, we decided to give Python Core Developers free entry to future EuroPython conferences, starting with EuroPython 2019 in Basel, Switzerland

In recognition of Guido’s almost 20 years of leading this team, and with his permission, we have named the grant “Guido van Rossum Core Developer Grant”.

Details of the grant program are available on our core grant page:

https://www.europython-society.org/core-grant

PS: If you are a core developer and want to organize a workshop, language summit or similar event at EuroPython 2019, please get in touch with our program workgroup soon, so that we can arrange rooms, slots, etc.

PPS: If you want to become a core developer, please have a look at the Python Dev Guide.

Enjoy,

EuroPython Society Board
https://www.europython-society.org/


from Planet Python
via read more

PyCharm 2019.1 EAP 2

Our Early Access Program (EAP) continues, and we have some great features in this second version:

New in PyCharm

Syntax Highlighting in Vagrantfiles

Vagrant Highlighting

If you’re developing an application that will be deployed in a virtual machine, Vagrant is a great tool to automate the creation and deletion of your VM while you’re developing. Even though PyCharm has long had support for running Python code in a Vagrant box using the Vagrant interpreter, we haven’t had any support for Vagrantfiles until now.

Haven’t tried Vagrant before? Read our blog post on developing with Vagrant and Ansible, to prepare for deploying an application on Amazon EC2.

Sudo Support for SSH Interpreters

SSH Root

Writing some administration automation scripts? Or experimenting with GPIO on your Raspberry Pi? You’ll need root privileges to execute your scripts. PyCharm now let’s you run scripts with elevated privileges over SSH, letting you debug these scripts as easily as a any other script.

Further Improvements

Interested?

Download this EAP from our website. Alternatively, you can use the JetBrains Toolbox App to stay up to date throughout the entire EAP.

If you’re on Ubuntu 16.04 or later, you can use snap to get PyCharm EAP, and stay up to date. You can find the installation instructions on our website.

PyCharm 2019.1 is in development during the EAP phase, therefore not all new features are already available. More features will be added in the coming weeks. As PyCharm 2019.1 is pre-release software, it is not as stable as the release versions. Furthermore, we may decide to change and/or drop certain features as the EAP progresses.

All EAP versions will ship with a built-in EAP license, which means that these versions are free to use for 30 days after the day that they are built. As EAPs are released weekly, you’ll be able to use PyCharm Professional Edition EAP for free for the duration of the EAP program, as long as you upgrade at least once every 30 days.


from PyCharm Blog
read more

Wednesday, January 30, 2019

Continuum Analytics Blog: RPM and Debian Repositories for Miniconda

Conda, the package manager from Anaconda, is now available as either a RedHat RPM or as a Debian package. The packages are the equivalent to the Miniconda installer which only contains Conda and its dependencies.…

The post RPM and Debian Repositories for Miniconda appeared first on Anaconda.


from Planet Python
via read more

Continuum Analytics Blog: Conda 4.6 Release

The latest set of major Conda improvements are here, with version 4.6.  This release has been stewing for a while and has the feature list to show for it.  Let’s walk through some of the…

The post Conda 4.6 Release appeared first on Anaconda.


from Planet Python
via read more

RPM and Debian Repositories for Miniconda

Conda, the package manager from Anaconda, is now available as either a RedHat RPM or as a Debian package. The packages are the equivalent to the Miniconda installer which only contains Conda and its dependencies.…

The post RPM and Debian Repositories for Miniconda appeared first on Anaconda.


from Planet SciPy
read more

Conda 4.6 Release

The latest set of major Conda improvements are here, with version 4.6.  This release has been stewing for a while and has the feature list to show for it.  Let’s walk through some of the…

The post Conda 4.6 Release appeared first on Anaconda.


from Planet SciPy
read more

Less than a week left to bid for a day’s work from me

Just a quick reminder that you’ve only got until next Tuesday to bid for a day’s work from me – so get bidding here. The full details and rules are available in my previous post, but basically I’ll do a day’s work for the highest bidder in this auction – working on coding, data science, […]

The post Less than a week left to bid for a day’s work from me appeared first on PyBloggers.


from PyBloggers
read more

Stack Abuse: Understanding Recursive Functions with Python

Introduction

When we think about repeating a task, we usually think about the for and while loops. These constructs allow us to perform iteration over a list, collection, etc.

However, there's another form of repeating a task, in a slightly different manner. By calling a function within itself, to solve a smaller instance of the same problem, we're performing recursion.

These functions call themselves until the problem is solved, practically dividing the initial problem to a lot of smaller instances of itself – like for an example, taking small bites of a larger piece of food.

The end goal is to eat the entire plate of hot pockets, you do this by taking a bite over and over. Each bite is a recursive action, after which you undertake the same action the next time. You do this for every bite, evaluating that you should take another one to reach the goal, until there are no hot pockets left on your plate.

What is Recursion?

As stated in the introduction, recursion involves a process calling itself in the definition. A recursive function generally has two components:

  • The base case which is a condition that determines when the recursive function should stop
  • The call to itself

Let's take a look at a small example to demonstrate both components:

# Assume that remaining is a positive integer
def hi_recursive(remaining):  
    # The base case
    if remaining == 0:
        return
    print('hi')

    # Call to function, with a reduced remaining count
    hi_recursive(remaining - 1)

The base case for us is if the remaining variable is equal to 0 i.e. how many remaining "hi" strings we must print. The function simply returns.

After the print statement, we call hi_recursive again but with a reduced remaining value. This is important! If we do not decrease the value of remaining the function will run indefinitely. Generally, when a recursive function calls itself the parameters are changed to be closer to the base case.

Let's visualize how it works when we call hi_recursive(3):

hi_recursive example

After the function prints 'hi', it calls itself with a lower value for remaining until it reaches 0. At zero, the function returns to where it was called in hi_recursive(1), which returns to where it was called in hi_recursive(2) and that ultimately returns to where it was called in hi_recursive(3).

Why not use a Loop?

All traversal can be handled with loops. Even so, some problems are often easier solved with recursion rather than iteration. A common use case for recursion is tree traversal:

Traversing through nodes and leaves of a tree is usually easier to think about when using recursion. Even though loops and recursion both traverse the tree, they have different purposes – loops are meant to repeat a task whereas recursion is meant to break down a large task into smaller tasks.

Recursion with trees for example fork well because we can process the entire tree by processing smaller parts of the tree individually.

Examples

The best way to get comfortable with recursion, or any programming concept, is to practice it. Creating recursive functions are straightforward: be sure to include your base case and call the function such that it gets closer to the base case.

Sum of a List

Python includes a sum function for lists. The default Python implementation, CPython, uses an indefinite for-loop in C to create those functions (source code here for those interested). Let's see how to do it with recursion:

def sum_recursive(nums):  
    if len(nums) == 0:
        return 0

    last_num = nums.pop()
    return last_num + sum_recursive(nums)

The base case is the empty list - the best sum for that is 0. Once we handle our base case, we remove the last item of the list. We finally call the sum_recursive function with the reduced list, and we add the number we pulled out into the total.

In a Python interpreter sum([10, 5, 2]) and sum_recursive([10, 5, 2]) should both give you 17.

Factorial Numbers

You may recall that a factorial of a positive integer, is the product of all integers preceding it. The following example would make it clearer:

5! = 5 x 4 x 3 x 2 x 1 = 120  

The exclamation mark denotes a factorial, and we see that we multiply 5 by the product of all the integers from 4 till 1. What if someone enters 0? It's widely understood and proven that 0! = 1. Now let's create a function like below:

def factorial(n):  
    if n == 0 or n == 1:
        return 1
    return n * factorial(n - 1)

We cater for the cases where 1 or 0 is entered, and otherwise we multiply the current number by the factorial of the number decreased by 1.

A simple verification in your Python interpreter would show that factorial(5) gives you 120.

Fibonacci Sequence

A Fibonacci sequence is one where each number is the sum of the proceeding two numbers. This sequence makes an assumption that Fibonacci numbers for 0 and 1 are also 0 and 1. The Fibonacci equivalent for 2 would therefore be 1.

Let's see the sequence and their corresponding natural numbers:

    Integers:   0, 1, 2, 3, 4, 5, 6, 7
    Fibonacci:  0, 1, 1, 2, 3, 5, 8, 13

We can easily code a function in Python to determine the fibonacci equivalent for any positive integer using recursion:

def fibonacci(n):  
    if n == 0:
        return 0
    if n == 1:
        return 1
    return fibonacci(n - 1) + fibonacci(n - 2)

You can verify it works as expected by checking that fibonacci(6) equals to 8.

Now I'd like you to consider another implementation of this function that uses a for loop:

def fibonacci_iterative(n):  
    if n <= 1:
        return n

    a = 0
    b = 1
    for i in range(n):
        temp = a
        a = b
        b = b + temp
    return a

If the integer is less than or equal to 1, then return it. Now that our base case is handled. We continuously add the first number with the second one by storing the first number in a temp variable before we update it.

The output is the same as the first fibonacci() function. It's possible that it may even be faster. The solution however, is not as easily readable as our first attempt. There lies one of recursion's greatest powers: elegance. Some programming solutions are most naturally solved using recursion.

Conclusion

Recursion allows us to break a large task down to smaller tasks by repeatedly calling itself. A recursive function requires a base case to stop execution, and the call to itself which gradually leads to the function to the base case. It's commonly used in trees, but other functions can be written with recursion to provide elegant solutions.


from Planet Python
via read more

PyCharm: PyCharm 2018.3.4

We’re happy to announce general availability of our latest update to PyCharm 2018.3. In this update we’ve fixed a couple of issues, and some other small updates.

New in This Version

  • Pasting a new name over a variable that was defined right after an indented block, would cause PyCharm to incorrectly indent the variable. See PY-22563.
  • In some cases inserting a newline in an f-string would lead to invalid code. See PY-32918.
  • PyCharm can now create Python 3.7 Conda environments
  • Many improvements in SQL support. Did you know that PyCharm Professional Edition bundles all features from JetBrains DataGrip in its Database tool window?
  • See the release notes for more details

Updating PyCharm

You can update PyCharm by choosing Help | Check for Updates (or PyCharm | Check for Updates on macOS) in the IDE. PyCharm will be able to patch itself to the new version, there should no longer be a need to run the full installer.

If you’re on Ubuntu 16.04 or later, or any other Linux distribution that supports snap, you should not need to upgrade manually, you’ll automatically receive the new version.


from Planet Python
via read more

Robin Wilson: Less than a week left to bid for a day’s work from me

Just a quick reminder that you’ve only got until next Tuesday to bid for a day’s work from me – so get bidding here. The full details and rules are available in my previous post, but basically I’ll do a day’s work for the highest bidder in this auction – working on coding, data science, GIS/remote sensing, teaching…pretty much anything in my areas of expertise. This could be a great way to get some work from me for a very reasonable price – so please have a look, and share with anyone else who you think might be interested.

from Planet Python
via read more

Python Data: Stationary Data Tests for Time Series Forecasting

I wasn’t planning on making a ‘part 2’ to the Forecasting Time Series Data using Autoregression post from last week, but I really wanted to show how to use more advanced tests to check for stationary data. Additionally, I wanted to use a new dataset that I ran across on Kaggle for energy consumption at an hourly level (find the dataset here).  For this example, I’m going to be using the DEOK_hourly dataset (i’ve added it to my git repo here).  You can follow along with the jupyter notebook here.

In this post, I’m going to follow the same approach that I took in the previous one – using autoregression to forecast time series data after checking to ensure the data is stationary.

Checking for Stationary data

So, what do we need to do to check for stationary data?  We can do the following:

  • Plot the data – this is the first step and often will provide a great deal of information about your data. Regardless of the data you’re using or the steps you take afterwards, this should always be the first step in your process.
  • Statistics Summaries and Tests  – There are a plethora of statistical tests that you can / should run but a quick summary of your data is probably the best thing to do.  Additionally, you can run tests like the Dickey-Fuller test to help understand your data and its stationarity.

Let’s plot our data first and take a look at a couple different plots. First, let’s get our imports taken care of.

import pandas as pd
import numpy as np
import matplotlib.pylab as plt
%matplotlib inline
 
plt.rcParams['figure.figsize']=(20,10)
plt.style.use('ggplot')

Next, let’s load our data and plot the time series.

data = pd.read_csv('DEOK_hourly.csv')
data['Datetime']=pd.to_datetime(data['Datetime'])
data.set_index('Datetime', inplace=True)

DEOK Time Series plot

Looking at the data, it looks pretty stationary. There’s no real trend in the time series but there seems to be something that might be seasonality, so we’ll dig deeper into the data.  Let’s plot a histogram to see what the underlying distribution looks like.

data['DEOK_MW'].hist()

DEOK Histogram

Looks Gaussian with a bit of a long tail skew toward the right. From this histogram, I’m pretty confident that we have a stationary dataset otherwise we’d see something much less ‘bell-shaped’ due to trending and/or seasonality (e.g., we’d see more data plotted to the left or right).

Now, let’s look at some statistical tests. A simple one that you can use is to look at the mean and variance of multiple sections of the data and compare them. If they are similar, your data is most likely stationary.

There are many different ways to split the data for this check, but one way I like to do this is to follow the approach highlighted here.

one, two, three = np.split(
        data['DEOK_MW'].sample(
        frac=1), [int(.25*len(data['DEOK_MW'])),
        int(.75*len(data['DEOK_MW']))])

The above code creates three new series. I randomly selected 25% for series one and 75% for the two and three – but you could create them of equal length if you wanted. I like making them different sizes just for a bit of extra randomness to the test.

Next, we’ll look at the means and variances of each series to see what they look like. Remember, if the data is stationary, the means/variances should be similar.

mean1, mean2, mean3 = one.mean(), two.mean(), three.mean()
var1, var2, var3 = one.var(), two.var(), three.var()

print mean1, mean2, mean3
print var1, var2, var3

The output of this is:

3093.27497575 3107.45445099 3112.20124697
353154.655416 363558.421407 358899.692558

Not great formatting, but you can quickly see that the means and variances are similar, pointing to stationary data.

Now that you know how to find stationarity using some plots and some basic stats, you should know that the above tests can be fooled sometimes, especially since they make assumptions about your data. So…don’t rely on these only…they’re a quick way to see what you have without having to pull out the big guns and run things like the Dickey-Fuller test.

Dickey-Fuller Test for Stationarity

Officially, this is called the ‘augmented Dickey-Fuller test’, but most folks just say ‘Dickey-Fuller’ when talking about it.  This is a test that tests the null hypothesis that a unit root is present in time series data.    To make things a bit more clear, this test is checking for stationarity or non-stationary data.  The test is trying to reject the null hypothesis that a unit root exists and the data is non-stationary. If the null hypothesis is rejected, then the alternate can be considered valid (e.g., the data is stationary).  You can read more about the test here if interested.

When you run the test, you’ll get an ADF value and a p-value. The ADF number should be a negative number and the p-value should be beneath a certain threshold value (e.g., 1% or 5%, etc) for a confidence level. For this example, we’ll use 5% (or 95% confidence level), so if the p-value is greater than 0.05 then we say we fail to reject the null hypothesis because the data has a unit root and is non-stationary.  If the p-value is less than or equal to 0.05, we can say we reject the null hypothesis because the data does not have a unit root and is stationary.

Let’s run the Augmented Dickey-Fuller test and see what we see.  The statsmodels library has a function called adfuller to make it easy for us to run this test.

from statsmodels.tsa.stattools import adfuller

adf_test = adfuller(data['DEOK_MW'])

print "ADF = " + str(adf_test[0])
print "p-value = " +str(adf_test[1])

In this code, we import the adfuller library from the statsmodels library and then run our data through the test.  The full output of the test is:

(-14.913267801069782,
 1.4477674072055658e-27,
 57,
 57681,
 {'1%': -3.4304633751328555,
  '10%': -2.5667966716717614,
  '5%': -2.8615901096273602},
 669611.23911962728)

The ADF value is the first value in the result and the p-value is the 2nd.  The ‘1%’, ‘10%’ and ‘5%’ values are the critical values for 99%, 90% and 95% confidence levels.

Let’s look specifically at our ADF and p-values.

print "ADF = " + str(adf_test[0])
print "p-value = " +str(adf_test[1])

We get these results:

ADF = -14.9132678011
p-value = 1.44776740721e-27

Our p-value is definitely less than 0.5 and is even less than 0.01 so we can say with pretty good confidence that we can reject the null (unit root, non-stationary data) and can assume our data is stationary. Additionally, our ADF is much less than our 1% confidence value of -3.43, so we have another confirmation that we can reject the null.

Now that we know its stationary, we need to see if its correlated (remember there’s an assumption of dependance / correlation for autoregression). Let’s look at a lagplot.

pd.tools.plotting.lag_plot(data['DEOK_MW'])

DEOK Lag Plot

No question…that data is correlated somehow.

Now…we can actually DO something with the data! Let’s run a forecast on it now using autoregression.

Forecasting Time Series Data using Autoregression

We know our data is stationary and correlated (or at least we *believe* it is based on our tests). Let’s run our autoregression forecast and see what we see.

For this, we’ll use a different approach than we did before sine we have much more data. We’ll use the same training/testing data creation that we used in the previous post and create a 12 period testing dataset and prediction dataset (i.e., we are going to predict the ‘next’ 12 readings).

#create train/test datasets
X = data['DEOK_MW'].dropna()

train_data = X[1:len(X)-12]
test_data = X[len(X)-12:]

Now, we’ll run our the AR() model.

from statsmodels.tsa.ar_model import AR
from sklearn.metrics import r2_score

#train the autoregression model
model = AR(train_data)
model_fitted = model.fit()

print('The lag value chose is: %s' % model_fitted.k_ar)

The lag value chosen for this model is 59.  Now, let’s make some predictions and check the accuracy.

# make predictions 
predictions = model_fitted.predict(
    start=len(train_data), 
    end=len(train_data) + len(test_data)-1, 
    dynamic=False)


# create a comparison dataframe
compare_df = pd.concat(
    [data['DEOK_MW'].reset_index().tail(12),
    predictions], axis=1).rename(
    columns={'DEOK_MW': 'actual', 0:'predicted'})
compare_df=compare_df[['actual', 'predicted']].dropna()

In the above, we are making predictions and then creating a dataframe to compare the ‘predicted’ values versus the ‘actual’ values. Plotting these values together gives us the following.

DEOK Actual vs Predicted

Not a bad forecast with the cycle being pretty good but magnitude being a bit off. Let’s take a look at r-squared.

r2 = r2_score(compare_df.actual, compare_df.predicted)

Our r-squared is 0.76, which is pretty good for a first pass at this data and forecasting, especially given the fact that our lag is auto-selected for us.

Hopefully this helps shed some light on how to use statistical tests and plots to check for stationarity when running forecasts with time series data.


Contact me / Hire me

If you’re working for an organization and need help with forecasting, data science, machine learning/AI or other data needs, contact me and see how I can help. Also, feel free to read more about my background on my Hire Me page. I also offer data science mentoring services for beginners wanting to break into data science….if this is of interested, contact me.


To learn more about Time Series Forecasting, I highly recommend the following books:


The post Stationary Data Tests for Time Series Forecasting appeared first on Python Data.


from Planet Python
via read more

Codementor: Introduction to Machine Learning with Python and repl.it

We walk step-by-step through an introduction to machine learning using Python and scikit-learn, explaining each concept and line of code along the way. You'll learn to build a text classifier that can tell the difference between positive and negative sentences (sentiment analysis).

from Planet Python
via read more

PyCharm 2018.3.4

We’re happy to announce general availability of our latest update to PyCharm 2018.3. In this update we’ve fixed a couple of issues, and some other small updates.

New in This Version

  • Pasting a new name over a variable that was defined right after an indented block, would cause PyCharm to incorrectly indent the variable. See PY-22563.
  • In some cases inserting a newline in an f-string would lead to invalid code. See PY-32918.
  • PyCharm can now create Python 3.7 Conda environments
  • Many improvements in SQL support. Did you know that PyCharm Professional Edition bundles all features from JetBrains DataGrip in its Database tool window?
  • See the release notes for more details

Updating PyCharm

You can update PyCharm by choosing Help | Check for Updates (or PyCharm | Check for Updates on macOS) in the IDE. PyCharm will be able to patch itself to the new version, there should no longer be a need to run the full installer.

If you’re on Ubuntu 16.04 or later, or any other Linux distribution that supports snap, you should not need to upgrade manually, you’ll automatically receive the new version.


from PyCharm Blog
read more

Codementor: 5 Best Python Frameworks for WebView Testing

A look into several different testing frameworks that are compatible with the Python programming language, looking at how they help to test hybrid applications.

from Planet Python
via read more

Tuesday, January 29, 2019

Real Python: Python "for" Loops (Definite Iteration)

This tutorial will show you how to perform definite iteration with a Python for loop.

In the previous tutorial in this introductory series, you learned the following:

  • Repetitive execution of the same block of code over and over is referred to as iteration.
  • There are two types of iteration:
    • Definite iteration, in which the number of repetitions is specified explicitly in advance
    • Indefinite iteration, in which the code block executes until some condition is met
  • In Python, indefinite iteration is performed with a while loop.

Here’s what you’ll cover in this tutorial:

  • You’ll start with a comparison of some different paradigms used by programming languages to implement definite iteration.

  • Then you will learn about iterables and iterators, two concepts that form the basis of definite iteration in Python.

  • Finally, you’ll tie it all together and learn about Python’s for loops.

Free Bonus: Click here to get access to a chapter from Python Tricks: The Book that shows you Python's best practices with simple examples you can apply instantly to write more beautiful + Pythonic code.

A Survey of Definite Iteration in Programming

Definite iteration loops are frequently referred to as for loops because for is the keyword that is used to introduce them in nearly all programming languages, including Python.

Historically, programming languages have offered a few assorted flavors of for loop. These are briefly described in the following sections.

Numeric Range Loop

The most basic for loop is a simple numeric range statement with start and end values. The exact format varies depending on the language but typically looks something like this:

for i = 1 to 10
    <loop body>

Here, the body of the loop is executed ten times. The variable i assumes the value 1 on the first iteration, 2 on the second, and so on. This sort of for loop is used in the languages BASIC, Algol, and Pascal.

Three-Expression Loop

Another form of for loop popularized by the C programming language contains three parts:

  • An initialization
  • An expression specifying an ending condition
  • An action to be performed at the end of each iteration.

This type of has the following form:

for (i = 1; i <= 10; i++)
    <loop body>

Technical Note: In the C programming language, i++ increments the variable i. It is roughly equivalent to i += 1 in Python.

This loop is interpreted as follows:

  • Initialize i to 1.
  • Continue looping as long as i <= 10.
  • Increment i by 1 after each loop iteration.

Three-expression for loops are popular because the expressions specified for the three parts can be nearly anything, so this has quite a bit more flexibility than the simpler numeric range form shown above. These for loops are also featured in the C++, Java, PHP, and Perl languages.

Collection-Based or Iterator-Based Loop

This type of loop iterates over a collection of objects, rather than specifying numeric values or conditions:

for i in <collection>
    <loop body>

Each time through the loop, the variable i takes on the value of the next object in <collection>. This type of for loop is arguably the most generalized and abstract. Perl and PHP also support this type of loop, but it is introduced by the keyword foreach instead of for.

Further Reading: See the For loop Wikipedia page for an in-depth look at the implementation of definite iteration across programming languages.

The Python for Loop

Of the loop types listed above, Python only implements the last: collection-based iteration. At first blush, that may seem like a raw deal, but rest assured that Python’s implementation of definite iteration is so versatile that you won’t end up feeling cheated!

Shortly, you’ll dig into the guts of Python’s for loop in detail. But for now, let’s start with a quick prototype and example, just to get acquainted.

Python’s for loop looks like this:

for <var> in <iterable>:
    <statement(s)>

<iterable> is a collection of objects—for example, a list or tuple. The <statement(s)> in the loop body are denoted by indentation, as with all Python control structures, and are executed once for each item in <iterable>. The loop variable <var> takes on the value of the next element in <iterable> each time through the loop.

Here is a representative example:

>>>
>>> a = ['foo', 'bar', 'baz']
>>> for i in a:
...     print(i)
...
foo
bar
baz

In this example, <iterable> is the list a, and <var> is the variable i. Each time through the loop, i takes on a successive item in a, so print() displays the values 'foo', 'bar', and 'baz', respectively. A for loop like this is the Pythonic way to process the items in an iterable.

But what exactly is an iterable? Before examining for loops further, it will be beneficial to delve more deeply into what iterables are in Python.

Iterables

In Python, iterable means an object can be used in iteration. The term is used as:

  • An adjective: An object may be described as iterable.
  • A noun: An object may be characterized as an iterable.

If an object is iterable, it can be passed to the built-in Python function iter(), which returns something called an iterator. Yes, the terminology gets a bit repetitive. Hang in there. It all works out in the end.

Each of the objects in the following example is an iterable and returns some type of iterator when passed to iter():

>>>
>>> iter('foobar')                             # String
<str_iterator object at 0x036E2750>

>>> iter(['foo', 'bar', 'baz'])                # List
<list_iterator object at 0x036E27D0>

>>> iter(('foo', 'bar', 'baz'))                # Tuple
<tuple_iterator object at 0x036E27F0>

>>> iter({'foo', 'bar', 'baz'})                # Set
<set_iterator object at 0x036DEA08>

>>> iter({'foo': 1, 'bar': 2, 'baz': 3})       # Dict
<dict_keyiterator object at 0x036DD990>

These object types, on the other hand, aren’t iterable:

>>>
>>> iter(42)                                   # Integer
Traceback (most recent call last):
  File "<pyshell#26>", line 1, in <module>
    iter(42)
TypeError: 'int' object is not iterable

>>> iter(3.1)                                  # Float
Traceback (most recent call last):
  File "<pyshell#27>", line 1, in <module>
    iter(3.1)
TypeError: 'float' object is not iterable

>>> iter(len)                                  # Built-in function
Traceback (most recent call last):
  File "<pyshell#28>", line 1, in <module>
    iter(len)
TypeError: 'builtin_function_or_method' object is not iterable

All the data types you have encountered so far that are collection or container types are iterable. These include the string, list, tuple, dict, set, and frozenset types.

But these are by no means the only types that you can iterate over. Many objects that are built into Python or defined in modules are designed to be iterable. For example, open files in Python are iterable. As you will see soon in the tutorial on file I/O, iterating over an open file object reads data from the file.

In fact, almost any object in Python can be made iterable. Even user-defined objects can be designed in such a way that they can be iterated over. (You will find out how that is done in the upcoming article on object-oriented programming.)

Iterators

Okay, now you know what it means for an object to be iterable, and you know how to use iter() to obtain an iterator from it. Once you’ve got an iterator, what can you do with it?

An iterator is essentially a value producer that yields successive values from its associated iterable object. The built-in function next() is used to obtain the next value from in iterator.

Here is an example using the same list as above:

>>>
>>> a = ['foo', 'bar', 'baz']

>>> itr = iter(a)
>>> itr
<list_iterator object at 0x031EFD10>

>>> next(itr)
'foo'
>>> next(itr)
'bar'
>>> next(itr)
'baz'

In this example, a is an iterable list and itr is the associated iterator, obtained with iter(). Each next(itr) call obtains the next value from itr.

Notice how an iterator retains its state internally. It knows which values have been obtained already, so when you call next(), it knows what value to return next.

What happens when the iterator runs out of values? Let’s make one more next() call on the iterator above:

>>>
>>> next(itr)
Traceback (most recent call last):
  File "<pyshell#10>", line 1, in <module>
    next(itr)
StopIteration

If all the values from an iterator have been returned already, a subsequent next() call raises a StopIteration exception. Any further attempts to obtain values from the iterator will fail.

You can only obtain values from an iterator in one direction. You can’t go backward. There is no prev() function. But you can define two independent iterators on the same iterable object:

>>>
>>> a
['foo', 'bar', 'baz']

>>> itr1 = iter(a)
>>> itr2 = iter(a)

>>> next(itr1)
'foo'
>>> next(itr1)
'bar'
>>> next(itr1)
'baz'

>>> next(itr2)
'foo'

Even when iterator itr1 is already at the end of the list, itr2 is still at the beginning. Each iterator maintains its own internal state, independent of the other.

If you want to grab all the values from an iterator at once, you can use the built-in list() function. Among other possible uses, list() takes an iterator as its argument, and returns a list consisting of all the values that the iterator yielded:

>>>
>>> a = ['foo', 'bar', 'baz']
>>> itr = iter(a)
>>> list(itr)
['foo', 'bar', 'baz']

Similarly, the built-in tuple() and set() functions return a tuple and a set, respectively, from all the values an iterator yields:

>>>
>>> a = ['foo', 'bar', 'baz']

>>> itr = iter(a)
>>> tuple(itr)
('foo', 'bar', 'baz')

>>> itr = iter(a)
>>> set(itr)
{'baz', 'foo', 'bar'}

It isn’t necessarily advised to make a habit of this. Part of the elegance of iterators is that they are “lazy.” That means that when you create an iterator, it doesn’t generate all the items it can yield just then. It waits until you ask for them with next(). Items are not created until they are requested.

When you use list(), tuple(), or the like, you are forcing the iterator to generate all its values at once, so they can all be returned. If the total number of objects the iterator returns is very large, that may take a long time.

In fact, it is possible to create an iterator in Python that returns an endless series of objects. (You will learn how to do this in upcoming tutorials on generator functions and itertools.) If you try to grab all the values at once from an endless iterator, the program will hang.

The Guts of the Python for Loop

You now have been introduced to all the concepts you need to fully understand how Python’s for loop works. Before proceeding, let’s review the relevant terms:

Term Meaning
Iteration The process of looping through the objects or items in a collection
Iterable An object (or the adjective used to describe an object) that can be iterated over
Iterator The object that produces successive items or values from its associated iterable
iter() The built-in function used to obtain an iterator from an iterable

Now, consider again the simple for loop presented at the start of this tutorial:

>>>
>>> a = ['foo', 'bar', 'baz']
>>> for i in a:
...     print(i)
...
foo
bar
baz

This loop can be described entirely in terms of the concepts you have just learned about. To carry out the iteration this for loop describes, Python does the following:

  • Calls iter() to obtain an iterator for a
  • Calls next() repeatedly to obtain each item from the iterator in turn
  • Terminates the loop when next() raises the StopIteration exception

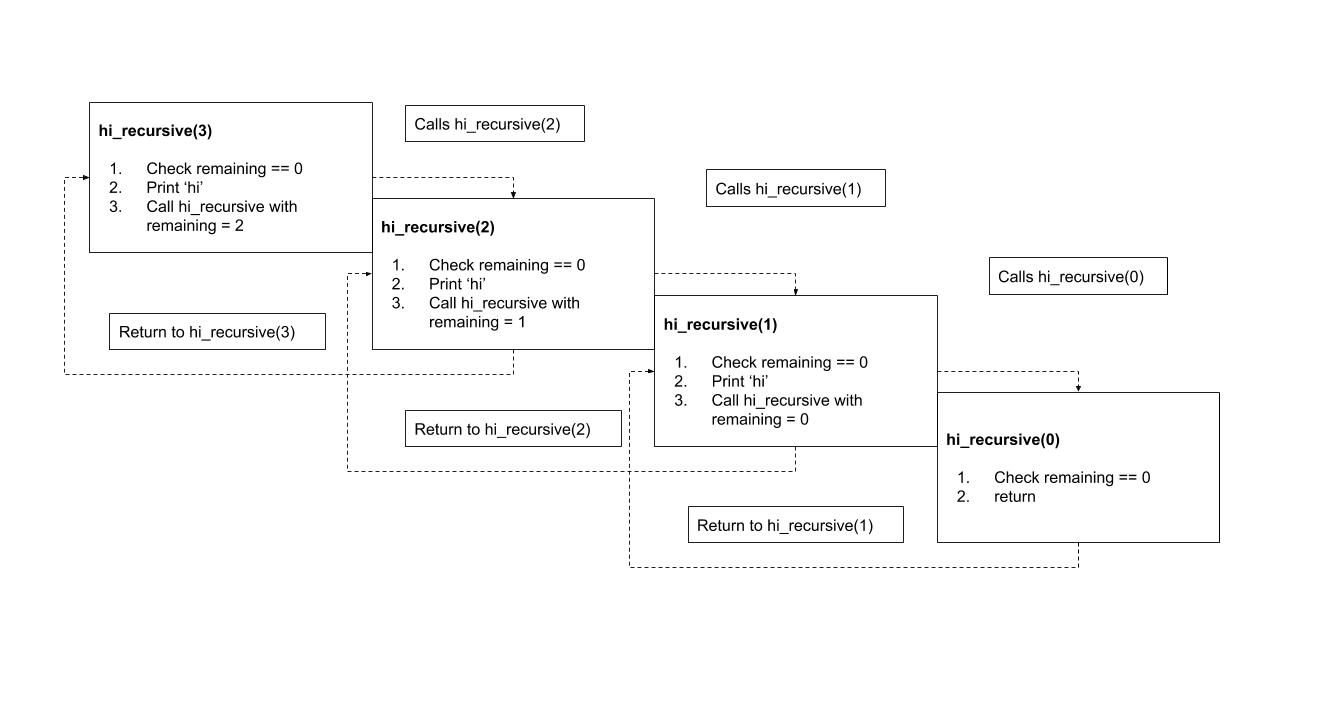
The loop body is executed once for each item next() returns, with loop variable i set to the given item for each iteration.

This sequence of events is summarized in the following diagram:

Python for loop diagramSchematic Diagram of a Python for Loop

Perhaps this seems like a lot of unnecessary monkey business, but the benefit is substantial. Python treats looping over all iterables in exactly this way, and in Python, iterables and iterators abound:

  • Many built-in and library objects are iterable.

  • There is a Standard Library module called itertools containing many functions that return iterables.

  • User-defined objects created with Python’s object-oriented capability can be made to be iterable.

  • Python features a construct called a generator that allows you to create your own iterator in a simple, straightforward way.

You will discover more about all the above throughout this series. They can all be the target of a for loop, and the syntax is the same across the board. It’s elegant in its simplicity and eminently versatile.

Iterating Through a Dictionary

You saw earlier that an iterator can be obtained from a dictionary with iter(), so you know dictionaries must be iterable. What happens when you loop through a dictionary? Let’s see:

>>>
>>> d = {'foo': 1, 'bar': 2, 'baz': 3}
>>> for k in d:
...     print(k)
...
foo
bar
baz

As you can see, when a for loop iterates through a dictionary, the loop variable is assigned to the dictionary’s keys.

To access the dictionary values within the loop, you can make a dictionary reference using the key as usual:

>>>
>>> for k in d:
...     print(d[k])
...
1
2
3

You can also iterate through a dictionary’s values directly by using .values():

>>>
>>> for v in d.values():
...     print(v)
...
1
2
3

In fact, you can iterate through both the keys and values of a dictionary simultaneously. That is because the loop variable of a for loop isn’t limited to just a single variable. It can also be a tuple, in which case the assignments are made from the items in the iterable using packing and unpacking, just as with an assignment statement:

>>>
>>> i, j = (1, 2)
>>> print(i, j)
1 2

>>> for i, j in [(1, 2), (3, 4), (5, 6)]:
...     print(i, j)
...
1 2
3 4
5 6

As noted in the tutorial on Python dictionaries, the dictionary method .items() effectively returns a list of key/value pairs as tuples:

>>>
>>> d = {'foo': 1, 'bar': 2, 'baz': 3}

>>> d.items()
dict_items([('foo', 1), ('bar', 2), ('baz', 3)])

Thus, the Pythonic way to iterate through a dictionary accessing both the keys and values looks like this:

>>>
>>> d = {'foo': 1, 'bar': 2, 'baz': 3}
>>> for k, v in d.items():
...     print('k =', k, ', v =', v)
...
k = foo , v = 1
k = bar , v = 2
k = baz , v = 3

The range() Function

In the first section of this tutorial, you saw a type of for loop called a numeric range loop, in which starting and ending numeric values are specified. Although this form of for loop isn’t directly built into Python, it is easily arrived at.

For example, if you wanted to iterate through the values from 0 to 4, you could simply do this:

>>>
>>> for n in (0, 1, 2, 3, 4):
...     print(n)
...
0
1
2
3
4

This solution isn’t too bad when there are just a few numbers. But if the number range were much larger, it would become tedious pretty quickly.

Happily, Python provides a better option—the built-in range() function, which returns an iterable that yields a sequence of integers.

range(<end>) returns an iterable that yields integers starting with 0, up to but not including <end>:

>>>
>>> x = range(5)
>>> x
range(0, 5)
>>> type(x)
<class 'range'>

Note that range() returns an object of class range, not a list or tuple of the values. Because a range object is an iterable, you can obtain the values by iterating over them with a for loop:

>>>
>>> for n in x:
...     print(n)
...
0
1
2
3
4

You could also snag all the values at once with list() or tuple(). In a REPL session, that can be a convenient way to quickly display what the values are:

>>>
>>> list(x)
[0, 1, 2, 3, 4]

>>> tuple(x)
(0, 1, 2, 3, 4)

However, when range() is used in code that is part of a larger application, it is typically considered poor practice to use list() or tuple() in this way. Like iterators, range objects are lazy—the values in the specified range are not generated until they are requested. Using list() or tuple() on a range object forces all the values to be returned at once. This is rarely necessary, and if the list is long, it can waste time and memory.

range(<begin>, <end>, <stride>) returns an iterable that yields integers starting with <begin>, up to but not including <end>. If specified, <stride> indicates an amount to skip between values (analogous to the stride value used for string and list slicing):

>>>
>>> list(range(5, 20, 3))
[5, 8, 11, 14, 17]

If <stride> is omitted, it defaults to 1:

>>>
>>> list(range(5, 10, 1))
[5, 6, 7, 8, 9]
>>> list(range(5, 10))
[5, 6, 7, 8, 9]

All the parameters specified to range() must be integers, but any of them can be negative. Naturally, if <begin> is greater than <end>, <stride> must be negative (if you want any results):

>>>
>>> list(range(-5, 5))
[-5, -4, -3, -2, -1, 0, 1, 2, 3, 4]

>>> list(range(5, -5))
[]
>>> list(range(5, -5, -1))
[5, 4, 3, 2, 1, 0, -1, -2, -3, -4]

Technical Note: Strictly speaking, range() isn’t exactly a built-in function. It is implemented as a callable class that creates an immutable sequence type. But for practical purposes, it behaves like a built-in function.

For more information on range(), see the Real Python article Python’s range() Function (Guide).

Altering for Loop Behavior

You saw in the previous tutorial in this introductory series how execution of a while loop can be interrupted with break and continue statements and modified with an else clause. These capabilities are available with the for loop as well.

The break and continue Statements

break and continue work the same way with for loops as with while loops. break terminates the loop completely and proceeds to the first statement following the loop:

>>>
>>> for i in ['foo', 'bar', 'baz', 'qux']:
...     if 'b' in i:
...         break
...     print(i)
...
foo

continue terminates the current iteration and proceeds to the next iteration:

>>>
>>> for i in ['foo', 'bar', 'baz', 'qux']:
...     if 'b' in i:
...         continue
...     print(i)
...
foo
qux

The else Clause

A for loop can have an else clause as well. The interpretation is analogous to that of a while loop. The else clause will be executed if the loop terminates through exhaustion of the iterable:

>>>
>>> for i in ['foo', 'bar', 'baz', 'qux']:
...     print(i)
... else:
...     print('Done.')  # Will execute
...
foo
bar
baz
qux
Done.

The else clause won’t be executed if the list is broken out of with a break statement:

>>>
>>> for i in ['foo', 'bar', 'baz', 'qux']:
...     if i == 'bar':
...         break
...     print(i)
... else:
...     print('Done.')  # Will not execute
...
foo

Conclusion

This tutorial presented the for loop, the workhorse of definite iteration in Python.

You also learned about the inner workings of iterables and iterators, two important object types that underlie definite iteration, but also figure prominently in a wide variety of other Python code.

In the next two tutorials in this introductory series, you will shift gears a little and explore how Python programs can interact with the user via input from the keyboard and output to the console.


[ Improve Your Python With 🐍 Python Tricks 💌 – Get a short & sweet Python Trick delivered to your inbox every couple of days. >> Click here to learn more and see examples ]


from Planet Python
via read more

TestDriven.io: Working with Static and Media Files in Django

This article looks at how to work with static and media files in a Django project, locally and in production. from Planet Python via read...