This article looks at how to work with static and media files in a Django project, locally and in production.
from Planet Python
via read more
Tuesday, February 8, 2022
ItsMyCode: AttributeError: Can only use .str accessor with string values
The AttributeError: Can only use .str accessor with string values, which use np.object_ dtype in pandas occurs if you try to replace the values of string column, but in reality, it is of a different type.
In this tutorial, we will look at what is AttributeError: Can only use .str accessor with string values and how to fix this error with examples.
AttributeError: Can only use .str accessor with string values, which use np.object_ dtype in pandas
Let us take a simple example to reproduce this error. In the below example, we have Pandas DataFrame, which indicates the standing of each cricket team.
# import pandas library
import pandas as pd

# create pandas DataFrame
df = pd.DataFrame({'team': ['India', 'South Africa', 'New Zealand', 'England'],
                   'points': [12.0, 8.0, 3.0, 5],
                   'runrate': [0.5, 1.4, 2, -0.6],
                   'wins': [5, 4, 2, 2]})
print(df['points'])
df['points'] = df['points'].str.replace('.', '')
print(df['points'])
Output
0    12.0
1     8.0
2     3.0
3     5.0
Name: points, dtype: float64
raise AttributeError("Can only use .str accessor with string values!")
AttributeError: Can only use .str accessor with string values!. Did you mean: 'std'?
When we run the above code, we get AttributeError Can only use .str accessor with string values!.
The points column is in the float datatype, and using the str.replace() can be applied only on the string columns.
How to fix Can only use .str accessor with string values error?
We can fix the error by casting the DataFrame column “points” from float to string before replacing the values in the column.
Let us fix our code and run it once again.
# import pandas library
import pandas as pd

# create pandas DataFrame
df = pd.DataFrame({'team': ['India', 'South Africa', 'New Zealand', 'England'],
                   'points': [12.0, 8.0, 3.0, 5],
                   'runrate': [0.5, 1.4, 2, -0.6],
                   'wins': [5, 4, 2, 2]})
print(df['points'])
df['points'] = df['points'].astype(str).str.replace('.', '')
print(df['points'])
Output
0    12.0
1     8.0
2     3.0
3     5.0
Name: points, dtype: float64

0    120
1     80
2     30
3     50
Name: points, dtype: object
Notice that the error is gone, and the points column is converted from float to object, and also, the decimal has been replaced with an empty string.
Conclusion
The AttributeError: Can only use .str accessor with string values, which use np.object_ dtype in pandas occurs if you try to replace the values of string column, but in reality, it is of a different type.
We can fix the issue by casting the column to a string before replacing the values in the column.
from Planet Python
via read more
Monday, February 7, 2022
Glyph Lefkowitz: A Better Pygame Mainloop
I’ve written about this before, but in that context I was writing mainly about frame-rate independence, and only gave a brief mention of vertical sync; the title also mentioned Twisted, and upon re-reading it I realized that many folks who might get a lot of use out of its technique would not have bothered to read it, just because I made it sound like an aside in the context of an animation technique in a game that already wanted to use Twisted for some reason, rather than a comprehensive best practice. Now that Pygame 2.0 is out, though, and the vsync=1 flag is more reliably available to everyone, I thought it would be worth revisiting.
Per the many tutorials out there, including the official one, most Pygame mainloops look like this:
1 2 3 4 5 6 7 8 |
|
Obviously that works okay, or folks wouldn’t do it, but it can give an impression of a certain lack of polish for most beginner Pygame games.
The thing that’s always bothered me personally about this idiom is: where does the networking go? After spending many years trying to popularize event loops in Python, I’m sad to see people implementing loops over and over again that have no way to get networking, or threads, or timers scheduled in a standard way so that libraries could be written without the application needing to manually call them every frame.
But, who cares how I feel about it? Lots of games don’t have networking1. There are more general problems with it. Specifically, it is likely to:
- waste power, and
- look bad.
Wasting Power
Why should anyone care about power when they’re making a video game? Aren’t games supposed to just gobble up CPUs and GPUs for breakfast, burning up as much power as they need for the most gamer experience possible?
Chances are, if you’re making a game that you expect anyone that you don’t personally know to play, they’re going to be playing it on a laptop2. Pygame might have a reputation for being “slow”, but for a simple 2D game with only a few sprites, Python can easily render several thousand frames per second. Even the fastest display in the world can only refresh at 360Hz3. That’s less than one thousand frames per second. The average laptop display is going to be more like 60Hz, or — if you’re lucky — maybe 120. By rendering thousands of frames that the user never even sees, you warm up their CPU uncomfortably4, and you waste 10x (or more) of their battery doing useless work.
At some point your game might have enough stuff going on that it will run the CPU at full tilt, and if it does, that’s probably fine; at least then you’ll be using up that heat and battery life in order to make their computer do something useful. But even if it is, it’s probably not doing that all of the time, and battery is definitely a use-over-time sort of problem.
Looking Bad
If you’re rendering directly to the screen without regard for vsync, your players are going to experience Screen Tearing, where the screen is in the middle of updating while you’re in the middle of drawing to it. This looks especially bad if your game is panning over a background, which is a very likely scenario for the usual genre of 2D Pygame game.
How to fix it?
Pygame lets you turn on VSync, and in Pygame 2, you can do this simply by passing the pygame.SCALED flag and the vsync=1 argument to set_mode().
Now your game will have silky smooth animations and scrolling5! Solved!
But... if the fix is so simple, why doesn’t everybody — including, notably, the official documentation — recommend doing this?
The solution creates another problem: pygame.display.flip may now block until the next display refresh, which may be many milliseconds.
Even worse: note the word “may”. Unfortunately, behavior of vsync is quite inconsistent between platforms and drivers, so for a properly cross-platform game it may be necessary to allow the user to select a frame rate and wait on an asyncio.sleep than running flip in a thread. Using the techniques from the answers to this stack overflow answer you can establish a reasonable heuristic for the refresh rate of the relevant display, but if adding those libraries and writing that code is too complex, “60” is probably a good enough value to start with, even if the user’s monitor can go a little faster. This might save a little power even in the case where you can rely on flip to tell you when the monitor is actually ready again; if your game can only reliably render 60FPS anyway because there’s too much Python game logic going on to consistently go faster, it’s better to achieve a consistent but lower framerate than to be faster but inconsistent.
The potential for blocking needs to be dealt with though, and it has several knock-on effects.
For one thing, it makes my “where do you put the networking” problem even worse: most networking frameworks expect to be able to send more than one packet every 16 milliseconds.
More pressingly for most Pygame users, however, it creates a minor performance headache. You now spend a bunch of time blocked in the now-blocking flip call, wasting precious milliseconds that you could be using to do stuff unrelated to drawing, like handling user input, updating animations, running AI, and so on.
The problem is that your Pygame mainloop has 3 jobs:
- drawing
- game logic (AI and so on)
- input handling
What you want to do to ensure the smoothest possible frame rate is to draw everything as fast as you possibly can at the beginning of the frame and then call flip immediately to be sure that the graphics have been delivered to the screen and they don’t have to wait until the next screen-refresh. However, this is at odds with the need to get as much done as possible before you call flip and possibly block for 1/60th of a second.
So either you put off calling flip, potentially risking a dropped frame if your AI is a little slow, or you call flip too eagerly and waste a bunch of time waiting around for the display to refresh. This is especially true of things like animations, which you can’t update before drawing, because you have to draw this frame before you worry about the next one, but waiting until after flip wastes valuable time; by the time you are starting your next frame draw, you possibly have other code which now needs to run, and you’re racing to get it done before that next flip call.
Now, if your Python game logic is actually saturating your CPU — which is not hard to do — you’ll drop frames no matter what. But there are a lot of marginal cases where you’ve mostly got enough CPU to do what you need to without dropping frames, and it can be a lot of overhead to constantly check the clock to see if you have enough frame budget left to do one more work item before the frame deadline - or, for that matter, to maintain a workable heuristic for exactly when that frame deadline will be.
The technique to avoid these problems is deceptively simple, and in fact it was covered with the deferToThread trick presented in my earlier post. But again, we’re not here to talk about Twisted. So let’s do this the no-additional-dependencies, stdlib-only way, with asyncio:
1 2 3 4 5 6 7 8 9 10 11 12 13 14 15 16 17 18 19 20 21 22 23 24 25 26 27 28 29 30 31 32 33 34 35 36 37 38 39 40 41 |
|
Go Forth and Loop Better
At some point I will probably release my own wrapper library6 which does something similar to this, but I really wanted to present this as a technique rather than as some packaged-up code to use, since do-it-yourself mainloops, and keeping dependencies to a minimum, are such staples of Pygame community culture.
As you can see, this technique is only a few lines longer than the standard recipe for a Pygame main loop, but you now have access to a ton of additional functionality:
- You can manage your framerate independence in both animations and game logic by just setting some timers and letting the frames update at the appropriate times; stop worrying about doing math on the clock by yourself!
- Do you want to add networked multiplayer? No problem! Networking all happens inside the event loop, make whatever network requests you want, and never worry about blocking the game’s drawing on a network request!
- Now your players’ laptops run cool while playing, and the graphics don’t have ugly tearing artifacts any more!
I really hope that this sees broader adoption so that the description “indie game made in Python” will no longer imply “runs hot and tears a lot when the screen is panning”. I’m also definitely curious to hear from readers, so please let me know if you end up using this technique to good effect!7
-
And, honestly, a few fewer could stand to have it, given how much unnecessary always-online stuff there is in single-player experiences these days. But I digress. That’s why I’m in a footnote, this is a good place for digressing. ↩
-
“Worldwide sales of laptops have eclipsed desktops for more than a decade. In 2019, desktop sales totaled 88.4 million units compared to 166 million laptops. That gap is expected to grow to 79 million versus 171 million by 2023.” ↩
-
At least, Nvidia says that “the world’s fastest esports displays” are both 360Hz and also support G-Sync, and who am I to disagree? ↩
-
They’re playing on a laptop, remember? So they’re literally uncomfortable. ↩
-
Assuming you’ve made everything frame-rate independent, as mentioned in the aforementioned post. ↩
-
because of course I will ↩
-
And also, like, if there are horrible bugs in this code, so I can update it. It is super brief and abstract to show how general it is, but that also means it’s not really possible to test it as-is; my full-working-code examples are much longer and it’s definitely possible something got lost in translation. ↩
from Planet Python
via read more
Stack Abuse: Numpy Array to Tensor and Tensor to Numpy Array with PyTorch
Tensors are multi-dimensional objects, and the essential data representaion block of Deep Learning frameworks such as Tensorflow and PyTorch.
A scalar has one dimension, a vector has two, and tensors have three or more. In practice, we oftentimes refer to scalars and vectors as tensors as well for convinience.
Note: A tensor can also be any n-dimensional array, just like a Numpy array can. Many frameworks have support for working with Numpy arrays, and many of them are built on top of Numpy so the integration is both natural and efficient.
However, a torch.Tensor has more built-in capabilities than Numpy arrays do, and these capabilities are geared towards Deep Learning applications (such as GPU acceleration), so it makes sense to prefer torch.Tensor instances over regular Numpy arrays when working with PyTorch. Additionally, torch.Tensors have a very Numpy-like API, making it intuitive for most with prior experience!
In this guide, learn how to convert between a Numpy Array and PyTorch Tensors.
Convert Numpy Array to PyTorch Tensor
To convert a Numpy array to a PyTorch tensor - we have two distinct approaches we could take: using the from_numpy() function, or by simply supplying the Numpy array to the torch.Tensor() constructor or by using the tensor() function:
import torch
import numpy as np

np_array = np.array([5, 7, 1, 2, 4, 4])

# Convert Numpy array to torch.Tensor
tensor_a = torch.from_numpy(np_array)
tensor_b = torch.Tensor(np_array)
tensor_c = torch.tensor(np_array)
So, what's the difference? The from_numpy() and tensor() functions are dtype-aware! Since we've created a Numpy array of integers, the dtype of the underlying elements will naturally be int32:
print(np_array.dtype)
# dtype('int32')
If we were to print out our two tensors:
print(f'tensor_a: {tensor_a}\ntensor_b: {tensor_b}\ntensor_c: {tensor_c}')
tensor_a and tensor_c retain the data type used within the np_array, cast into PyTorch's variant (torch.int32), while tensor_b automatically assigns the values to floats:
tensor_a: tensor([5, 7, 1, 2, 4, 4], dtype=torch.int32)
tensor_b: tensor([5., 7., 1., 2., 4., 4.])
tensor_c: tensor([5, 7, 1, 2, 4, 4], dtype=torch.int32)
This can also be observed through checking their dtype fields:
print(tensor_a.dtype) # torch.int32
print(tensor_b.dtype) # torch.float32
print(tensor_c.dtype) # torch.int32
Numpy Array to PyTorch Tensor with dtype
These approaches also differ in whether you can explicitly set the desired dtype when creating the tensor. from_numpy() and Tensor() don't accept a dtype argument, while tensor() does:
# Retains Numpy dtype
tensor_a = torch.from_numpy(np_array)
# Creates tensor with float32 dtype
tensor_b = torch.Tensor(np_array)
# Retains Numpy dtype OR creates tensor with specified dtype
tensor_c = torch.tensor(np_array, dtype=torch.int32)

print(tensor_a.dtype) # torch.int32
print(tensor_b.dtype) # torch.float32
print(tensor_c.dtype) # torch.int32
Naturally, you can cast any of them very easily, using the exact same syntax, allowing you to set the dtype after the creation as well, so the acceptance of a dtype argument isn't a limitation, but more of a convenience:
tensor_a = tensor_a.float()
tensor_b = tensor_b.float()
tensor_c = tensor_c.float()

print(tensor_a.dtype) # torch.float32
print(tensor_b.dtype) # torch.float32
print(tensor_c.dtype) # torch.float32
Convert PyTorch Tensor to Numpy Array
Converting a PyTorch Tensor to a Numpy array is straightforward, since tensors are ultimately built on top of Numpy arrays, and all we have to do is "expose" the underlying data structure.
Since PyTorch can optimize the calculations performed on data based on your hardware, there are a couple of caveats though:
tensor = torch.tensor([1, 2, 3, 4, 5])

np_a = tensor.numpy()
np_b = tensor.detach().numpy()
np_c = tensor.detach().cpu().numpy()
So, why use
detach()andcpu()before exposing the underlying data structure withnumpy(), and when should you detach and transfer to a CPU?
CPU PyTorch Tensor -> CPU Numpy Array
If your tensor is on the CPU, where the new Numpy array will also be - it's fine to just expose the data structure:
np_a = tensor.numpy()
# array([1, 2, 3, 4, 5], dtype=int64)
This works very well, and you've got yourself a clean Numpy array.
CPU PyTorch Tensor with Gradients -> CPU Numpy Array
However, if your tensor requires you to calculate gradients for it as well (i.e. the requires_grad argument is set to True), this approach won't work anymore. You'll have to detach the underlying array from the tensor, and through detaching, you'll be pruning away the gradients:
tensor = torch.tensor([1, 2, 3, 4, 5], dtype=torch.float32, requires_grad=True)

np_a = tensor.numpy()
# RuntimeError: Can't call numpy() on Tensor that requires grad. Use tensor.detach().numpy() instead.
np_b = tensor.detach().numpy()
# array([1., 2., 3., 4., 5.], dtype=float32)
GPU PyTorch Tensor -> CPU Numpy Array
Finally - if you've created your tensor on the GPU, it's worth remembering that regular Numpy arrrays don't support GPU acceleration. They reside on the CPU! You'll have to transfer the tensor to a CPU, and then detach/expose the data structure.
Note: This can either be done via the to('cpu') or cpu() functions - they're functionally equivalent.
This has to be done explicitly, because if it were done automatically - the conversion between CPU and CUDA tensors to arrays would be different under the hood, which could lead to unexpected bugs down the line.
PyTorch is fairly explicit, so this sort of automatic conversion was purposefully avoided:
# Create tensor on the GPU
tensor = torch.tensor([1, 2, 3, 4, 5], dtype=torch.float32, requires_grad=True).cuda()

np_b = tensor.detach().numpy()
# TypeError: can't convert cuda:0 device type tensor to numpy. Use Tensor.cpu() to copy the tensor to host memory first.
np_c = tensor.detach().cpu().numpy()
# array([1., 2., 3., 4., 5.], dtype=float32)
Note: It's highly advised to call detach() before cpu(), to prune away the gradients before transfering to the CPU. The gradients won't matter anyway after the detach() call - so copying them at any point is totally redundant and inefficient. It's better to "cut the dead weight" as soon as possible.
Generally speaking - this approach is the safest, as no matter which sort of tensor you're working - it won't fail. If you've got a CPU tensor, and you try sending it to the CPU - nothing happens. If you've got a tensor without gradients, and try detaching it - nothing happens. On the other end of the stick - exceptions are thrown.
Conclusion
In this guide - we've taken a look at what PyTorch tensors are, before diving into how to convert a Numpy array into a PyTorch tensor. Finally, we've explored how PyTorch tensors can expose the underlying Numpy array, and in which cases you'd have to perform additional transfers and pruning.
from Planet Python
via read more
Matt Layman: Episode 16 - Setting Your Sites
On this episode, we look at how to manage settings on your Django site. What are the common techniques to make this easier to handle? Let’s find out! Listen at djangoriffs.com or with the player below. Last Episode On the last episode, we dug into sessions and how Django uses that data storage technique for visitors to your site. How Is Django Configured? To run properly, Django needs to be configured.
from Planet Python
via read more
from Planet Python
via read more
Python News: What's New From January 2022?
In January 2022, the code formatter Black saw its first non-beta release and published a new stability policy. IPython, the powerful interactive Python shell, marked the release of version 8.0, its first major version release in three years. Additionally, PEP 665, aimed at making reproducible installs easier by specifying a format for lock files, was rejected. Last but not least, a fifteen-year-old memory leak bug in Python was fixed.
Let’s dive into the biggest Python news stories from the past month!
Free Bonus: Click here to get a Python Cheat Sheet and learn the basics of Python 3, like working with data types, dictionaries, lists, and Python functions.
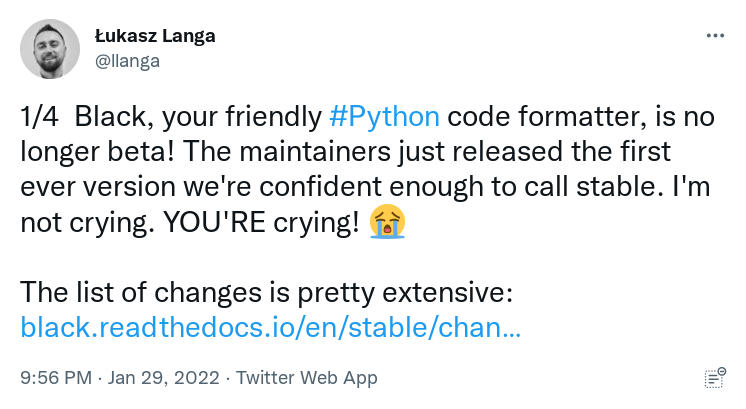
Black No Longer Beta
The developers of Black, an opinionated code formatter, are now confident enough to call the latest release stable. This announcement brings Black out of beta for the first time:
Code formatting can be the source of a surprising amount of conflict among developers. This is why code formatters, or linters, help enforce style conventions to maintain consistency across a whole codebase. Linters suggest changes, while code formatters rewrite your code:
This makes your codebase more consistent, helps catch errors early, and makes code easier to scan.
YAPF is an example of a formatter. It comes with the PEP 8 style guide as a default, but it’s not strongly opinionated, giving you a lot of control over its configuration.
Black goes further: it comes with a PEP 8 compliant style, but on the whole, it’s not configurable. The idea behind disallowing configuration is that you free up your brain to focus on the actual code by relinquishing control over style. Many believe this restriction gives them much more freedom to be creative coders. But of course, not everyone likes to give up this control!
One crucial feature of opinionated formatters like Black is that they make your diffs much more informative. If you’ve ever committed a cleanup or formatting commit to your version control system, you may have inadvertently polluted your diff.
Read the full article at https://realpython.com/python-news-january-2022/ »
[ Improve Your Python With 🐍 Python Tricks 💌 – Get a short & sweet Python Trick delivered to your inbox every couple of days. >> Click here to learn more and see examples ]
from Real Python
read more
Mike Driscoll: PyDev of the Week: Batuhan Taskaya
This week we welcome Batuhan Taskaya (@isidentical) as our PyDev of the Week! Batuhan is a core developer of the Python language. Batuhan is also a maintainer of multiple Python packages including parso and Black.
You can see what else Batuhan is up to by checking out his website or GitHub profile.
Let's take a few moments to get to know Batuhan better!
Can you tell us a little about yourself (hobbies, education, etc):
Hey there! My name is Batuhan, and I'm a software engineer who loves to work on developer tools to improve the overall productivity of the Python ecosystem.
I pretty much fill all my free time with open source maintenance and other programming related activities. If I am not programming at that time, I am probably reading a paper about PLT or watching some sci-fi show. I am a huge fan of the Stargate franchise.
Why did you start using Python?
I was always intrigued by computers but didn't do anything related to programming until I started using GNU/Linux on my personal computer (namely Ubuntu 12.04). Back then, I was searching for something to pass the time and found Python.
Initially, I was mind-blown by the responsiveness of the REPL. I typed `2 + 2`, it replied `4` back to me. Such a joy! For someone with literally zero programming experience, it was a very friendly environment. Later, I started following some tutorials, writing more code and repeating that process until I got a good grasp of the Python language and programming in general.
What other programming languages do you know and which is your favourite?
After being exposed to the level of elegancy and the simplicity in Python, I set the bar too high for adopting a new language. C is a great example where the language (in its own terms) is very straightforward, and currently, it is the only language I actively use apart from Python. I also think it goes really well when paired with Python, which might not be surprised considering the CPython itself and the extension modules are written in C.
If we let the mainstream languages go, I love building one-off compilers for weird/esoteric languages.
What projects are you working on now?
Most of my work revolves around CPython, which is the reference implementation of the Python language. In terms of the core, I specialize in the parser and the compiler. But outside of it, I maintain the ast module, and a few others.
One of the recent changes I've collaborated (with Pablo Galindo Salgado an Ammar Askar) on CPython was the new fancy tracebacks which I hope will really increase the productivity of the Python developers:
Traceback (most recent call last):
  File "query.py", line 37, in <module>
    magic_arithmetic('foo')
    ^^^^^^^^^^^^^^^^^^^^^^^
  File "query.py", line 18, in magic_arithmetic
    return add_counts(x) / 25
           ^^^^^^^^^^^^^
  File "query.py", line 24, in add_counts
    return 25 + query_user(user1) + query_user(user2)
                ^^^^^^^^^^^^^^^^^
  File "query.py", line 32, in query_user
    return 1 + query_count(db, response['a']['b']['c']['user'], retry=True)
                               ~~~~~~~~~~~~~~~~~~^^^^^
TypeError: 'NoneType' object is not subscriptable
Alongside that, I help maintain projects like
and I am a core member of the fsspec.
Which Python libraries are your favorite (core or 3rd party)?
It might be a bit obvious, but I love the ast module. Apart from that, I enjoy using dataclasses and pathlib.
I generally avoid using dependencies since nearly %99 of the time, I can simply use the stdlib. But there is one exception, rich. For the last three months, nearly every script I've written uses it. It is such a beauty (both in terms of the UI and the API). I also really love pytest and pre-commit.
Not as a library, though one of my favorite projects from the python ecosystem is PyPy. It brings an entirely new python runtime, which depending on your work can be 1000X faster (or just 4X in general).
Is there anything else you’d like to say?
I've recently started a GitHub Sponsors Page, and if any of my work directly touches you (or your company) please consider sponsoring me!
Thanks for the interview Mike, and I hope people reading the article enjoyed it as much as I enjoyed answering these questions!
Thanks for doing the interview, Batuhan!
The post PyDev of the Week: Batuhan Taskaya appeared first on Mouse Vs Python.
from Planet Python
via read more
Subscribe to:
Comments (Atom)
-
Podcasts are a great way to immerse yourself in an industry, especially when it comes to data science. The field moves extremely quickly, an...
-
Dialogs are useful GUI components that allow you to communicate with the user (hence the name dialog ). They are commonly used for file Ope...
-
 This tutorial outlines object oriented programming (OOP) in Python with examples. It is a step by step guide which was designed for people w...

